Table of Contents
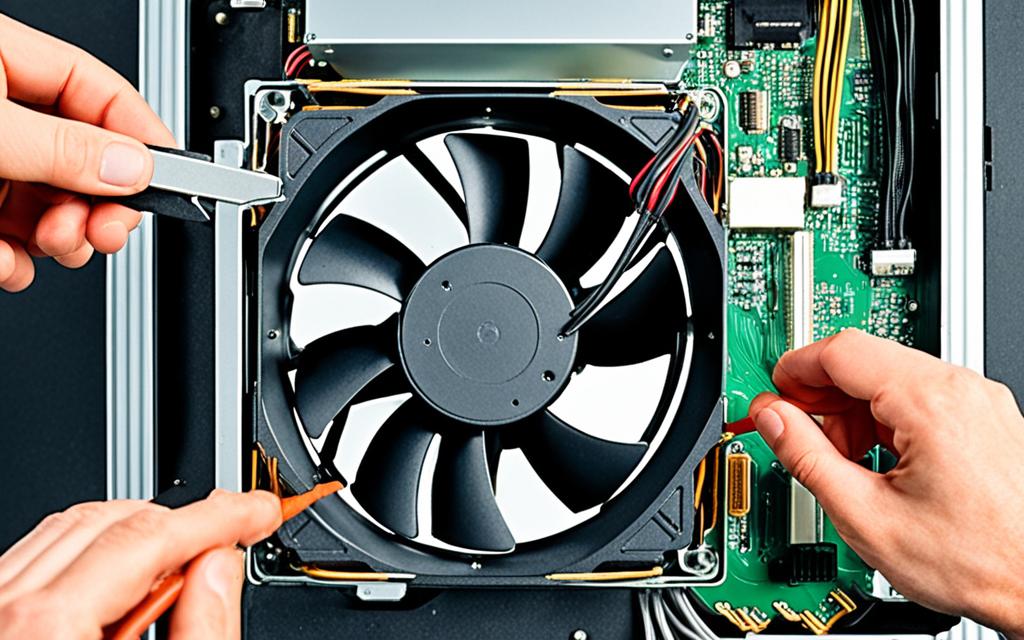
Keeping your computer cool is key to it running well. Learning how to take out a CPU fan is a useful skill for any tech lover. This guide gives you easy steps to remove a CPU fan safely, helping you keep your CPU cooler in good shape without trouble. There are 34 steps to take out the fan. It’s important to do this right to take good care of your parts1.
The CPU fan stops your computer from getting too hot and helps it run better. You need to look after it well. If you don’t, your computer might not work as well and could get damaged2. This guide will teach you how to remove a CPU fan. You’ll learn more about how your computer works.
Key Takeaways
- Understanding the role of the CPU fan is vital for system performance.
- Always prepare your workspace to avoid static damage to components.
- Follow a step-by-step approach to ensure safe CPU fan removal.
- Cleaning procedures enhance the efficiency of your CPU fan.
- Replace thermal paste when necessary to maintain thermal conductivity.
- Regular maintenance is crucial for the longevity of your computer.
Understanding the Importance of CPU Fans
CPU fans are incredibly important in today’s computers. They keep the CPU cool, ensuring it works properly. Without a good CPU fan, the computer’s performance could drop massively. This is because the CPU won’t run as efficiently if it’s too hot.
Role of a CPU, Fan in System Performance
CPU fans get rid of the heat from the processor. This not only cools the processor but also keeps the computer stable. However, fans can get clogged with dust, making them less effective3. Regular cleaning helps improve airflow and reduces the computer’s temperature3. Keeping an eye on temperatures helps spot problems early on.
Risks of Neglecting CPU Fan Maintenance
If you don’t look after your CPU fan, your system could become unstable or overheat. Neglecting the fan could even damage your computer permanently4. The whole system suffers if you ignore fan maintenance. Regular maintenance is essential.
It keeps your system running smoothly. If you ignore it, you might end up paying for expensive repairs or suffer from poor performance.
Preparing Your Workspace for Removal
Before you start removing the CPU fan, make sure your workspace is ready. A clean and organised space makes the job easier. First, collect all the tools and materials you’ll need.
Gathering Necessary Tools and Materials
To remove a CPU fan, you will need a few important tools. These include a small Phillips screwdriver, thermal paste, and compressed air or a soft brush. Don’t forget an anti-static wrist strap. With these CPU fan removal tools, you’ll have everything close by. Keeping these tools ready is key to taking care of your computer parts5.
Creating a Static-Free Environment
Avoiding static is key when working with computers. Work on a non-carpeted floor and ground yourself first. It’s widely advised to turn off and unplug your computer before beginning6. These steps help protect your computer’s sensitive parts, so you can safely remove the CPU fan.
Powering Down Your Computer Safely
It’s very important to be safe when dealing with computer hardware. Start by shutting down and unplugging the computer. This stops electrical shocks. Always disconnect all cables before you start. This preparation makes the whole process safer. By doing so, you ensure a safe power down of your computer.
Shutting Down and Unplugging
First, completely shut down your system. Once off, unplug it. This step is crucial to stop unintended restarts. When the power is off, both you and your computer’s parts are safer. This ensures everything is off before you start with the hardware.
Allowing Your System to Cool
Once off and unplugged, let your computer cool. Cooling down is key for cooling system before maintenance. A short wait prevents burns from hot components. Collect your tools now for an easy fan removal.
Prepare well to work smoothly and prevent damage. Gentle handling keeps your hardware safe. These steps create a safe space for work and ensure success with maintenance789.
How to Remove CPU Fan: Step-by-Step Guide
Taking out a CPU fan might seem tough, but the right method makes it easier. You’ll learn to reach computer parts with ease and find the process rewarding.
Accessing the Computer Case
First, gather your tools, like a T5 screwdriver, since 71% of computers need a screwdriver to open the CPU10. Find the case’s back cover. Check if there are buttons to press to open it; 29% of computers have these10. Make sure the system was off for five minutes before you start11.
Locating and Disconnecting the Fan
Look for the CPU fan near the CPU. Follow the steps to unplug the fan correctly. Start by unscrewing the two fasteners marked 3, 2, and 111. Be gentle with the wires to avoid damage.
Removing Fasteners and Lifting the Fan
Removing the fan might be tricky due to thermal paste. The Heatsink and Fan usually have thermal pads. They might be white or pink and should stay put to avoid overheating11. After removing the fasteners, lift the fan carefully. Make sure the thermal pads stay in place. Cleaning the CPU area with canned air is beneficial for all CPUs10.
| Step | Details |
|---|---|
| 1 | Gather tools (T5 screwdriver recommended). |
| 2 | Power off the computer for at least five minutes. |
| 3 | Depress any buttons if required to access the case. |
| 4 | Locate and unscrew fan fasteners (in specific order). |
| 5 | Carefully lift the fan and inspect for thermal paste. |
| 6 | Clean surfaces around CPU and fan. |
By sticking to these steps, you’ll manage to take out the CPU fan effectively. This prepares your components for future care11.
Cleaning the CPU Fan and Surrounding Areas
After taking out the CPU fan, it’s vital to clean thoroughly to improve cooling. This means getting rid of the dust and debris that lower performance. For best results, clean the CPU fan and areas around it every 6 to 12 months. If you’re in a dusty place, clean it more often1210,).
Removing Dust and Debris
Compressed air is great for cleaning the CPU fan. It can get rid of about 90% of dust with quick air bursts. Keep the air can 2 inches away from what you’re cleaning to prevent damage10. Don’t use vacuums or hair dryers as they might harm sensitive parts with static12.
Check for dust every 3 to 6 months. This will help keep your computer running well, especially at home or work13.
Best Practices for Cleaning
Be gentle to avoid harming your computer. Use a soft brush or lint-free cloth with isopropyl alcohol for tough spots. Clean heat sinks and fans if you notice higher temperatures, odd noises, or dust13. Adding dust filters to case intakes helps a lot by keeping dust out. This keeps your computer cool and running smoothly13.
Replacing Thermal Paste (If Required)
Changing thermal paste is key in CPU fan upkeep. If you remove the fan, inspect the paste’s condition. Should it seem dry or worn out, put fresh paste on to boost CPU cooling. Intel insists on new paste each time the cooler comes off, keeping heat transfer ideal14.
When to Replace Thermal Paste
Keep an eye on CPU temperatures. If they stay above 65 to 80 degrees Celsius, the paste might need changing14. Experts advise a new application every one to two years, depending on how you use it and the paste’s type14. Don’t reuse old paste as it won’t work as well, making cooling less effective14.
Applying New Thermal Paste Effectively
Start by cleaning off any old paste from the CPU and heatsink. Put a small dab of new paste right in the middle of the CPU. It’s important to spread it carefully for full coverage, aiding in optimal cooling11. Use just enough paste; too much can cause a mess and reduce cooling power11.
By adhering to these thermal paste replacement tips, users ensure their CPU works well for longer. Watching temperatures regularly helps catch cooling problems early11.
Reinstalling the CPU Fan
Putting back the CPU fan is key for a smooth-running computer. Make sure it lines up with the heatsink or bracket right. This makes sure the fan sits well for good air flow. Don’t push too hard when fixing it in, to avoid damage.
Proper Alignment and Fastening Techniques
First, place the fan on its mount. Make sure the screw holes line up perfectly. Slowly tighten the screws to keep it in place. This avoids damages and keeps the fan working right.
If you’re applying new thermal paste, first clean off the old one. Then put on fresh paste. Whenever you take the fan off, it’s best to do this for top performance15. If the heatsink was removed, clean and add new paste before putting it back15.
Reconnecting Power Cables
Once the fan is secured, reconnect its cables. Find the CPU fan spot on the motherboard for a solid connection. This ensures the fan works well when you turn on the PC. Some might reapply paste for better heat handling15. Using an old ID card can help remove excess paste, a tip many recommend15.
These steps boost your system’s cooling. For more tips on CPU fan care, check out this useful guide here15.
Conclusion
Keeping your CPU fan in good shape is key for great computer performance. Regular care boosts cooling, which can drop temperatures by up to 20 degrees Celsius. This keeps your system stable and efficient16. Always safely remove the CPU to avoid damage: turn off and unplug the computer first17. Follow this guide to dodge the issues that come with poor CPU fan upkeep.
Clean the fan and heat sink every 6 to 12 months to stop dust buildup. This affects thermal performance and how long the parts last17. Handling everything correctly and following the right steps is crucial. This is especially true for top-notch fans like the Cooler Master, which are made to be reliable and easy to fit16. Being proactive stops serious hardware problems or crashes caused by bad cooling.
Staying on top of maintenance and taking good care of your system makes a big difference. Your computer parts will last longer, and your computing experience gets better. Remember, a system that’s looked after well works well. So, keeping up with these maintenance tasks is super important for all computer users..
FAQ
What is the role of a CPU fan in my computer system?
The CPU fan keeps the processor cool. It stops it from overheating. This keeps your computer working well.
How often should I clean my CPU fan?
You should clean your CPU fan every six months. If you live in a dusty area, do it more often. This stops overheating and makes your computer last longer.
What tools do I need to remove the CPU fan?
You’ll need a screwdriver set, thermal paste, and isopropyl alcohol. An anti-static wrist strap is also necessary. A static-free area is essential for protecting your computer’s parts.
Is it safe to remove the CPU fan while the computer is powered on?
No, always power off and unplug your computer first. This stops you from getting shocked. It also keeps your computer’s parts safe.
How do I know if I need to replace the thermal paste?
Check if the thermal paste is dry or not good anymore. Changing it is key for cooling. New thermal paste makes your CPU work better.
What are the best practices for cleaning my CPU fan?
Use compressed air or a soft brush for dust. Use isopropyl alcohol for tough spots. Be gentle to avoid damage.
How can I ensure that my CPU fan is reinstalled correctly?
Make sure it fits right on the mounting bracket or heatsink. Don’t push too hard when securing it. Check the power cable is connected for it to work when you turn on the PC.
What are the risks of neglecting CPU fan maintenance?
Not looking after your CPU fan can cause many problems. Your system might become unstable or overheat. This can badly damage important parts like the CPU and motherboard. Keeping it maintained is very important for a good-working computer.
Source Links
- https://docs.oracle.com/cd/E19127-01/ultra27.ws/820-6776/z40001fc1036391/index.html – To Remove the Heat Sink and CPU (Sun Ultra 27 Workstation Service Manual)
- https://softwareg.com.au/blogs/computer-hardware/how-to-remove-intel-cpu-fan – How To Remove Intel CPU Fan
- https://ms.codes/blogs/computer-hardware/remove-cpu-fan-from-heatsink – Remove CPU Fan From Heatsink
- https://www.lenovo.com/us/en/glossary/fan/ – How Does a Computer Fan Work? | Different Types Explained
- https://softwareg.com.au/blogs/computer-hardware/how-to-remove-cpu-fan-from-motherboard – How To Remove CPU Fan From Motherboard
- https://ms.codes/en-gb/blogs/computer-hardware/how-to-remove-intel-cpu-fan – How To Remove Intel CPU Fan
- https://medium.com/@marksmithgpuexpert/how-to-remove-a-cpu-cooler-or-fan-without-damaging-the-motherboard-72a7c43dfa3e – How to Remove a CPU Cooler or Fan Without Damaging the Motherboard?
- https://www.pcworld.com/article/393599/how-do-i-remove-a-cpu-cooler-without-damaging-the-processor-ask-an-expert.html – How do I remove a CPU cooler without damaging the processor? | Ask an expert
- https://www.linkedin.com/advice/0/how-do-you-replace-faulty-damaged-cpu-fan-safely – How do you replace a faulty or damaged cpu fan safely and efficiently?
- https://www.wikihow.com/Clean-a-CPU-Fan – How to Clean a CPU Fan: Complete Guide
- https://guides.frame.work/Guide/Heatsink and Fan Replacement Guide/84 – Heatsink and Fan Replacement Guide
- https://www.askteamclean.com/us/en/cleaning/how-to-clean-a-pc-fan.html – How to Clean a PC fan
- https://www.linkedin.com/advice/0/how-do-you-clean-maintain-your-heat-sink-fans-prevent – How do you clean and maintain your heat sink and fans to prevent dust buildup and clogging?
- https://koolingmonster.com/insights/do-i-need-to-replace-thermal-paste-after-removing-the-heatsink – Do I Need to Replace Thermal Paste After Removing the Heatsink? — Kooling Monster
- https://forums.tomshardware.com/threads/removing-cpu-fan-and-re-installing-again.1462497/ – Removing cpu fan and re-installing again
- https://ms.codes/blogs/computer-hardware/remove-cooler-master-cpu-fan – Remove Cooler Master CPU Fan
- https://softwareg.com.au/blogs/computer-hardware/how-to-remove-a-cpu-fan – How To Remove A CPU Fan


