Table of Contents
Welcome to our easy setup guide on how to play Guitar Hero on your PC. Whether you’re a seasoned rock star or a complete beginner, this guide will walk you through the step-by-step process of getting Guitar Hero up and running on your computer. With just a few simple steps, you’ll be rocking out to your favorite tunes in no time.
In this guide, we’ll cover everything you need to know, from connecting your guitar controller to installing a Guitar Hero emulator and downloading custom songs or track lists. By following our instructions, you’ll be able to unleash your inner rock god and experience the thrill of Guitar Hero on your PC.
So, if you’re ready to start your virtual rock and roll journey, let’s dive into the world of Guitar Hero on PC!
Before we get started, make sure you have a Guitar Hero controller. Whether you have an original Guitar Hero controller or a Rock Band controller, we’ve got you covered. Simply connect your controller to your PC using a USB cable or via Bluetooth, depending on the type of controller you have.
Once your controller is connected, you’ll need to install a Guitar Hero emulator. Our recommended emulator is Clone Hero, a free and open-source program that supports a wide range of Guitar Hero and Rock Band games. Head over to the official Clone Hero website and download the latest version of the emulator.
With the emulator installed, it’s time to add some custom songs or track lists to your Guitar Hero library. You can find a variety of custom songs and track packs on websites like C3 Universe and Chorus. If you’re feeling creative, you can even create your own custom songs using tools like Moonscraper or EOF.
Once you have your custom songs, open Clone Hero and set the songs folder to the location where you extracted the files. Then, simply click “Start Scan” to add the custom songs to your library. Now, you’re ready to rock and roll!
With your guitar controller connected, the emulator installed, and custom songs in your library, all that’s left to do is launch the emulator, browse your songs, choose a track, and start playing Guitar Hero on your PC.
So what are you waiting for? Grab your guitar controller and get ready to embark on an epic rock and roll journey with Guitar Hero on PC!
Connect Your Guitar Controller to Your PC
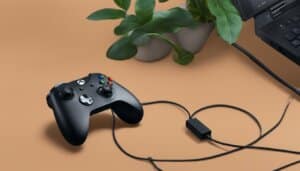
To play Guitar Hero on your PC, you’ll need to connect your guitar controller. You can use either an original Guitar Hero controller or a Rock Band controller. If your controller has a USB connector, simply plug it into your computer. If your guitar controller is wireless, you’ll need to connect it via Bluetooth. The steps to pair your guitar controller via Bluetooth may vary depending on the controller model, so it’s best to refer to the user manual for specific instructions.
| Guitar Controller Type | Connection Method |
|---|---|
| Original Guitar Hero Controller | USB connector |
| Rock Band Controller | USB connector |
| Wireless Guitar Controller | Bluetooth |
Pairing your wireless guitar controller via Bluetooth will require following the specific instructions provided in the user manual for your controller model. Ensure you have the necessary Bluetooth adapter and that it is properly installed on your PC.
Connecting your guitar controller to your PC is a crucial step in setting up Guitar Hero on your computer. It allows you to experience the thrill of playing your favorite rock songs with a controller that mimics the feel of a real guitar. Whether you prefer to rock out with an original Guitar Hero controller or a Rock Band controller, make sure to follow the appropriate connection method for a seamless and enjoyable gaming experience.
Install a Guitar Hero Emulator
After connecting your guitar controller, the next step is to install a Guitar Hero emulator. We recommend using Clone Hero, a free and open-source emulator that supports a wide range of Guitar Hero and Rock Band games. To install Clone Hero, follow these simple steps:
- Visit the official Clone Hero website at https://clonehero.net/.
- Download the latest version of the emulator by clicking on the “Download” button.
- Once the download is complete, locate the downloaded file on your computer. It should be named “Clone Hero.exe”.
- Extract the files from the downloaded zip folder to a location of your choice.
- Locate the “Clone Hero.exe” file in the extracted folder and double-click on it to launch the emulator.
Now you have successfully installed the Guitar Hero emulator on your PC. Get ready to rock out with your favorite Guitar Hero songs!
For visual reference, here is a step-by-step guide:
| Step | Description |
|---|---|
| 1 | Visit the official Clone Hero website at https://clonehero.net/. |
| 2 | Download the latest version of the emulator by clicking on the “Download” button. |
| 3 | Once the download is complete, locate the downloaded file on your computer. It should be named “Clone Hero.exe”. |
| 4 | Extract the files from the downloaded zip folder to a location of your choice. |
| 5 | Locate the “Clone Hero.exe” file in the extracted folder and double-click on it to launch the emulator. |
Download and Install Custom Songs or Track Lists
Enhance your Guitar Hero experience on PC by downloading and installing custom songs or track lists. There are several websites where you can find a wide selection of custom songs and track packs, including the popular C3 Universe and Chorus. These websites offer a vast library of user-created content, allowing you to expand your song collection and enjoy new challenges.
If you have a creative flair, you can also create your own custom songs using tools like Moonscraper or EOF. This gives you the freedom to personalize your Guitar Hero experience and play your favorite songs that may not be available in the original game.
Once you have obtained the custom song files or track packs, you will need to extract them to a designated folder on your PC. In the Clone Hero emulator, navigate to the “Settings” menu and specify the location of the songs folder where you have extracted your custom songs. Finally, click on “Start Scan” to add the custom songs to your Clone Hero library.
Now, you are ready to launch the emulator, browse your custom songs library, select a song, and start playing Guitar Hero on your PC with the added excitement of your favorite custom songs or track lists. Embrace the endless possibilities and rock out to your own unique selection of tunes!
FAQ
How do I connect my guitar controller to my PC?
To connect your guitar controller to your PC, simply plug in the USB connector if your controller has one. If your controller is wireless, refer to the user manual for instructions on how to connect it via Bluetooth.
What Guitar Hero emulator should I use?
We recommend using Clone Hero, a free and open-source emulator that supports various Guitar Hero and Rock Band games. Visit the official Clone Hero website, download the latest version, and launch the “Clone Hero.exe” file to start the emulator.
Where can I find custom songs or track lists for Guitar Hero?
You can find custom songs and track packs on websites like C3 Universe and Chorus. Alternatively, you can create your own custom songs using tools like Moonscraper or EOF.
How do I add custom songs to the Clone Hero emulator?
After downloading the custom song files or track packs, extract them to a folder on your PC. In the Clone Hero emulator’s “Settings” menu, set the songs folder to the location of the extracted custom songs. Click on “Start Scan” to add the custom songs to your Clone Hero library.
Can I play Guitar Hero on my PC with a Rock Band controller?
Yes, you can use either an original Guitar Hero controller or a Rock Band controller to play Guitar Hero on your PC.
Are there any other emulators I can use apart from Clone Hero?
Yes, there are other emulators available for playing Guitar Hero on your PC, such as Frets on Fire and Phase Shift. However, Clone Hero is widely recommended for its compatibility and features.

