Table of Contents
Today, creating a hyper-v windows 10 development environment is crucial for developers and testers. Hyper-V, a virtualisation tool by Microsoft, simplifies software development, testing, and trials. This guide helps users in the setting up Hyper-V process. It covers the requirements and how to manage creating virtual machines for different tasks.
To use Hyper-V, you’ll need at least 4 GB of RAM and a 64-bit processor. It works on Windows 10 Enterprise, Pro, or Education versions. This piece will guide you through enabling features and setting up virtual machines. The goal is to have a stable, efficient development space on your Windows 10 system.
Introduction to Hyper-V on Windows 10
Hyper-V is a tool from Microsoft that lets you create virtual machines. It’s built into Windows 10 and lets you run different operating systems at once. This improves your work efficiency.
What is Hyper-V?
Hyper-V is a powerful feature in Windows 10 Pro, Enterprise, and Education. It lets you set up virtual spaces with their own operating systems and apps. You can use many operating systems, like different versions of Linux and FreeBSD. Features like snapshots and live migrations make managing these spaces easier.
Benefits of using Hyper-V for development
Developers find Hyper-V very useful. It helps them create separate spaces for projects, avoiding software issues. This leads to better performance across various tasks. Setting up and removing these environments is quick, which speeds up testing and development.
The snapshot feature also helps by saving the state of your work, so you don’t lose progress. Hyper-V makes moving between tasks seamless during development. In short, it boosts productivity and efficiency for developers.
Hyper-V Windows 10 Development Environment: Getting Started
Setting up Hyper-V on Windows 10 starts with checking system requirements. Make sure your hardware matches the Hyper-V system requirements. This includes compatibility with Windows 10. After that, you can turn Hyper-V on. This opens up its many features.
Checking system requirements for Hyper-V
To start with Hyper-V, make sure your PC is ready. You need:
- 64-bit processor with Second Level Address Translation (SLAT) capabilities
- Virtualisation switched on in the BIOS
- At least 4 GB of RAM, 8 GB for the best performance
- Windows 10 Pro or Enterprise
- At least 50 GB of free space for the virtual machine
Check if your system works with Windows 10 through system info or PowerShell. This makes using Hyper-V smooth.
Enabling Hyper-V on Windows 10
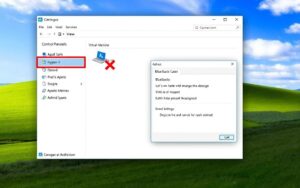
To enable Hyper-V, you have two ways. Using the Control Panel is one:
- Navigate to “Programs”.
- Select “Turn Windows features on or off”.
- Tick the box for Hyper-V.
Or, if you’re okay with command lines, use PowerShell. Type Enable-WindowsOptionalFeature -Online -FeatureName Microsoft-Hyper-V -All. Restart your PC after. Make sure your security software doesn’t block Hyper-V.
Accessing Hyper-V Manager
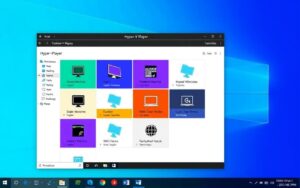
Once Hyper-V is on, you can start using Hyper-V Manager. It’s found in the Start menu or by searching. In Hyper-V Manager, you can make new virtual machines or manage old ones. You can also check their status and change settings as needed.
For more help on setting up Hyper-V on Windows 10, look at this useful link.
Creating a Virtual Machine in Hyper-V
Creating a virtual machine in Hyper-V lets developers run different systems and apps separately. The Quick Create feature simplifies the setup, allowing for fast launches of new instances.
Using Quick Create for a new virtual machine
The Quick Create option, added in the Fall Creators Update, simplifies starting a new virtual machine. You can find it in the Start menu, selecting an OS from the gallery or using a local source. Choosing the right OS image, like a .iso or .vhdx file, is crucial. Linux users might need to tweak the Secure Boot setting for compatibility.
Customising virtual machine settings
After making a virtual machine, tweaking its options is key. This includes giving it a unique name and choosing the install media. Also, setting up network options might mean linking to a virtual switch or letting Hyper-V manage the network. These adjustments ensure the machine has what it needs for development work.
Installing an operating system on the virtual machine
Once you’ve set your virtual hardware, you can install the operating system. You might see a “Press any key to boot from CD or DVD” message if the media is set right. Remember, running Windows OS inside might require a separate license, unless you have a volume-licensed version. Follow the normal installation steps to wrap up setting up your virtual machine.
If you’re facing problems creating virtual machines, there’s help. A detailed guide can help fix common issues for smooth use in Hyper-V. For further help, check out this link.
Conclusion
Setting up a development environment with Hyper-V on Windows 10 gives developers many benefits. It lets users manage and tailor multiple operating systems and software setups easily. This flexibility makes testing and developing apps more efficient, boosting productivity.
As you learn about Hyper-V, like its nested virtualisation and simple management tools, you’ll see its big impact on coding problems. This Hyper-V development environment summary shows the perks of virtual machines. It helps you adjust to different development needs easily.
Using virtualisation platforms like Hyper-V isn’t just a trend. It’s a key move for developers who want solutions that are both low-cost and scalable. These final thoughts on Hyper-V highlight its importance. Hyper-V streamlines tasks and improves the development process.
FAQ
What versions of Windows 10 support Hyper-V?
Hyper-V is supported in Windows 10 Professional, Enterprise, and Education editions.
How can I check if my system is compatible with Hyper-V?
To check compatibility, look at the system information panel or use PowerShell commands. These will show if your hardware meets the requirements.
What are the minimum hardware requirements for running Hyper-V?
Your computer needs a 64-bit processor with SLAT. Also, make sure Virtualisation is enabled in the BIOS. You’ll need at least 4 GB of RAM too.
How do I enable Hyper-V on my Windows 10 device?
Enable Hyper-V via the Control Panel. Go to “Programs,” select “Turn Windows features on or off,” and tick Hyper-V. Alternatively, use the PowerShell command: Enable-WindowsOptionalFeature -Online -FeatureName Microsoft-Hyper-V -All.
What is Hyper-V Manager, and how do I access it?
Hyper-V Manager is your go-to for managing virtual machines. Find it by searching “Hyper-V Manager” in the Start menu.
What is the Quick Create feature in Hyper-V?
Quick Create lets you easily set up new virtual machines. Choose an OS from the gallery or use a local source.
Can I install multiple operating systems on my virtual machines?
Yes, with Hyper-V, you can run various operating systems on separate virtual machines. Each one operates independently.
How can I back up my virtual machines in Hyper-V?
Use the snapshot feature in Hyper-V for backups. It saves the VM’s state, so you can return to it anytime.


