Table of Contents
Creating a custom gaming PC offers significant savings and a sense of accomplishment. Prebuilt systems often come with a hefty price tag, but assembling your own can save you 20-40%. For example, a mid-range setup might cost around $870, while a budget-friendly version could drop to $585.
Choosing the right components is crucial for performance and cost-effectiveness. Popular picks like the MSI Mag B760 motherboard and Intel Core i5-13400F processor ensure smooth gameplay. Tools like PC Part Picker help verify compatibility, making the process seamless.
This checklist is designed for all skill levels. Whether you’re a beginner or an experienced builder, it provides a clear roadmap. Customizing your gaming rig not only saves money but also allows you to tailor it to your exact preferences.
Introduction to Building a Gaming PC
Many believe building a PC is overly complex, but the process is straightforward with the right guidance. Beginners often complete their first build in just 3-4 hours. This hands-on experience not only saves money but also boosts technical skills. In fact, 70% of first-time builders report improved confidence in handling hardware.
Budget flexibility is a key advantage. For instance, power supply units (PSUs) range from affordable options like EVGA and Corsair at £50 to premium models like Be Quiet! This allows you to prioritize components based on your needs and financial plan. Understanding parts like DDR5 RAM or NVMe SSDs adds educational value, making the process both practical and informative.
Workspace setup is another critical factor. Anti-static precautions, such as using a wrist strap, ensure safety during assembly. A well-organized area also reduces the risk of errors. As one builder shared, a simple firmware update on the motherboard resolved an initial boot issue, highlighting the importance of preparation.
Costs vary widely depending on your goals. Entry-level builds start around $300, while high-end setups can exceed $3,000. Whether you’re aiming for a budget-friendly rig or a top-tier system, the journey is equally rewarding. For more detailed builds, check out this resource.
| Component | Budget Option | Premium Option |
|---|---|---|
| PSU | EVGA/Corsair (£50) | Be Quiet! (£120+) |
| RAM | 16GB DDR4 (£50) | 32GB DDR5 (£150) |
| Storage | 500GB SATA SSD (£40) | 1TB NVMe SSD (£100) |
Building a gaming PC is more than just assembling parts—it’s a learning experience that enhances your technical knowledge. With the right approach, anyone can create a system tailored to their preferences and performance needs.
Essential Components for a Gaming PC
Assembling a high-performance system starts with selecting the right components. Each part plays a critical role in ensuring smooth operation and longevity. From the motherboard to the case, every choice impacts performance and aesthetics.
Motherboard: The Foundation of Your Build
The motherboard connects all components, making it the backbone of your system. Models like the MSI Mag B760 offer excellent compatibility and features. Ensure it supports your CPU and GPU for seamless integration.
CPU: The Brain of Your Gaming PC
Processors like the Intel Core i5-13400F handle tasks efficiently. A powerful CPU ensures smooth gameplay and multitasking. Always consider core count and clock speed for future-proofing.
GPU: Powering Your Visual Experience
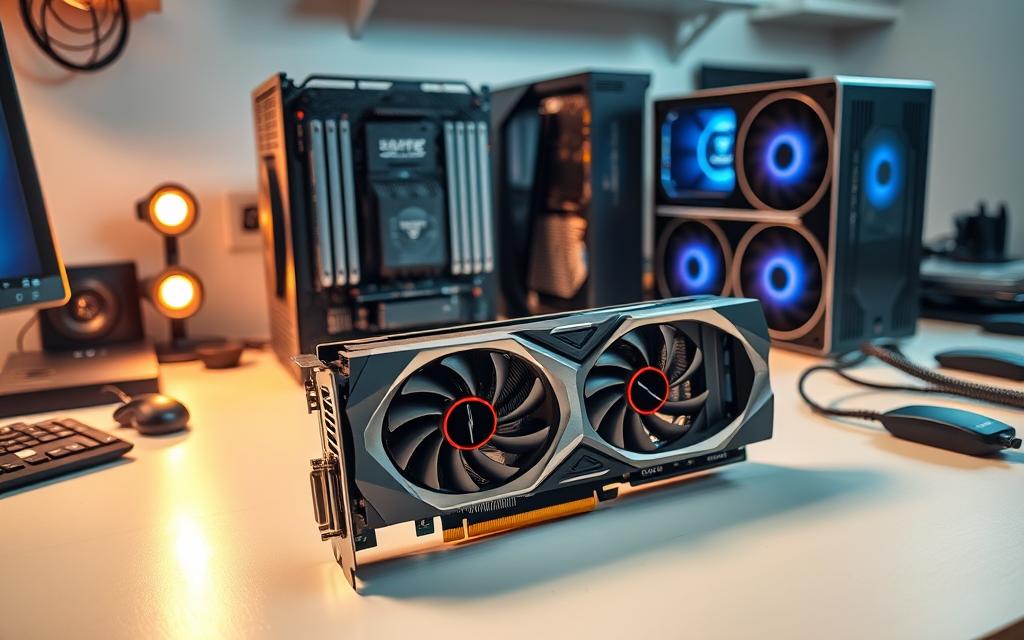
Graphics cards like the RTX 4090 deliver stunning visuals and high frame rates. Ensure your case has sufficient clearance, up to 400mm, for larger GPUs. Proper airflow and cooling are essential for optimal performance.
RAM: Ensuring Smooth Performance
Memory is crucial for multitasking and gaming. Opt for at least 16GB of DDR4 or DDR5 RAM. Faster memory improves loading times and overall responsiveness.
Storage: SSDs vs. HDDs
SSDs offer faster boot times and data access compared to HDDs. NVMe SSDs, like the Samsung 970 EVO, provide superior speed. Balance capacity and speed based on your needs.
Power Supply Unit (PSU): Keeping Everything Running
A reliable PSU ensures stable power delivery. Modular units like those from Be Quiet! simplify cable management. Choose a wattage that matches your system’s requirements.
Case: Housing Your Components
The case protects and organizes your hardware. Models like the Be Quiet! Pure Base 500DX offer excellent airflow and dust filters. Mid-tower and full-tower options cater to different needs.
| Component | Key Features |
|---|---|
| Motherboard | Compatibility, expansion slots |
| CPU | Core count, clock speed |
| GPU | Clearance, cooling |
| RAM | Capacity, speed |
| Storage | SSD vs. HDD, NVMe support |
| PSU | Wattage, modular design |
| Case | Airflow, dust filters, size |
Selecting the right components ensures a balanced and efficient system. Prioritize quality and compatibility for a seamless experience. With careful planning, your setup will meet both performance and aesthetic goals.
Tools You’ll Need for the Build
Proper tools and setup ensure a smooth and efficient build process. Having the right equipment not only saves time but also reduces the risk of errors. Below are the essential tools and workspace tips to get started.
Screwdrivers and Pliers
A set of precision screwdrivers is indispensable for assembling components. Magnetic tips can prevent screws from falling into tight spaces. Pliers are useful for securing cables and adjusting small parts.
Anti-Static Wrist Strap
Static electricity can damage sensitive components. An anti-static wrist strap grounds you, preventing accidental discharges. This simple tool is a must-have for protecting your hardware.
Lighting and Workspace Setup
Good lighting is crucial for visibility during assembly. LED desk lamps with adjustable brightness are ideal. Ensure your workspace has ample space, with a desk width of at least 36 inches for comfort and efficiency.
- Use a headlamp for hands-free illumination in tight areas.
- Organize tools and components in labeled containers for easy access.
- Keep the workspace clutter-free to minimize distractions.
Choosing the Right GPU for Your Needs
Selecting the right GPU can make or break your system’s performance. Graphics cards handle rendering visuals, ensuring smooth gameplay and high frame rates. With options ranging from budget-friendly to high-end, understanding key factors is essential.
Understanding VRAM
VRAM (Video Random Access Memory) is crucial for handling textures and resolutions. Cards like the RTX 3060 come with 12GB of VRAM, ideal for 1080p and 1440p gaming. For 4K gaming or heavy multitasking, consider GPUs with 16GB or more.
Budget Considerations
GPUs vary widely in price. Entry-level models like the GTX 1650 are affordable but limited in performance. Mid-range options like the RTX 3060 offer excellent value. High-end cards like the RTX 4090 deliver top-tier performance but come at a premium.
Compatibility with Your System
Ensure your GPU fits your case and power supply. Measure case clearance, as larger GPUs may not fit compact cases like the NZXT H510. Check PCIe power cables—most modern GPUs require 6+2-pin connectors.
- Verify GPU length and case dimensions for a proper fit.
- Ensure your PSU has the necessary wattage and connectors.
- Check motherboard PCIe slot compatibility for seamless integration.
Choosing the right GPU involves balancing performance, budget, and compatibility. With careful consideration, you can find a card that meets your needs and enhances your gaming experience.
Selecting the Best CPU for Gaming
The CPU is the heart of any gaming system, dictating performance and efficiency. A powerful processor ensures smooth gameplay, quick multitasking, and compatibility with modern titles. Whether you’re aiming for a budget-friendly build or a high-end rig, understanding key factors like core count, clock speed, and brand differences is essential.
Core Count and Clock Speed
Core count and clock speed are critical for gaming performance. More cores allow your CPU to handle multiple tasks simultaneously, while higher clock speeds ensure faster processing. For example, the Intel Core i5-13400F offers 10 cores and a boost clock of 4.6GHz, making it ideal for gaming and productivity.
Modern games often benefit from at least 6 cores, but 8-core processors like the AMD Ryzen 7 7800X provide extra headroom for demanding applications. Always balance core count and clock speed based on your gaming needs.
Intel vs. AMD
Intel and AMD are the two leading CPU manufacturers, each with unique strengths. Intel processors, like the Core i5-13400F, excel in single-threaded performance, making them great for gaming. AMD’s Ryzen series, such as the Ryzen 7 7800X, offers superior multi-threaded performance, ideal for multitasking and content creation.
Both brands support DDR5 RAM and PCIe 5.0 SSDs, ensuring compatibility with the latest components. Consider your budget and usage when choosing between Intel and AMD.
Future-Proofing Your Build
Investing in a future-proof CPU ensures your system remains relevant for years. Opt for processors with DDR5 and PCIe 5.0 support, as these technologies offer faster data transfer and improved performance. For example, the AMD Ryzen 9 7950X supports both, making it a top choice for high-end builds.
Pair your CPU with a 750W PSU to accommodate future GPU upgrades. This ensures your system can handle more powerful graphics cards without requiring a PSU replacement.
| Feature | Intel Core i5-13400F | AMD Ryzen 7 7800X |
|---|---|---|
| Cores/Threads | 10/16 | 8/16 |
| Base Clock | 2.5GHz | 4.5GHz |
| Boost Clock | 4.6GHz | 5.0GHz |
| DDR5 Support | Yes | Yes |
| PCIe 5.0 Support | Yes | Yes |
Choosing the right CPU involves balancing performance, budget, and future-proofing. With careful consideration, you can select a processor that meets your gaming needs and ensures longevity.
RAM and Storage: Balancing Speed and Capacity
Optimizing RAM and storage is essential for achieving peak system performance. These components directly impact how quickly your system processes data and loads applications. Whether you’re gaming, multitasking, or handling large files, understanding their roles ensures a smooth experience.
How Much RAM Do You Need?
RAM is critical for multitasking and running demanding applications. For most users, 16GB is the sweet spot, offering enough capacity for gaming and productivity. However, 32GB is recommended for content creators or those running memory-intensive software.
Faster RAM, such as DDR5, improves loading times and overall responsiveness. Always check your motherboard’s compatibility to ensure optimal performance.
SSD vs. HDD: Pros and Cons
SSDs and HDDs serve different purposes in a system. SSDs offer faster boot times and data access, making them ideal for the operating system and frequently used applications. HDDs, on the other hand, provide larger storage capacities at a lower cost, suitable for backups and large files.
For a balanced setup, consider pairing a smaller SSD with a larger HDD. This combination delivers speed and ample storage without breaking the budget.
NVMe vs. SATA SSDs
NVMe SSDs, like the Samsung 980 Pro, leverage PCIe lanes for faster data transfer speeds—up to 7,000MB/s. In contrast, SATA SSDs, such as the Crucial MX500, max out at 550MB/s. NVMe drives are ideal for users prioritizing speed, while SATA drives remain a cost-effective option.
PCIe 4.0 lanes double the bandwidth of PCIe 3.0, further enhancing NVMe performance. Ensure your motherboard supports the latest standard for maximum efficiency.
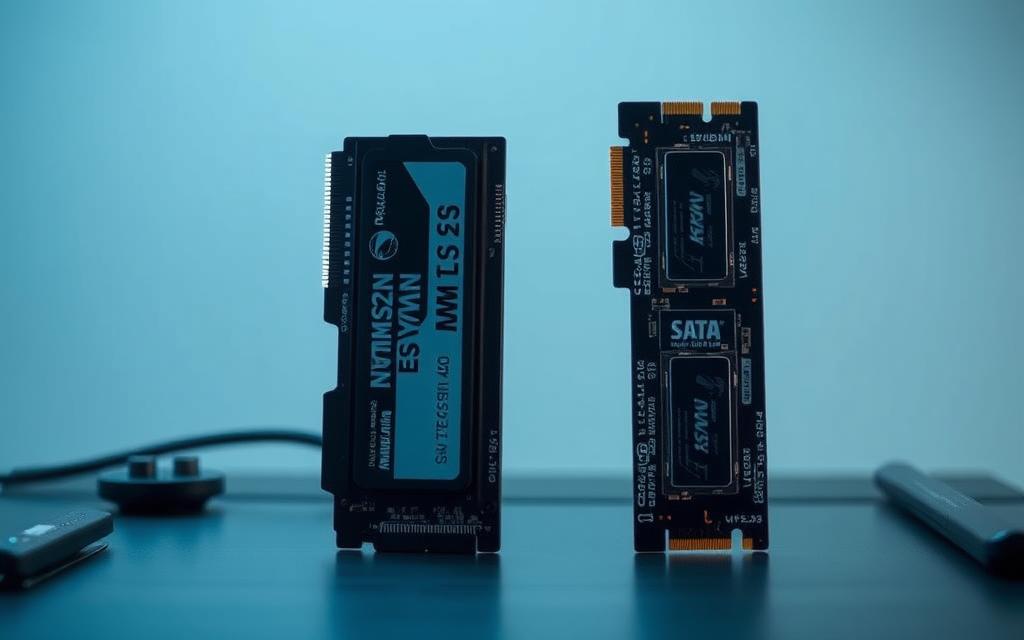
| Feature | NVMe SSD | SATA SSD |
|---|---|---|
| Speed | Up to 7,000MB/s | Up to 550MB/s |
| Interface | PCIe 4.0/3.0 | SATA III |
| Best Use | OS, gaming, high-performance tasks | General storage, budget builds |
| Example | Samsung 980 Pro | Crucial MX500 |
Balancing RAM and storage ensures your system meets both speed and capacity needs. With the right choices, you can create a setup that delivers exceptional performance for any task.
Power Supply Unit (PSU): Calculating Your Needs
Choosing the right PSU involves balancing wattage, efficiency, and design. A reliable power supply ensures your system runs smoothly and safely, delivering consistent power to all components. Whether you’re building a compact setup or a high-performance rig, understanding PSU specifications is essential.
Wattage Requirements
Determining the correct wattage is the first step. Your PSU must provide enough power for all components, including the CPU, GPU, and peripherals. Use online calculators like OuterVision to estimate your system’s needs. For example, a mid-range build with an RTX 3060 and Intel Core i5 typically requires a 550W PSU.
High-end systems with components like the RTX 4090 may need 850W or more. Always add a 20% buffer to ensure stability during peak loads. This prevents overloading and extends the PSU’s lifespan.
Efficiency Ratings
Efficiency ratings indicate how effectively a PSU converts AC power to DC. Higher ratings mean less energy waste and lower electricity bills. Look for 80 Plus certifications like Bronze, Silver, Gold, or Platinum. For instance, the Be Quiet! Pure Power 12M boasts an 80 Plus Gold rating, ensuring reliable performance with minimal energy loss.
Efficient PSUs also generate less heat, reducing the need for additional cooling. This is especially important in compact builds where airflow is limited.
Modular vs. Non-Modular PSUs
Modular PSUs, like the Be Quiet! Pure Power 12M, allow you to connect only the cables you need. This simplifies cable management and improves airflow, making them ideal for clean builds. Non-modular units come with fixed cables, which can clutter the case but are often more affordable.
For small form factor (SFF) builds, modular PSUs are highly recommended. Custom cables from brands like CableMod enhance aesthetics and ensure a perfect fit. These kits are available in various colors and lengths, allowing for a personalized look.
| Feature | Modular PSU | Non-Modular PSU |
|---|---|---|
| Cable Management | Customizable, clean setup | Fixed cables, potential clutter |
| Cost | Higher | Lower |
| Best For | SFF builds, aesthetics | Budget-friendly setups |
Selecting the right PSU ensures your system operates efficiently and reliably. Consider wattage, efficiency, and design to meet your specific needs. With the right choice, you’ll enjoy a stable and long-lasting setup.
Cooling Systems: Keeping Your PC at Optimal Temperature
Effective cooling is vital for maintaining your system’s performance and longevity. Overheating can lead to throttling, reduced lifespan, and even hardware failure. Choosing the right cooling solution ensures your components operate efficiently, even under heavy loads.
Air Cooling vs. Liquid Cooling
Air coolers, like the Noctua NH-D15, use heat sinks and fans to dissipate heat. They are affordable, reliable, and easy to install. Liquid coolers, such as the Corsair iCUE H150i, use coolant to transfer heat away from the cpu. They offer superior cooling performance but are more complex and expensive.
Air cooling is ideal for budget builds or systems with moderate heat output. Liquid cooling excels in high-performance setups or overclocked systems. Both options have their merits, so choose based on your needs and budget.
Case Fans and Airflow
Proper airflow is essential for maintaining low temperatures. Case fans, like the Be Quiet! Silent Wings 3, ensure consistent air movement. Intake fans draw cool air in, while exhaust fans expel hot air. A balanced setup prevents heat buildup and improves overall cooling efficiency.
Positioning matters. Place intake fans at the front or bottom and exhaust fans at the rear or top. This creates a natural airflow path, keeping your components cool. Dust filters also help maintain cleanliness and performance.
Thermal Paste Application
Thermal paste improves heat transfer between the cpu and cooler. Applying it correctly is crucial. The pea-sized dot method prevents spills and ensures even coverage. Popular options like Kryonaut and MX-6 offer excellent thermal conductivity and durability.
Kryonaut is ideal for high-performance systems, while MX-6 is more budget-friendly. Both require curing times of 50-200 hours for optimal performance. Always clean the surface before applying new paste to avoid air gaps.
- Compare Kryonaut vs. MX-6 for thermal conductivity and cost.
- Discuss curing times and their impact on performance.
- Highlight the importance of proper application techniques.
With the right cooling system, your PC will run smoothly and efficiently. Prioritize airflow, choose the right cooler, and apply thermal paste correctly for optimal results.
Step-by-Step Guide to Assembling Your Gaming PC
Assembling a gaming PC is a rewarding process that combines technical skill with creativity. Following a structured approach ensures each component is installed correctly, resulting in a high-performance system. Below is a detailed guide to help you through the process.
Installing the Motherboard and CPU
Start by placing the motherboard on a flat, non-conductive surface. Align it with the standoffs in the case and secure it with screws. Next, install the CPU by lifting the retention arm on the motherboard socket. Carefully place the processor into the socket, ensuring the alignment markers match. Lower the retention arm to lock the CPU in place.
Apply a pea-sized amount of thermal paste to the CPU before attaching the cooler. Secure the cooler using the provided brackets or screws. Ensure it’s firmly in place to maintain proper heat dissipation.
Mounting the GPU and RAM
Insert the RAM sticks into the DIMM slots on the motherboard. Press down firmly until the clips snap into place. For the GPU, locate the PCIe x16 slot and remove the corresponding slot cover on the case. Align the GPU with the slot and press it in until it clicks. Secure it with screws to prevent movement.
Connecting Storage and PSU
Install the SSD or HDD in the designated drive bays. Connect the SATA or NVMe cable to the motherboard and the power cable from the PSU. For the PSU, mount it in the bottom or top of the case, depending on the design. Connect the 24-pin motherboard cable, 8-pin CPU power cable, and PCIe power cables for the GPU.
Cable Management Tips
Effective cable management improves airflow and aesthetics. Use Velcro straps to bundle PSU cables neatly. Label cables with a Brother P-touch labeler for easy identification. The Be Quiet! Pure Base 500DX offers excellent routing channels for a clean setup.
| Component | Installation Tips |
|---|---|
| Motherboard | Align with standoffs, secure with screws |
| CPU | Match alignment markers, apply thermal paste |
| GPU | Secure with screws, connect PCIe power |
| RAM | Press firmly until clips snap |
| Storage | Connect SATA/NVMe and power cables |
| PSU | Mount securely, connect essential cables |
Post-Build Setup and Testing
After assembling your gaming PC, the next critical step is ensuring it runs smoothly and efficiently. Proper setup and testing are essential to verify that all components function as intended. This phase includes installing the operating system, updating drivers, and stress testing the system to confirm stability and performance.
Installing the Operating System
Begin by installing your preferred operating system, such as Windows or Linux. Use a bootable USB drive to load the OS onto your SSD or HDD. Follow the on-screen instructions to complete the installation. Ensure your system is connected to the internet for necessary updates during the process.
Drivers and Software Updates
Once the OS is installed, update all drivers to their latest versions. Visit the manufacturer’s website for your motherboard, GPU, and other components to download the appropriate drivers. This ensures compatibility and optimal performance. Additionally, install essential software like antivirus programs and system monitoring tools.
Stress Testing Your System
Stress testing is crucial to confirm your system’s stability under heavy loads. Run tools like Prime95 and FurMark for at least one hour to simulate intense usage. Monitor temperatures using HWInfo64, ensuring your CPU stays below 85°C. Check SSD health with CrystalDiskInfo to verify its condition.
| Tool | Function |
|---|---|
| Prime95 | CPU stress testing |
| FurMark | GPU stress testing |
| HWInfo64 | Temperature monitoring |
| CrystalDiskInfo | SSD health check |
By following these steps, you can ensure your gaming PC is ready for action. Proper setup and stress testing guarantee a stable and high-performing system, ready to handle any task or game you throw at it.
Conclusion: Your Gaming PC is Ready
With your gaming rig now assembled, it’s time to explore its full potential and future possibilities. Whether you’re running a budget-friendly setup or a high-performance system, the journey doesn’t end here. Consider joining communities like Reddit’s r/buildapc for troubleshooting tips and advice from fellow enthusiasts.
Looking to upgrade? The RTX 4070 Ti or Ryzen 7 7800X3D are excellent choices for boosting performance. These components ensure your system stays ahead of the curve. Don’t forget to register warranties for all parts to protect your investment.
Your build is more than just hardware—it’s a gateway to endless possibilities. Stay engaged, keep learning, and enjoy the rewards of your hard work.
FAQ
What are the essential components for a gaming PC?
The key components include a motherboard, CPU, GPU, RAM, storage (SSD or HDD), power supply unit (PSU), and a case. Each plays a critical role in ensuring optimal performance and compatibility.
How do I choose the right GPU for my gaming PC?
Consider factors like VRAM, budget, and compatibility with your system. Brands like NVIDIA and AMD offer options for various performance levels and price ranges.
What should I look for in a CPU for gaming?
Focus on core count, clock speed, and whether you prefer Intel or AMD. Future-proofing your build is also essential to handle upcoming game releases.
How much RAM do I need for gaming?
16GB is the sweet spot for most modern games. However, 32GB can future-proof your system for more demanding applications.
What’s the difference between SSDs and HDDs?
SSDs offer faster load times and better performance, while HDDs provide more storage at a lower cost. Combining both can balance speed and capacity.
How do I calculate the wattage for my PSU?
Add up the power requirements of all components and add a 20% buffer. Tools like PSU calculators can simplify this process.
What cooling system is best for a gaming PC?
Air cooling is cost-effective and reliable, while liquid cooling offers superior heat dissipation for high-performance builds. Proper case fans and thermal paste application are also crucial.
What tools are needed to build a gaming PC?
Basic tools like screwdrivers, pliers, and an anti-static wrist strap are essential. A well-lit workspace ensures precision during assembly.
How do I test my gaming PC after building it?
Install the operating system, update drivers, and run stress tests to ensure stability. Monitoring software can help identify any issues.
What’s the importance of cable management?
Proper cable management improves airflow, reduces dust buildup, and makes future upgrades easier. Use zip ties and routing channels for a clean setup.


