Table of Contents
Today, knowing how to connect an HDD to a motherboard SATA port is key. It’s a simple way to boost your computer’s storage. Most new desktop hard drives work with this interface. It’s a crucial step for adding more hard drive space. By following this guide, you can improve your computer’s performance and storage space easily.
Key Takeaways
- Understanding the SATA interface is crucial for modern computer setups.
- Many motherboards accommodate 4-6 SATA ports, allowing for multiple connections1.
- HDDs offer greater storage at lower prices compared to SSDs, making them a popular choice2.
- Connecting an HDD requires two cables: a SATA data cable and a SATA power cable1.
- Installation is straightforward, yet proper precautions should be taken to avoid damaging components1.
Understanding the SATA Interface
The Serial ATA (SATA) interface was a big change in how we connect storage to computers. It took over from the older Parallel ATA (PATA) standard back in 2003. This change meant faster data transfer speeds and better efficiency3. Today, SATA connections are found in most computers, laptops, and servers. They’re used for connecting internal hard drives and solid-state drives (SSDs).
What is SATA?
SATA’s design features L-shaped pins that make connecting to motherboards easier. You can use SATA cables up to 39 inches long, giving you plenty of room for building computers4. These cables are thinner and more bendable than their predecessors, helping keep computers cool by improving airflow. SATA drives use a serial method for transferring data. This method is much quicker than the older PATA way5.
Benefits of Using SATA Drives
SATA drives stand out because they transfer data quickly, which is crucial for demanding software. They can even be powered through USB ports, which is handy for 2.5-inch laptop drives3. The slimmer SATA cables also make it simpler to install and tidy up inside a computer. What’s more, SATA lets you use different controller modes. This means you can pick AHCI for speed or RAID for protecting your data5.
SATA drives bring many benefits. They are easy to use, boost performance, and manage power well. This makes them a top choice for today’s storage needs.
| Feature | SATA | PATA |
|---|---|---|
| Introduction Year | 2003 | 1986 |
| Cable Length | Up to 39 inches | Up to 18 inches |
| Cable Type | Thinner and more flexible | Ribbon cable |
| Data Transfer | Serial | Parallel |
| Maximum Storage Capacity | 6 TB supported with USB 3.0 | Limited by older standards |
Getting to know SATA and its drive benefits is valuable. It helps users boost their computing experience and get the most out of their systems.
Preparing for Installation
Before you start connecting a new hard drive, it’s important to be well-prepared. You should gather all the necessary tools and safety gear. This ensures your installation goes smoothly and safely.
Equipment Needed for the Installation
Start by collecting everything you need for the HDD installation:
- SATA data cables
- SATA power connectors, which may require an adapter if your power supply does not support them6
- A Phillips-head screwdriver
- An anti-static wrist strap to prevent electrostatic discharge
- A drive bay adapter if installing a 2.5-inch drive into a 3.5-inch bay
Having extra SATA data cables is a good idea. Many motherboards have a limited number of connectors7.
Safety Precautions Before Opening Your Computer
Before you start the physical installation, follow these key safety steps:
- Turn off your computer and unplug it from the power outlet.
- Use an anti-static wrist strap to prevent damaging your components with static electricity.
- Make sure your work area is clean to avoid any accidents.
- Learn how to correctly connect the hard drive and its cables to avoid any issues.
Research how to install your specific drive and check it fits well with your computer. Check this link for guidance during the installation process. With the right preparation and tools, connecting your HDD will be easy.
How to Connect HDD to Motherboard SATA
To expand your storage, connecting an HDD to a motherboard SATA port is crucial. It’s a simple process if you follow steps carefully. Our guide will show you how to securely install the HDD and mention common errors to avoid.
Step-by-Step Guide to Installation
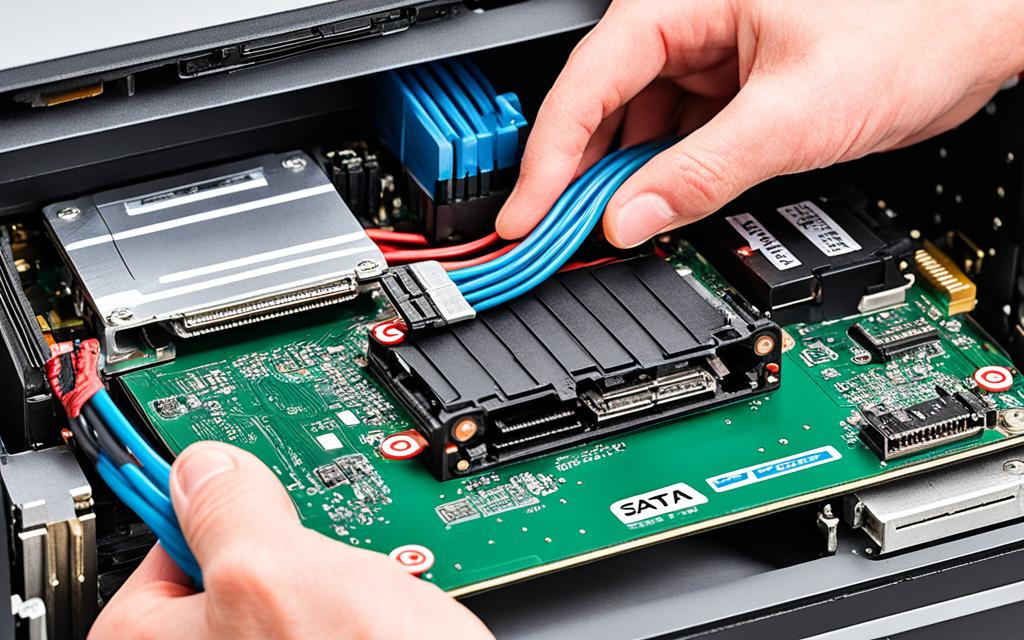
Firstly, ensure your computer is off and unplugged. Open the case by unscrewing the side panel. Then, place the HDD into an empty bay, making sure you can easily get to its SATA ports.
Now, secure the HDD with screws. Then, connect a SATA data cable from the drive to a free SATA port on the motherboard. Also, attach the power cable from the PSU to the HDD. If your PSU lacks SATA connectors, a Molex-to-SATA adapter could be necessary. It shows the need for diverse connection options8.
Before touching any computer parts, ground yourself to avoid electrostatic damage. This can be done with an antistatic wrist strap or by touching a grounded object8.
Common Mistakes to Avoid During Installation
Some errors can disrupt the HDD installation. A frequent issue is forgetting to connect both the power and data cables, leading to the drive not being detected. Also, not securing the HDD well can cause vibrations that harm the computer. It’s best to connect your main drive to the first SATA port on the motherboard for top performance8.
Another crucial aspect is keeping enough space between drives. This helps with air flow and cooling, keeping the system in good shape8.
| Mistake | Consequence | Solution |
|---|---|---|
| Neglecting power connection | Drive not recognized | Ensure both power and data cables are securely connected |
| Improper drive placement | Potential vibration damage | Fix HDD securely and allow for adequate spacing |
| Incorrect SATA port connection | Suboptimal performance | Connect primary drive to the lowest SATA port |
Remember, some motherboards might not support SATA drives, requiring an upgrade9. If you prefer not to open up your computer, consider using external HDDs. They connect via USB and offer a simple alternative9.
By following these steps, you’ll successfully install your HDD. This will improve your computer’s storage capacity89.
Post-Installation Checks
After installing the HDD, the next steps are crucial for checking its function. You’ll need to boot up the system, check the BIOS settings, and look into disk management on your computer.
Booting the System and BIOS Configuration
First, reconnect the power and turn on your computer. When it starts, press DEL or F2 to enter BIOS/UEFI setup. Here, you should see if the new HDD shows up. If it’s not listed, make sure all the cables are connected properly. You might also need to try another SATA port on the motherboard. It’s best to plug the boot drive into the lowest SATA port to get good performance8.
Checking Disk Management in Your Operating System
Once you see the HDD in BIOS, and if it’s a new drive, you’ll have to format it. Go to Disk Management in Windows to set up a new volume and give it a drive letter. Secure the hard drive well to avoid any damage10. After formatting, you should hear the drive start to spin. This sound means you’ve made a successful connection10
These steps after installing your HDD are crucial. They make sure the drive works well with your system. Some motherboards might need more setups or driver updates for everything to run smoothly6.
Conclusion
Connecting an HDD to a motherboard’s SATA port boosts your computer’s storage space. By checking out the HDD connection summary, you understand the pluses. More capacity and better data management are among these. Also, a correct install lets the system spot the new drive, enhancing your computer use.
SATA drives stand out for their swift data transfer and wide compatibility. They’re slimmer than old tech but provide lots of room for files11. As we wrap up thoughts on fitting an HDD, it’s clear that good prep and tools make this task a win for your system’s speed.
At its core, fitting an HDD lifts your storage limit and lets you tailor your setup. So, approach installation with eagerness and explore your machine’s full potential.
FAQ
What tools do I need to connect my HDD to the motherboard?
To connect your HDD, you’ll need SATA cables for data and power. Plus, a Phillips-head screwdriver and an anti-static wrist strap. If it’s a 2.5-inch HDD, you might also need a drive bay adapter.
How do I ensure my HDD is securely installed?
First, place your HDD into an empty drive bay. Then secure it with screws. Make sure the SATA data cable connects well to the HDD and the motherboard.
What should I do if my HDD is not detected in the BIOS after installation?
If the BIOS doesn’t show your HDD, recheck all cable connections. Ensure SATA cables are properly fixed. You might also try another SATA port on the motherboard.
Can I connect multiple HDDs to my motherboard?
Yes, many motherboards have several SATA ports. This means you can hook up multiple HDDs at once. Remember to have enough SATA cables for all.
What are the advantages of using SATA over older connection types?
SATA provides quicker data transfer, better data integrity, and easier connections with its L-shaped connector. This boosts performance and simplifies the setup.
Should I take any precautions before opening my computer case?
Definitely! Use an anti-static wrist strap to avoid electrostatic damage. Also, turn off and unplug your PC before opening the case.
How do I check if my HDD is functioning after installation?
To check your HDD, first boot and enter the BIOS/UEFI. It should list your HDD if it’s connected right. Then, in your operating system, use disk management to check the drive’s health and setup.
Source Links
- https://www.ufsexplorer.com/articles/how-to/connect-sata-disks-video/ – Connecting SATA drives to a computer for data recovery
- https://www.pcworld.com/article/535852/how-to-install-a-new-hard-drive-in-your-desktop-pc.html – How to install a hard drive in your computer
- https://www.ufsexplorer.com/articles/how-to/connect-sata-disks-usb-video/ – Connecting SATA drives to a computer via USB step-by-step
- https://www.seagate.com/support/kb/how-to-install-and-troubleshoot-serial-ata-sata-hard-drives-196169en/ – How To Install and Troubleshoot Serial ATA (SATA) Hard Drives | Support Seagate US
- https://www.delkin.com/blog/sata-serial-ata/ – SATA (Serial ATA) Technical Guide | Delkin Devices
- https://www.ifixit.com/Wiki/Installing_a_Hard_Drive – Installing a Hard Drive
- https://www.computerhope.com/issues/ch000413.htm – How to Install a Hard Drive or SSD
- https://www.wikihow.com/Install-a-SATA-Drive – 3 Ways to Install a SATA Drive – wikiHow
- https://www.ufsexplorer.com/articles/how-to/connect-sata-disks-instruction/ – How to attach SATA drives to a computer
- https://www.wikihow.com/Install-a-Hard-Drive – 3 Easy Ways to Install a Hard Drive: Guide (With Pictures)
- https://recoverit.wondershare.com/hard-drive/what-is-sata.html – What Is SATA? How Does SATA Work?

