Table of Contents
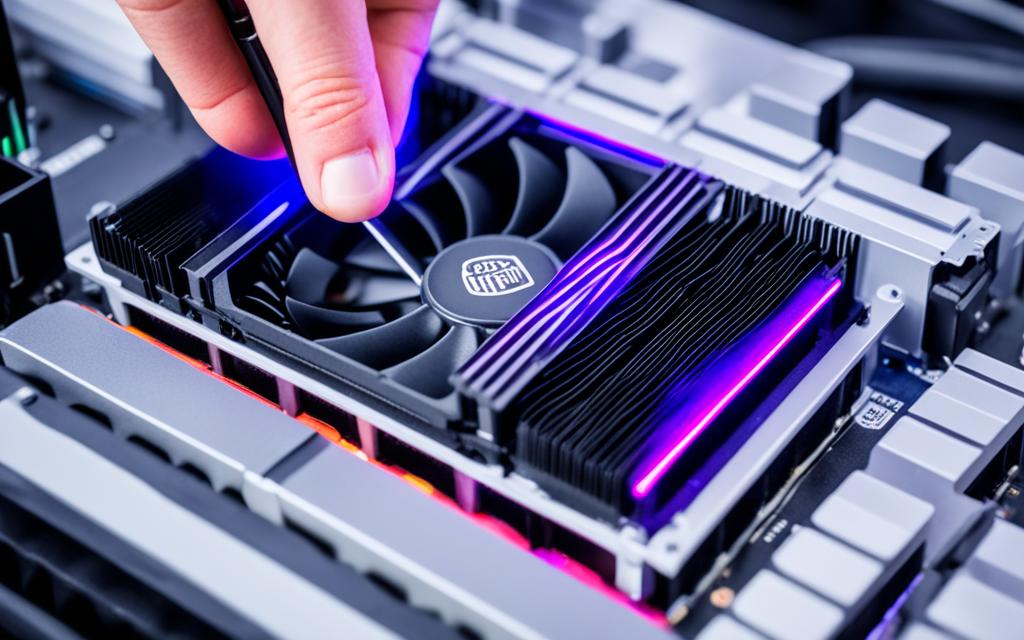
Taking off a Cooler Master CPU fan is easy if you know the steps. It’s key to get familiar with the process to dodge any mishaps. Learning this can save you time and protect your CPU or cooler from damage.
Whether you’re upgrading your cooling system or just doing some upkeep, knowing how to do this is very useful. This guide will give you the know-how and confidence to pull off the task well. For more info, please see12, and3.
Key Takeaways
- Understanding the types of CPU fans is essential for informed removal.
- Preparation, including the right tools, is vital for a successful removal process.
- Cleaning the CPU heat sink properly can enhance cooling efficiency.
- Installing a new fan requires careful matching of specifications and connection to the motherboard.
- Avoiding common mistakes can prevent damage to both the CPU fan and the motherboard.
Understanding Your Cooler Master CPU Fan
A CPU fan keeps any computer running smoothly by getting rid of the heat from the processor. It’s not just about keeping things cool; it stops your system from getting too hot. This can prevent big problems and even stop your hardware from being damaged. Knowing why your CPU fan matters helps you see the clever design and use behind it.
What is a CPU fan and why is it important?
The CPU fan moves air to help cool down the CPU. This lets the components work within safe temperatures. Good cooling stops the CPU from slowing down when it gets too hot. When a CPU gets too warm, it might not work as fast and could get damaged sooner. It’s really important to have a top-quality CPU fan like those from Cooler Master to keep your system running well.
Types of Cooler Master CPU fans
Cooler Master is known for its range of CPU cooling options. They have air coolers which are easy to put in, and AIO liquid coolers for more intense cooling. Each kind has its own benefits, depending on what you need. This means you can choose the right one for your system’s demands.
| Type | Description | Ideal Use Cases |
|---|---|---|
| Air Coolers | Utilise metal heatsinks and fans to dissipate heat. | General use and moderate gaming |
| AIO Liquid Coolers | Employ liquid cooling for superior heat dissipation. | Overclocking and high-performance gaming |
Knowing about the different types and what they’re best for is key when you need to change your CPU fan. Understanding how each type works ensures your system runs well and lasts longer45.
Preparing for Removal
To make removing your Cooler Master CPU fan easy, get ready in advance. It’s key to have the right tools and know-how to keep things safe. This will also protect your hardware during the job.
Essential tools and materials needed
Before you start, gather these important CPU fan removal tools:
- Screwdriver (appropriate for the screws used on your fan)
- Thermal paste remover
- Cleaning materials (lint-free cloths and isopropyl alcohol)
- A grounding strap or an anti-static mat to prevent static discharge
By doing this, you’ll minimize the chance of damaging parts. It ensures the fan comes off the right way. Improper removal could mean spending a lot on fixes6.
Safety precautions to consider
It’s crucial to be safe while taking off the hardware. Keep these points in mind:
- Power off the computer: Always turn off your computer and unplug it from the power source.
- Familiarise yourself with the manual: Review the CPU cooler manual to understand the specific steps for your model.
- Ground yourself: Discharge any static electricity by using a grounding strap or touching a metal part of the case.
- Be gentle: When removing the fan, be careful not to damage the CPU or fan. Avoid any rough actions that might break things7.
Following these steps carefully will make the removal safe. It helps you maintain your hardware without risk8.
How to Remove Cooler Master CPU Fan
Getting rid of a Cooler Master CPU fan needs certain steps. This is to be safe and efficient. Follow the guidance closely to avoid trouble while taking the fan off. We cover each part of the process, including typical issues.
Step-by-step removal instructions
To take off the Cooler Master CPU fan, follow these steps:
- First, make sure your computer is off and disconnected.
- Removing the RAM DIMMs can make it easier to get around the cooler.
- Disconnect the fan connector from the motherboard to stop electrical problems.
- Unscrew the cooler carefully. A Cooler Master V8 cooler usually has 4 top screws, 2 side screws, and 2 bottom screws. You might deal with 6 to 8 screws in total93.
- If the cooler sticks due to thermal paste, twist gently while pulling it off.
Troubleshooting common issues during removal
When removing the CPU cooler, you might face some issues:
- If it’s stuck, the thermal paste might have hardened. Twist and pull gently to free it.
- Watch out for static electricity, especially on carpets. It could harm the motherboard or CPU.
- Make sure you can reach all screws. If not, check how the cooler and motherboard line up.
- If a backplate makes taking it off hard, you might need to remove the motherboard for better access.[93k7>ul>
By handling these common problems well, removing the CPU cooler will be easier.
Cleaning and Maintaining Your CPU Heat Sink
Effective CPU maintenance is key for top performance. It starts with cleaning your CPU heat sink well. Doing this regularly helps cool your system and makes it last longer.
Proper cleaning techniques for CPU interfaces
Cleaning your CPU heat sink well is a must to avoid overheating. It’s good to clean your heat sink and fans every 3 to 6 months. In dusty areas or homes with pets, monthly cleaning is smarter10. Start by gathering a soft brush, compressed air, and isopropyl alcohol. Be sure to spray from about 10 cm away to prevent damage11.
How to apply thermal paste after removal
After cleaning, putting on thermal paste right is vital. Diamond thermal compound, like IC Diamond 24 Carat, works well and costs about $2011. Make sure you spread a thin, even layer on the CPU. This helps with better cooling and performance.
Keep your computer in a clean, airy place to stop dust from gathering. If your system gets hotter or the fan gets louder, clean it as needed1012. Sticking to this routine will make your system run well101112.
Installing a New Cooler Master Fan
Choosing the right CPU fan is crucial for your computer’s cooling efficiency. Make sure the fan fits your Cooler Master model and meets your system’s cooling needs. Check the fan’s size, how much air it moves, and how loud it is. These aspects are key to a cooling system’s success. Some people even add extra fans for better temperature control when they modify a Cooler Master V8 CPU cooler. They’ve shared that removing the top cap and adjusting eight screws helps replace the fan easily. Good access makes these changes simple, showing how easy it is to upgrade93.
Choosing the right replacement fan
Make sure the new fan matches your computer’s setup. It should connect without issues to your motherboard. You can choose a basic stock fan or a third-party option for better performance. Stock fans are easier to set up than aftermarket fans. According to many reviews, the best fans are quiet, efficient, and let you control their speed3.
Installation tips for optimal performance
To install your fan well, follow these tips:
- Secure the fan firmly to prevent it from shaking.
- Connect the fan wires to the motherboard correctly to avoid problems.
- Make sure all screws are tight so nothing comes loose while the computer is on.
- Apply thermal paste correctly (about the size of a sunflower seed) to improve CPU contact13.
- Keep the liquid cooling radiator above the pump to prevent air bubbles.
By following these steps, your Cooler Master fan will work better and last longer. Picking the right fan and installing it carefully can greatly improve your computer’s performance.
Common Mistakes to Avoid When Removing CPU Fans
Removing a CPU fan might look easy, but making common CPU fan removal mistakes can cause big problems. Often, people skip preparing properly and run into trouble. Knowing what could go wrong helps avoid fan removal errors and keeps your computer running well while avoiding motherboard damage.
Getting stuck with screws and clips
Dealing with screws and clips is a big challenge when removing fans. Folks often use too much force, resulting in damaged screws or clips. Many even damage other parts by mishandling screws. It’s important to use the right tools and be careful to avoid accidents.
Damage to the motherboard or CPU
Using the wrong method can seriously harm the motherboard or CPU. Not turning off the power can cause short circuits, and some have even damaged their processor this way. Hands may slip or thermal paste could be applied wrongly if you’re not careful. To prevent motherboard damage, read all the instructions carefully. Knowing the steps well reduces errors.
To learn more about removing CPU coolers properly, check a thorough guide here. Clean and well-maintained fans avoid many problems. Regular upkeep lessens overheating risks, which is key for a long-lasting system; learn why cleaning your PC fans is vital here.
Being aware of these CPU fan removal mistakes and taking steps to prevent them boosts your confidence. You’ll lessen the risk of damage significantly1415.
Conclusion
In summary, changing a Cooler Master CPU fan needs care and the right know-how. This Cooler Master fan guide gives a full overview, making you ready to do the job confidently. Knowing how to do it right is key, especially to avoid mistakes and make your system work best.
The recap on removing the fan covered not just the technical steps, but also the importance of regular upkeep and careful fitting techniques. By following the discussed methods, your CPU fan will work well, lasting longer and performing better. With this info, you’re set to take on the job of fan removal and installation, boosting your cooling power. Remember, the efficiency of your CPU largely depends on the quality of its components, so this effort is definitely worth it16.
FAQ
What tools do I need to remove a Cooler Master CPU fan?
To take off a Cooler Master CPU fan, get some screwdrivers, thermal paste for putting it back on, and maybe a plastic spudger. The spudger helps if the fan or cooler won’t budge easily.
How can I safely remove my Cooler Master CPU fan without damaging my components?
Make sure your PC is switched off and unplugged first. Read through the CPU cooler manual carefully. Choose a workspace that’s not carpeted to lessen static problems, and be careful with the parts to prevent damage.
What if the cooler is stuck due to thermal paste adhesion?
If the cooler won’t move, twist it gently while pulling up. This method should release the thermal paste’s hold safely without hurting the CPU or cooler.
Can I reuse thermal paste when reinstalling a CPU fan?
Reusing old thermal paste is a bad idea. Clean off the CPU surface well before putting on a new thermal paste layer. This ensures your CPU stays cool and works right.
How do I choose the right replacement fan for my CPU?
Choosing a new fan means looking at what your PC needs to stay cool, the fan size, and if it fits your CPU and case. Always check the specs and see what others say to find the best one.
What are some common mistakes to avoid when removing a CPU fan?
Some mistakes to steer clear of are using too much force with screws or clips, forgetting to switch off and unplug your PSU, and not setting up your workspace right. These could harm your computer.
How do I properly clean the CPU heat sink after fan removal?
To clean the heat sink and processor surface, you’ll need isopropyl alcohol and some paper towels. Make sure you remove all the old paste for a clean start before applying new thermal paste.
What are the signs that my CPU fan needs to be replaced?
You might need a new fan if you hear a lot of noise, or if your CPU gets too hot. Problems when running big programs can also be a sign. Replace the fan if it seems to be breaking down or can’t keep up.
Source Links
- https://www.xda-developers.com/how-to-install-cpu-cooler/ – How to install a CPU cooler: A beginners guide
- https://www.tomshardware.com/reviews/best-cpu-coolers,4181.html – Best CPU Coolers 2024: AIO and Air Coolers
- https://www.xda-developers.com/how-to-remove-your-cpu-cooler/ – How to remove your CPU cooler
- https://www.amd.com/en/resources/support-articles/faqs/CPU-7.html – How to Install or Remove an AMD CPU Cooler
- https://softwareg.com.au/blogs/computer-hardware/cooler-master-cpu-fan-installation – Cooler Master CPU Fan Installation
- https://softwareg.com.au/blogs/computer-hardware/remove-cooler-master-cpu-fan – Remove Cooler Master CPU Fan
- https://www.pcworld.com/article/393599/how-do-i-remove-a-cpu-cooler-without-damaging-the-processor-ask-an-expert.html – How do I remove a CPU cooler without damaging the processor? | Ask an expert
- https://ms.codes/blogs/computer-hardware/remove-cooler-master-cpu-fan – Remove Cooler Master CPU Fan
- https://forums.evga.com/Cooler-Master-V8-CPU-Cooler-Top-Cap-Removal-Instructions-Needed-Help-m378407.aspx – Cooler Master V8 CPU Cooler Top Cap Removal Instructions Needed Help!
- https://www.linkedin.com/advice/0/how-do-you-clean-maintain-your-heat-sink-fans-prevent – How do you clean and maintain your heat sink and fans to prevent dust buildup and clogging?
- https://www.linkedin.com/advice/1/what-best-practices-cleaning-maintaining-your – What are the best practices for cleaning and maintaining your cooling fans and heat sinks?
- https://www.team-bhp.com/forum/gadgets-computers-software/120413-laptop-performance-enhancement-cleaning-air-cooled-network-heat-sink.html – Laptop performance enhancement by cleaning air cooled network (Heat sink)
- https://www.coolermaster.com/en-us/guide-and-resources/how-to-install-a-liquid-cooler-in-your-pc/ – | Cooler Master
- https://forums.tomshardware.com/threads/cpu-fan-error.3567281/ – [SOLVED] – CPU Fan error
- https://rog-forum.asus.com/t5/hardware-build-advice/cpu-fan-error/td-p/882533 – CPU Fan error
- https://community.acer.com/en/discussion/626528/aspire-m1641-how-to-remove-cpu-fan-shroud-from-original-aspire-pc – aspire M1641 How to remove cpu fan shroud from original aspire pc


