Table of Contents
Virtualization has revolutionized the way we utilize our computing resources, allowing us to maximize efficiency and optimize performance. In this guide, we will delve into the world of virtualization on PC servers, exploring the benefits, implementation strategies, and available solutions.
By repurposing an old PC, you can breathe new life into outdated hardware and unlock its full potential. Whether you are a server room administrator or a home user, virtualizing a physical machine offers a multitude of advantages. Say goodbye to cluttered spaces and the limitations of obsolete hardware, and say hello to a streamlined and sustainable computing environment.
But where do you start? It all begins with choosing the right virtualization software. With a plethora of options available in the market, we will guide you through the process of selecting the most suitable solution for your needs, focusing on leading virtualization technology provider, VMware.
Once you have chosen your virtualization software, we will take you through the step-by-step process of converting your old PC into a virtual image. From installing the necessary software to configuring the virtual image, we have you covered every step of the way.
Management and maintenance of virtual machines are equally important to ensure optimal performance and longevity. We will explore the tools and techniques required to keep your virtual machines running smoothly, from regular updates to performance monitoring.
For those looking for an alternative to VMware, we will also discuss how to build a Proxmox server from an old PC. Proxmox is an open-source virtualization management platform that allows you to run multiple virtual machines on a single physical machine.
So, whether you are a seasoned server administrator or a tech-savvy home user, join us on this virtualization journey and unlock the true potential of your old PC. Let’s embark on a transformational journey of efficiency, scalability, and sustainability.
Benefits of Virtualizing a Physical PC
Virtualizing a physical PC offers several advantages. Firstly, it allows you to retire old desktop units or laptops that may have outdated hardware but still require specific operating systems or software. By virtualizing these devices, you can continue running the necessary applications without the need for physical hardware upgrades.
Secondly, server virtualization can help save space by consolidating multiple desktops into a single server. This eliminates the need for multiple physical machines, reducing power consumption, and simplifying management and maintenance tasks. With virtualization, you can optimize your infrastructure and efficiently utilize your resources.
Additionally, virtualization simplifies the management of your computing environment. It provides centralized control and monitoring capabilities, allowing you to easily deploy, manage, and scale virtual machines. Furthermore, it enables seamless migration of virtual machines between physical servers, ensuring high availability and flexibility.
Virtualization offers a cost-effective solution for repurposing old PCs, reducing physical footprint, and streamlining management processes. It allows organizations and individuals to maximize the value of their existing hardware while gaining the benefits of virtualization technology.
To illustrate the benefits of virtualizing a physical PC, consider the following table:
| Virtualization Benefits | Description |
|---|---|
| Cost Savings | Retire outdated hardware and avoid costly hardware upgrades. |
| Space Efficiency | Consolidate multiple desktops into a single server, saving physical space. |
| Flexibility | Migrate virtual machines between physical servers for scalability and high availability. |
| Centralized Management | Simplify management tasks with centralized control and monitoring capabilities. |
In conclusion, virtualizing a physical PC offers numerous benefits, including cost savings, space efficiency, flexibility, and centralized management. By leveraging virtualization technology, organizations and individuals can optimize their computing environments and make the most of their existing hardware resources.
Choosing the Right Virtualization Software
When it comes to virtualization software, you have several options to choose from. In this section, we will focus on using VMware software, specifically VMware vCentre Converter Standalone and VMware Player. VMware is a leading provider of virtualization technology, offering a wide range of solutions for both personal and enterprise use. However, it’s important to note that there are other virtualization software options available, such as VirtualBox and Hyper-V, which may also be suitable depending on your specific needs.
VMware is known for its robust and feature-rich virtualization software. With VMware vCentre Converter Standalone, you can easily convert your physical PC into a virtual image. This software provides a user-friendly interface and comprehensive tools to ensure a smooth and efficient conversion process. Additionally, VMware Player allows you to open and operate virtual machines, providing a seamless virtualization experience.
When choosing virtualization software, it’s essential to consider your requirements and the specific features offered by each option. Evaluate factors such as performance, scalability, management capabilities, and compatibility with your existing infrastructure. By selecting the right virtualization software, you can effectively leverage the benefits of virtualization technology and optimize your computing environment.
Comparison of Virtualization Software Options
| Virtualization Software | Features | Compatibility | Management |
|---|---|---|---|
| VMware | Robust features, comprehensive tools | Compatible with a wide range of hardware and software | Advanced management capabilities |
| VirtualBox | Open-source, versatile | Compatible with various operating systems | User-friendly interface |
| Hyper-V | Built-in virtualization solution for Windows | Native support for Windows operating systems | Tightly integrated with Microsoft ecosystem |
Virtualization software plays a crucial role in creating a virtualized environment. As you evaluate different options, it’s important to consider factors such as features, compatibility, and management capabilities. VMware, VirtualBox, and Hyper-V are among the popular choices, each offering unique benefits. Take the time to assess your requirements and select the software that best aligns with your needs, ensuring a successful virtualization implementation.
System Requirements for Virtualization
Before embarking on the virtualization journey, it is crucial to ensure that your old PC meets the necessary system requirements. These requirements will vary depending on the virtualization software you choose, so it is essential to consult the official documentation for specific details. Here are some key factors to consider:
- 64-bit Processor: Your old PC should have a compatible 64-bit processor with virtualization support. This is necessary for running virtual machines efficiently.
- Sufficient RAM: It is recommended to have at least 8GB of RAM or more for your intended workload. This will ensure smooth performance and prevent any bottlenecks.
- Adequate Storage Capacity: You need to have enough storage capacity to store virtual machine images. The exact amount will depend on the size and number of virtual machines you plan to create.
- Reliable Network Connectivity: A stable network connection is essential for accessing and managing virtual machines. Ensure that your old PC is connected to a network with reliable connectivity.
By meeting these system requirements, you can lay a solid foundation for a successful virtualization implementation. Keep in mind that these requirements may evolve as virtualization technology advances, so it is always a good idea to stay updated with the latest recommendations and guidelines provided by your chosen virtualization software.
| System Requirements | Minimum | Recommended |
|---|---|---|
| Processor | 64-bit processor with virtualization support | Multi-core processor with virtualization support |
| RAM | 8GB | 16GB or more |
| Storage | At least 100GB free space | 200GB or more free space |
| Network | Stable network connectivity | Stable network connectivity |
These requirements serve as a baseline, and it is advisable to consult the documentation provided by your chosen virtualization software for any additional recommendations or specific hardware considerations. By ensuring that your old PC meets these requirements, you can set the stage for a successful virtualization strategy and achieve the benefits that come with it.
Installing VMware vCentre Converter Standalone
Once you have identified an old PC to repurpose as a virtualization server, the next step is installing the necessary software. One of the key tools you will need is VMware vCentre Converter Standalone. This software enables you to convert your physical PC into a virtual image that can be accessed and managed through VMware Player.
To install VMware vCentre Converter Standalone, begin by downloading the software from the VMware website or other trusted sources. Once the download is complete, follow the installation instructions provided by VMware. The installation process is straightforward and typically involves running the installer and accepting the license agreement.
After the installation is complete, you can launch VMware vCentre Converter Standalone and start the conversion process. This involves selecting the source PC (the physical PC you want to convert), specifying the destination for the virtual image, and configuring the virtual machine settings. Once you have completed these steps, click the “Convert” button to initiate the conversion. The software will then begin creating a virtual image of your old PC.
It is important to note that the conversion process may take some time, depending on the size and complexity of your physical PC. During the conversion, the software will copy the contents of your physical PC and configure them into a format compatible with virtualization. Once the conversion is complete, you will have a virtual image that can be opened and operated using VMware Player on a separate PC.
| Step | Description |
|---|---|
| 1 | Download the VMware vCentre Converter Standalone software from the official VMware website or other trusted sources. |
| 2 | Run the installer and follow the installation instructions provided by VMware. |
| 3 | Launch VMware vCentre Converter Standalone and select the source PC for conversion. |
| 4 | Specify the destination for the virtual image and configure the virtual machine settings. |
| 5 | Initiate the conversion process by clicking the “Convert” button. |
| 6 | Wait for the conversion process to complete. |
Installing VMware Player
After successfully installing VMware vCentre Converter Standalone, the next step is to install VMware Player on a separate PC that will be used to interact with the virtual image. VMware Player is a free software that allows you to open and operate virtual machines. To download VMware Player, visit the official VMware website or trusted sources. Once downloaded, follow the installation instructions provided to install VMware Player on your designated PC.
It is important to ensure that the PC where VMware Player is being installed is connected to the same network as your old PC. This network connectivity is essential for seamless interaction between the virtual image and the designated PC. Once VMware Player is installed and the network is properly configured, you are ready to proceed with the next steps of the virtualization process.
“VMware Player is a user-friendly software that offers a simple yet powerful interface for managing virtual machines. With its intuitive controls and extensive features, it allows users to experience the benefits of virtualization without the need for advanced technical knowledge.”
By installing VMware Player, you are creating a platform from which you can view, access, and manage your virtual image. This software acts as a virtual machine host, providing the necessary environment for your virtualized PC. With VMware Player, you can easily switch between virtual machines, take snapshots for system recovery, and customize the settings of each virtual machine to suit your specific needs.
Table: Comparison of VMware and Proxmox
| Features | VMware | Proxmox |
|---|---|---|
| Virtualization Technology | Proprietary | Open-source |
| Cost | Commercial and free versions available | Completely free |
| Management Interface | VMware vCenter Server | Proxmox VE |
| Compatibility | Supports a wide range of operating systems | Supports Linux-based OS |
| Integration | Seamless integration with other VMware products | Integration with existing Linux infrastructure |
Converting Your Physical PC to a Virtual Image
Now that you have installed both VMware vCentre Converter Standalone and VMware Player, it’s time to convert your old PC into a virtual image. The conversion process is straightforward and can be completed using the step-by-step instructions provided by VMware software. Simply follow the prompts, making selections such as the source PC, destination for the virtual image, virtual machine settings, and initiate the conversion process. Once completed, you will have a virtual image of your old PC ready to be accessed and managed through VMware Player.
It is important to note that the time taken for the conversion process will depend on the size and complexity of your PC’s system. Larger systems with more applications and data may take longer to convert. It is advisable to allocate sufficient time for the conversion and ensure your old PC is connected to a stable power source throughout the process.
During the conversion process, it is recommended to closely monitor the progress and address any issues that may arise. VMware software provides detailed progress updates and error notifications to help you troubleshoot and resolve any potential conversion errors. By following the provided instructions and having patience throughout the conversion process, you can successfully transform your physical PC into a functional virtual image.
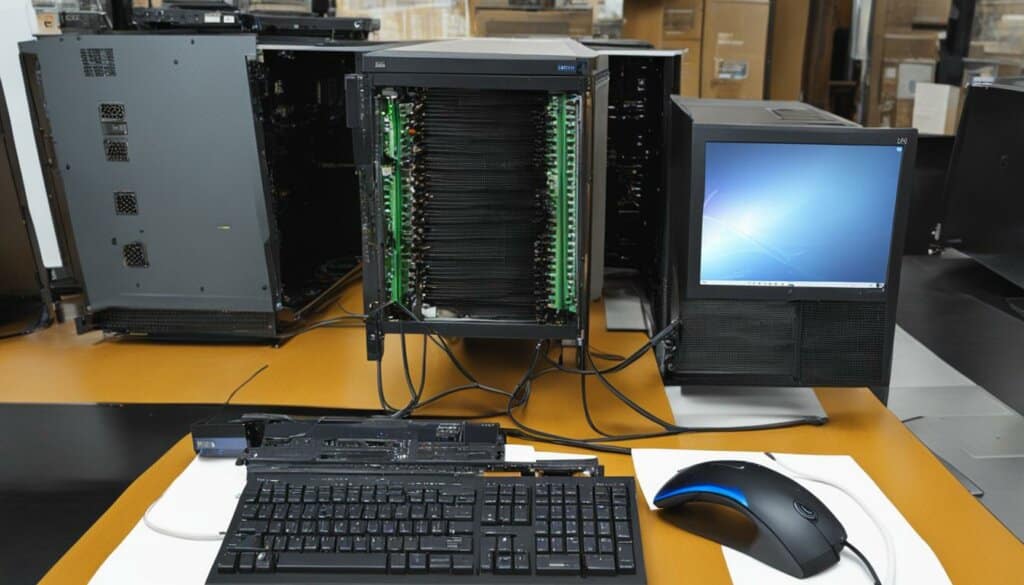
Once the conversion is complete, you can start exploring the possibilities offered by virtualization. This includes the ability to run multiple operating systems and applications simultaneously, seamlessly switch between different virtual machines, and easily manage your virtualized environment. Virtualization provides a flexible and efficient solution for maximizing the potential of your old PC, allowing you to continue using it for various purposes without the limitations of outdated hardware or software.
Configuring the Virtual Image
Once you have successfully created the virtual image of your old PC, the next step is to configure it to ensure smooth operation. The configuration process involves fine-tuning various settings and installing necessary software within the virtual machine.
The first aspect to consider is the amount of allocated RAM. Depending on the workload and the operating system you intend to run, you may need to adjust the RAM allocation accordingly. Allocating too little RAM can hinder performance, while allocating too much can negatively impact other virtual machines on the same server.
Next, you’ll need to configure the network settings of the virtual machine. This includes assigning an IP address, configuring DNS settings, and ensuring proper network connectivity. Depending on your requirements, you may choose to set up a bridged network, a NAT (Network Address Translation) network, or a host-only network. Each option offers different benefits and limitations, so it’s important to choose the one that best suits your virtualization strategy.
Finally, you’ll need to install the necessary operating system and applications within the virtual machine. This can be done by mounting an ISO file or using the installation media directly. Once the installation is complete, don’t forget to apply any relevant updates and patches to ensure the virtual machine is up to date and secure.
Example Configuration Steps for VMware:
| Configuration Step | Description |
|---|---|
| RAM Allocation | Adjust the amount of allocated RAM in the virtual machine settings based on the recommended system requirements for your chosen operating system. |
| Network Settings | Configure the network settings according to your network setup, ensuring proper connectivity and accessibility for the virtual machine. |
| Operating System Installation | Mount the ISO file or use the installation media to install the desired operating system within the virtual machine. |
| Application Installation | Install any necessary applications or software within the virtual machine to meet your specific requirements. |
| Updates and Patches | Apply any relevant updates and patches to keep the virtual machine secure and up to date. |
Management and Maintenance of Virtual Machines
Once you have successfully created your virtual machine, it is important to establish effective management and maintenance practices to ensure its optimal performance and longevity. By following virtualization implementation and strategies, you can keep your virtual machines running smoothly.
Regular Maintenance
Regular maintenance is essential to keep your virtual machines up to date and secure. This includes regularly applying software updates, patches, and security fixes provided by your virtualization software vendor. By keeping your virtual machines updated, you can ensure they are protected against vulnerabilities and take advantage of new features and enhancements.
“Regular maintenance is the key to ensuring the optimal functioning of your virtual machines.” – Virtualization Expert
In addition to software updates, it is also important to monitor the performance of your virtual machines. Virtualization software often provides built-in monitoring tools that allow you to track resource usage, such as CPU, memory, and disk utilization. By monitoring performance, you can identify any bottlenecks or issues and take appropriate actions to optimize performance.
Management Tools
Virtualization software typically offers a range of management tools that allow you to efficiently manage your virtual machines. These tools include features such as starting, stopping, and pausing virtual machines, cloning and creating snapshots, and configuring networking and storage options. By utilizing these management tools, you can easily manage and control your virtual machines, ensuring they meet your evolving requirements.
Table: Comparison of Virtualization Management Tools
| Virtualization Software | Management Tools | Features |
|---|---|---|
| VMware | vSphere Client | Start, stop, pause virtual machines, clone, create snapshots, configure networking and storage options |
| Proxmox | Proxmox Web Interface | Start, stop, pause virtual machines, clone, create snapshots, configure networking and storage options |
By effectively managing and maintaining your virtual machines, you can ensure their optimal functioning and reap the benefits of virtualization implementation. Regular maintenance, monitoring performance, and utilizing management tools are key components of a successful virtualization strategy.
Building a Proxmox Server from an Old PC
Virtualization on a PC server offers numerous benefits, and Proxmox is an excellent open-source virtualization management platform to consider. By repurposing your old PC, you can create a Proxmox server that enables you to run multiple virtual machines on a single physical machine. This not only extends the life of your outdated hardware but also simplifies management and saves space. Here’s a step-by-step guide on how to build a Proxmox server from an old PC.
Requirements for Building a Proxmox Server
Before diving into the installation process, it’s important to ensure that your old PC meets the necessary requirements. These include a 64-bit processor with virtualization support, sufficient RAM, ample storage capacity, and reliable network connectivity. Proxmox VE is compatible with a wide range of hardware, but it’s always a good idea to check the official documentation for specific details.
Step 1: Download the Proxmox VE Installation Image
The first step in building your Proxmox server is to download the Proxmox VE installation image. Visit the Proxmox website or other reliable sources to download the image that matches your hardware architecture. Make sure to choose the correct version and format (ISO or USB) for your needs.
Step 2: Install Proxmox VE on the Old PC
Once you have the Proxmox VE installation image, you can proceed with installing Proxmox VE on your old PC. Create a bootable medium using the downloaded image, such as a USB drive or DVD. Then, boot your old PC from the installation media and follow the on-screen instructions to install Proxmox VE. Make sure to select the appropriate options during the installation process, such as partitioning and network configuration.
Step 3: Configure Network Settings
After the installation is complete, you’ll need to configure the network settings for your Proxmox server. This involves assigning IP addresses, setting up DNS, configuring network interfaces, and establishing network connectivity. Refer to the Proxmox documentation for detailed instructions on how to configure the network settings to ensure seamless communication between your Proxmox server and other devices on the network.
Step 4: Create and Manage Virtual Machines
With your Proxmox server up and running, you can start creating and managing virtual machines. Proxmox provides a user-friendly web interface that allows you to create, configure, and monitor virtual machines with ease. Take advantage of Proxmox’s extensive features, such as high availability, live migration, and backup/restore options, to optimize the performance and reliability of your virtual machines.
Building a Proxmox server from an old PC is a cost-effective way to embrace virtualization and maximize the potential of your hardware. Whether you have a home lab or a small business, Proxmox offers a robust platform for running multiple virtual machines efficiently. By following the steps outlined above, you can transform your old PC into a powerful virtualization server and reap the benefits of server virtualization.
| Benefits of Building a Proxmox Server |
|---|
| Extend the life of outdated hardware – By repurposing your old PC into a Proxmox server, you can continue using your hardware even if it no longer meets the requirements for modern operating systems. |
| Simplify management – Running multiple virtual machines on a single physical machine makes managing your computing environment more streamlined and efficient. |
| Save space – Consolidating multiple virtual machines onto one physical server helps you optimize space in your server room or home lab. |
Conclusion
Transforming an old PC into a virtualization server offers numerous benefits in today’s world, where virtualization technology has become an integral part of server management. Whether you are a server room administrator or a home user looking to repurpose your old PC, server virtualization provides a powerful solution. By virtualizing a physical machine, you can extend the life of outdated hardware, optimize resource utilization, and simplify your computing environment.
Virtualization software plays a crucial role in this process, and there are several options available. From industry-leading solutions like VMware to open-source platforms like Proxmox, the choice ultimately depends on your specific requirements. Regardless of the software you choose, the steps outlined in this guide provide a comprehensive overview of the virtualization journey.
Through virtualization, you can unlock the potential of your old PC and maximize its efficiency. Discover the advantages of virtualization on a PC server, explore the possibilities of server virtualization, and take advantage of the benefits of PC virtualization. Embrace virtualization technology and witness the transformation it brings to your computing experience. Start your virtualization journey today and unleash the power of your old PC.
FAQ
What are the benefits of virtualizing a physical PC?
Virtualizing a physical PC allows you to retire outdated hardware while still using specific operating systems or software. It also saves space by consolidating multiple desktops into a single server and simplifies the management of your computing environment.
What virtualization software options are available?
VMware is a leading virtualization technology provider with tools like VMware vCentre Converter Standalone and VMware Player. Other options include VirtualBox and Hyper-V, which may be suitable depending on your specific needs.
What are the system requirements for virtualization?
You need a compatible 64-bit processor with virtualization support, sufficient RAM (8GB or more is recommended), adequate storage capacity for virtual machine images, and reliable network connectivity. Specific requirements may vary based on the virtualization software chosen.
How do I install VMware vCentre Converter Standalone?
Download the software from the VMware website, follow their installation instructions, and install it on your old PC.
How do I install VMware Player?
Download VMware Player from the VMware website, install it on a separate PC, and ensure it is connected to the same network as your old PC.
How do I convert my physical PC to a virtual image using VMware software?
Follow the step-by-step process provided by the VMware software, which typically involves selecting the source PC, specifying the destination for the virtual image, configuring virtual machine settings, and initiating the conversion.
How do I configure the virtual image after creating it?
Adjust the allocated RAM, configure network settings, and install the necessary operating system and applications within the virtual machine. Refer to the documentation provided by the virtualization software for detailed instructions.
What management tools are available for virtual machines?
Virtualization software provides tools to start, stop, pause, and delete virtual machines, as well as clone, snapshot, and configure networking and storage options.
Can I use Proxmox to create a virtualization server from an old PC?
Yes, Proxmox is an open-source virtualization management platform that can be installed on an old PC. It allows running multiple virtual machines on a single physical machine.

