Table of Contents
Revitalize your old PC and transform it into a functional print server with these simple steps. Save money and repurpose existing hardware by using your PC as a print server. Whether you need a network print server, wireless print server, or USB print server, this guide will show you how to make the most of your old PC.
Before we begin, let’s make sure your PC meets the minimum requirements. Check if you have an Intel 386 CPU or later, 8 MB of system memory, a floppy drive, and a parallel port. If you have an extra Ethernet network adapter card, it will be even better for connecting your PC to the network.
Now it’s time to download the necessary drivers and print server software. There are various free options available, such as Qcontrol from Pcounter. Don’t forget to install WinZip to un-compress the program files and WinImage to create a boot disk.
Next, add the drivers to a boot disk using WinImage. Drag the files for the NIC driver and print server application into the window, and include the file called modules.lrp. Write the contents to a floppy disk using WinImage, and you’ll have your boot disk ready.
Now, let’s connect your printer to the old PC using a parallel cable. Make sure the printer is powered on before booting up the PC with the boot disk. This will ensure that the printer is recognized by the PC and ready for configuration.
Go to the Control Panel, navigate to printers & fax, and click on add a printer. Follow the steps to manually add the IP address, port name, and Custom Raw Port number. This will configure the printer and the PC as a server on the network.
While repurposing an old PC as a print server may seem like a sustainable and stylish option, there are some considerations to keep in mind. The energy consumption of a 20-year-old computer running 24/7 is inefficient compared to a low-power network print server. It’s also important to ensure driver uniformity and consider using the old PC as a server room novelty for the IT team.
If using an old PC as a print server isn’t suitable for your needs, there are alternative options to explore. Consider a cheap NAS or a Linux printer server for similar functionality. Direct-IP printing is another option worth considering, where users can connect to the printer using its IP address. Consult with experts like PrintWhisperer for guidance on setting up alternative print server solutions.
If you have access to a Windows Server 2003, you can configure it as a file and print server using the Configure Your Server Wizard administrative tool or by following the provided steps manually.
Repurposing an old PC as a print server can be a cost-efficient and sustainable solution. By following the steps outlined in this article, you can transform your unused PC into a functional print server. Consider your specific needs and explore alternative options to find the best print server setup for your environment.
Checking PC Specifications
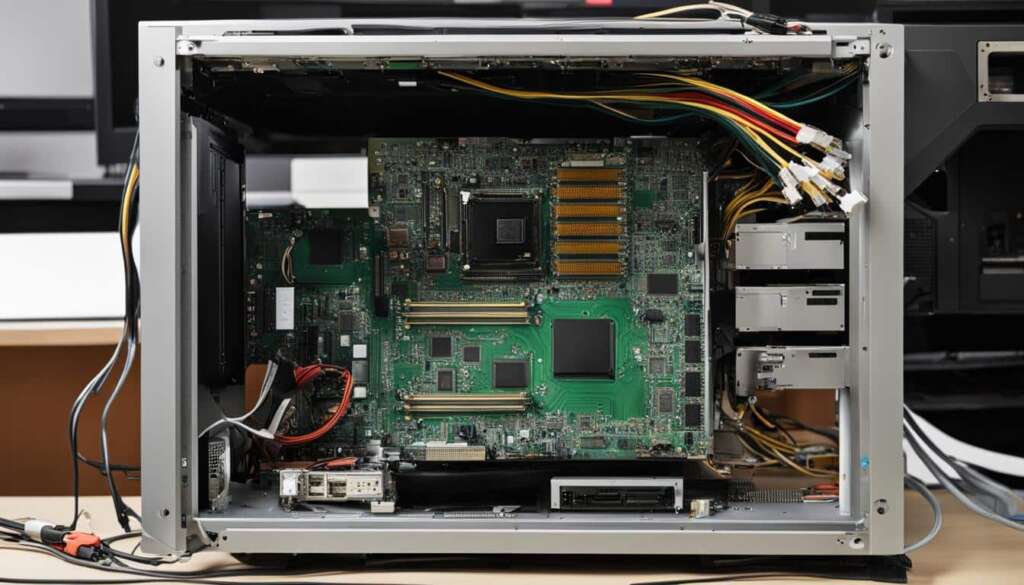
Before repurposing your old PC as a print server, it’s important to ensure that it meets the minimum specifications required for smooth operation. These specifications include:
- Intel 386 CPU or later
- 8 MB of system memory
- A 3.5-inch floppy drive
- A parallel port
- An Ethernet network adapter card (if available)
These specifications are crucial for the proper functioning of the print server. The Intel 386 CPU or later ensures compatibility with modern software, while the 8 MB of system memory allows for efficient processing of print jobs. The floppy drive and parallel port are necessary for connecting and communicating with the printer. Additionally, having an Ethernet network adapter card enables the PC to connect to the network seamlessly, ensuring easy accessibility to the print server.
By checking these specifications, you can determine whether your old PC is suitable for repurposing as a print server or if you need to consider alternative options. It’s important to note that while older PCs can still be functional, they may not meet the requirements for running modern print server software efficiently. Consider these specifications as a baseline for a smooth print server setup.
Table 2. PC Specifications
| Specification | Minimum Requirement |
|---|---|
| Processor | Intel 386 CPU or later |
| System Memory | 8 MB |
| Storage | 3.5-inch Floppy Drive |
| Connectivity | Parallel Port |
| Network | Ethernet Network Adapter Card (if available) |
Table 2 provides an overview of the minimum PC specifications required for repurposing an old PC as a print server. These specifications will ensure that your print server functions optimally and delivers reliable printing performance.
Downloading Drivers and Print Server Software
Setting up an old PC as a print server requires downloading the necessary drivers and print server software. Thankfully, there are several free choices available that can help you repurpose your old hardware. One such option is Qcontrol from Pcounter, which provides a user-friendly interface and efficient print management capabilities.
Before downloading the drivers and software, ensure that you have the appropriate tools installed on your PC. You will need WinZip to un-compress the program files and WinImage to create a disk image of the print server driver. These tools will make the installation process easier and smoother.
“Qcontrol from Pcounter is a reliable and feature-rich print server software that is easy to install and use. It offers seamless integration with various printer models, allowing you to efficiently manage your printing tasks.”
Once you have the necessary tools and software, follow these steps to download the drivers and configure your print server:
- Visit the manufacturer’s website or a trusted source to find the appropriate NIC driver for your old PC.
- Download the driver file to your computer.
- Open WinZip and extract the files from the downloaded driver file.
- Launch WinImage and create a disk image of the print server driver.
- Copy the disk image onto a medium that your old PC can read, such as a 1.44 MB floppy disk.
Table: Print Server Software Options
| Print Server Software | Description |
|---|---|
| Qcontrol from Pcounter | A free and user-friendly print server software with efficient print management capabilities. |
| Other Free Choices | Explore other free print server software options based on your specific requirements and preferences. |
Downloading drivers and print server software is an essential step in repurposing your old PC as a print server. By choosing reliable software like Qcontrol from Pcounter and ensuring you have the necessary tools, you can effectively set up a print server that meets your printing needs.
Adding Drivers to a Boot Disk
Now that you have downloaded the necessary NIC driver and print server software, it’s time to add them to a boot disk. This boot disk will enable you to install the drivers on your old PC and turn it into a functional print server.
To add the drivers to the boot disk, you will need to use a program called WinImage. Open WinImage in the command line and drag the files for the NIC driver and print server application into the window. Additionally, include the file called modules.lrp in the WinImage contents.
Once you have added all the necessary files, insert a floppy disk into your PC and follow the prompt in WinImage to write the contents to the disk. This will create a boot disk that contains all the drivers you need to install on your old PC.
| Steps | Description |
|---|---|
| 1 | Open WinImage in the command line |
| 2 | Drag the files for the NIC driver and print server application into the WinImage window |
| 3 | Include the file called modules.lrp in the WinImage contents |
| 4 | Insert a floppy disk into your PC |
| 5 | Follow the prompt in WinImage to write the contents to the disk |
Connecting the Printer
Now that you have set up your old PC as a print server, it’s time to connect the printer and make sure everything is ready for configuration. The first step is to connect the printer to the PC using a parallel cable. Ensure that the printer is powered on before booting up the PC with the boot disk. This will ensure that the printer is recognized by the PC and ready for configuration.
Connecting the printer is a crucial step in the process of setting up your print server. The parallel cable allows for a direct and reliable connection between the printer and the PC. Once connected, the printer can communicate with the PC and receive print jobs from other devices on the network. It’s important to ensure that the printer is powered on before booting up the PC to avoid any compatibility issues. This simple step will help ensure a smooth and efficient print server setup.
Remember, the success of your print server setup relies on a properly connected printer. The parallel cable provides a stable connection that allows for seamless printing. By powering on the printer before booting up the PC, you can ensure that the printer is detected and ready to be configured. With this crucial step completed, you are one step closer to fully utilizing your old PC as a functional print server.
| Step | Action |
|---|---|
| 1 | Connect the printer to the old PC using a parallel cable |
| 2 | Ensure that the printer is powered on |
| 3 | Boot up the PC with the boot disk |
Adding the Printer and Server to the Network
Setting up your old PC as a print server is not complete without adding the printer and server to the network. This step ensures that your printer is accessible to all devices connected to the network. To accomplish this, you will need to navigate to the Control Panel and access the printers & fax settings.
Once in the printers & fax settings, click on the “add a printer” option to begin the process of adding your printer to the network. In some cases, you may need to uncheck the Autodetect PnP function if it is enabled. Select the option to create a new port, then choose the Standard TCP/IP port for network printing.
In the configuration process, you will need to manually input the IP address of your printer. This can usually be found in the printer’s settings or by accessing your router’s admin panel. Additionally, you will need to assign a port name and specify a Custom Raw Port number. These configurations will allow your printer and PC server to communicate effectively on the network.
By following these steps and ensuring that your printer and PC server are properly connected to the network, you can maximize the functionality of your print server setup and enjoy seamless printing capabilities from any connected device.
| Control Panel | Navigate to printers & fax |
|---|---|
| Add a Printer | Select “add a printer” option |
| Autodetect PnP | Uncheck if necessary |
| Create New Port | Choose Standard TCP/IP port |
| IP Address | Manually input printer’s IP address |
| Port Name | Assign a name for the port |
| Custom Raw Port Number | Specify a custom raw port number |
Is it a Good Idea?
Repurposing an old PC as a print server may seem like a sustainable and stylish option, but it’s important to consider several factors before going ahead with the plan. One significant aspect to evaluate is the energy consumption of a 20-year-old computer. These older machines tend to be less energy-efficient compared to modern low-power network print servers. This discrepancy in energy consumption can lead to higher electricity bills and a less environmentally friendly setup.
Another consideration is driver uniformity. While using an old PC as a print server may work well with compatible printers, it could pose challenges when trying to connect newer printer models. Ensuring driver availability and compatibility for a wide range of printers can be a complex task, and it’s essential to assess whether the old PC can handle the necessary drivers for your specific printer requirements.
“While repurposing an old PC as a print server may sound appealing, it’s crucial to weigh the benefits against the potential drawbacks. From an energy consumption perspective to driver compatibility, it’s essential to consider the long-term implications of this setup.”
Lastly, using an old PC as a print server may be seen as a novelty in a server room environment. However, it’s important to ask whether the aesthetics and nostalgia outweigh the practicality and functionality of a dedicated low-power network print server. In a professional setting, it’s often more prudent to prioritize efficiency, reliability, and ease of use over the unique charm of repurposing outdated hardware.
| Considerations | Pros | Cons |
|---|---|---|
| Energy Consumption | Low upfront cost | Inefficient and higher electricity bills |
| Driver Uniformity | Compatible with older printers | Challenges with driver availability and compatibility for newer printers |
| Server Room Novelty | Aesthetically appealing | Prioritizing functionality and reliability may be more important |
While the idea of repurposing an old PC as a print server may be enticing, it’s essential to carefully evaluate the energy consumption, driver uniformity, and overall practicality of such a setup. Considering alternative options, such as low-power network print servers or dedicated Linux printer servers, may provide a more efficient and hassle-free printing solution for your needs.
Exploring Alternative Options
While repurposing an old PC as a print server may not be suitable for everyone, there are alternative options to consider. These options can provide similar functionality and may better meet your specific needs. Let’s explore a few alternatives:
NAS (Network Attached Storage)
If you’re looking for a cost-effective solution, a cheap NAS can serve as a reliable print server. NAS devices are designed specifically for data storage and sharing, making them a practical alternative to an old PC. With their low power consumption and built-in print server capabilities, NAS devices offer a seamless printing experience.
Linux Printer Server
Another alternative is setting up a Linux printer server. Linux offers various print server software options that are free and open-source. By leveraging Linux’s stability and flexibility, you can create a reliable print server that can handle multiple printers and clients effectively.
Direct-IP Printing
If you prefer a simple and straightforward solution, direct-IP printing is worth considering. With direct-IP printing, users can connect directly to the printer using its IP address. This eliminates the need for a dedicated print server, making it a convenient option for environments with a limited number of printers.
When exploring alternative options, it’s essential to consider factors such as cost, ease of setup, and compatibility with your existing infrastructure. Consulting with experts like PrintWhisperer can provide valuable insights and guidance in choosing the right alternative print server solution for your specific requirements.
| Option | Description |
|---|---|
| NAS (Network Attached Storage) | A cost-effective solution that combines data storage and print server capabilities. A cheap NAS device can serve as a reliable alternative to repurposing an old PC. |
| Linux Printer Server | Utilize the stability and flexibility of Linux to set up a print server. Linux offers free and open-source print server software options. |
| Direct-IP Printing | A simple and straightforward option where users directly connect to the printer using its IP address. This eliminates the need for a dedicated print server. |
Configuring a Windows Server as a Print Server
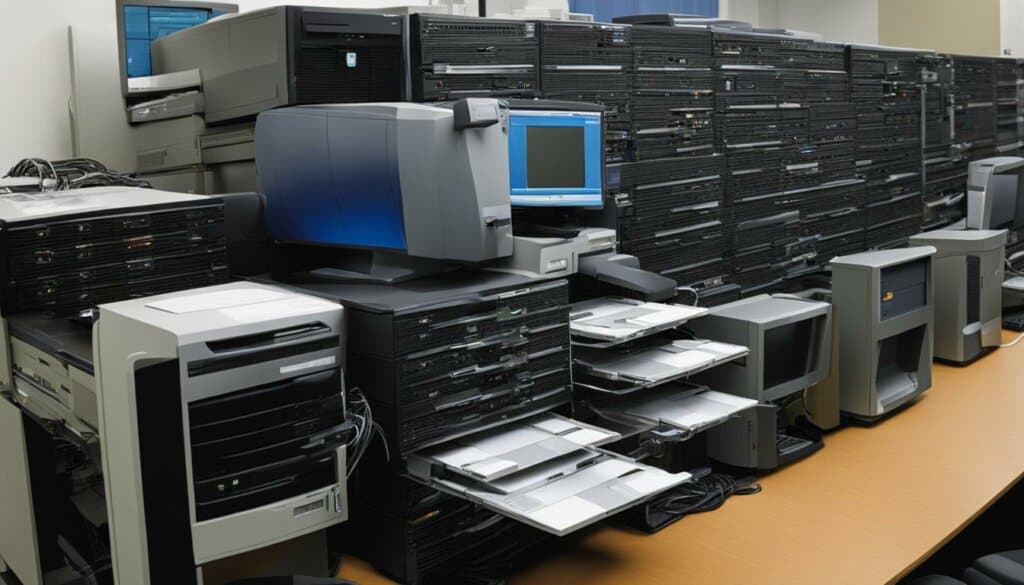
If repurposing an old PC as a print server isn’t suitable for your needs, you can consider using a Windows Server 2003 as a dedicated file and print server. With its robust capabilities, a Windows Server can efficiently handle the demands of a networked printing environment.
Using the Configure Your Server Wizard
One way to set up the Windows Server as a print server is by using the Configure Your Server Wizard. This administrative tool simplifies the process by guiding you through the necessary steps.
- Access the Configure Your Server Wizard by clicking on Start, then Administrative Tools, and selecting Configure Your Server.
- Follow the on-screen prompts and select the option to create a new file server and print server.
- Configure the necessary settings, including specifying the printers and print queues to be hosted by the server.
- Once the configuration is complete, the Windows Server will be ready to serve as a print server for your network.
Manually Installing a Print Server
If you prefer a more hands-on approach, you can manually install the file server and print server services on the Windows Server. Here’s how:
- Open the Server Manager by clicking on Start, then Administrative Tools, and selecting Server Manager.
- Navigate to the Roles section and click on Add Roles.
- Select the File Services role and the Print Services role.
- Configure the role settings according to your network requirements.
- Complete the installation process and restart the server if prompted.
By configuring a Windows Server as a print server, you can leverage the advanced features and stability of the server operating system to ensure reliable and efficient printing for your network.
| Benefits of Windows Server 2003 Print Server | Considerations |
|---|---|
| Centralized management of printers and print queues | Requires dedicated hardware and resources |
| Enhanced security features and access controls | May require additional licensing costs |
| Support for advanced print server functionalities | Requires technical expertise for setup and maintenance |
Conclusion
Repurposing an old PC as a print server can be a cost-efficient and sustainable solution for setting up a print server. By repurposing old hardware, you can save money while giving new life to your unused PC. With just a few simple steps, you can transform your old PC into a functional print server, allowing you to print wirelessly and connect multiple devices to a single printer.
However, it’s important to consider your specific needs and alternative options before committing to this setup. While repurposing an old PC may seem like a stylish choice, it may not be the most practical one. The energy consumption of a 20-year-old computer running constantly can be inefficient compared to low-power network print servers. Additionally, maintaining driver uniformity and exploring alternative options like cheap NAS or Linux printer servers may offer similar functionality.
In conclusion, repurposing an old PC as a print server is a viable option for those looking to repurpose old hardware and save money. Consider your specific requirements, weigh the pros and cons, and explore alternative solutions to ensure you choose the best print server setup for your environment.
FAQ
Can I use any PC as a print server?
No, you’ll need at least an Intel 386 CPU or later, 8 MB of system memory, a 3.5-inch floppy drive, and a parallel port. An extra Ethernet network adapter card is also beneficial for connecting the PC to the network.
Where can I find the necessary drivers and print server software?
There are various free options available, such as Qcontrol from Pcounter. You can download them online and make sure you have WinZip installed to un-compress the program files, and WinImage to create a disk image of the print server driver.
How do I add the drivers to a boot disk?
Open WinImage in the command line and drag the files for the NIC driver and print server application into the window. Also, include the file called modules.lrp in the WinImage contents. Insert a floppy disk and follow the prompt to write the WinImage contents to the disk. This boot disk will be used to install the necessary drivers on the old PC.
How do I connect the printer to the old PC?
Connect the printer to the old PC using a parallel cable. Make sure the printer is powered on before booting up the PC with the boot disk. This will ensure that the printer is recognized by the PC and ready for configuration.
How do I add the printer and server to the network?
Go to the Control Panel and navigate to printers & fax. Click on add a printer and uncheck the Autodetect PnP function if necessary. Select Create New Port, choose Standard TCP/IP port, and manually add the IP address, port name, and Custom Raw Port number. This will configure the printer and the PC as a server on the network.
Is using an old PC as a print server energy-efficient?
While repurposing an old PC as a print server may seem sustainable, the energy consumption of a 20-year-old computer running 24/7 is inefficient compared to a low-power network print server.
Are there alternative options to using an old PC as a print server?
Yes, you can consider options such as a cheap NAS or a Linux printer server. Direct-IP printing is another option where users can connect to the printer using its IP address. Consult with experts like PrintWhisperer for guidance on setting up alternative print server solutions.
Can I use a Windows Server as a print server?
If you have access to a Windows Server 2003, you can configure it as a file and print server. Use the Configure Your Server Wizard administrative tool to create a file server and print server. Alternatively, you can manually install a file server and print server by following the provided steps.
Is repurposing an old PC as a print server cost-efficient?
Yes, repurposing an old PC as a print server can be a cost-efficient solution that allows you to transform your unused hardware into a functional print server.
Can I repurpose any old PC as a print server?
It is recommended to check the minimum PC specifications and ensure that your old PC meets the requirements before using it as a print server.


