Table of Contents
Looking to connect your Oculus Quest 2 to your PC? We’ve got you covered! Whether you want to enjoy PC-only VR experiences or enhance your visuals, connecting your Quest 2 to a PC opens up a whole new world of gaming possibilities. In this guide, we’ll walk you through the process step by step, so you can start exploring the best of both worlds.
Key Takeaways
- There are two options to connect your Oculus Quest 2 to a PC: Oculus Link for a wired connection and Air Link for a wireless connection.
- Oculus Link requires reviewing compatibility requirements, plugging in the USB or Oculus Link cable, and enabling Oculus Link.
- Air Link requires updating Quest 2 and the Oculus app, connecting to the same network, enabling Air Link in the Quest 2 settings, and pairing your PC with the headset.
- Prior to connecting, download the Oculus Quest 2 PC app from the Oculus website and consider purchasing an Oculus Link cable for a wired connection.
- For Oculus Link connection, use an Oculus Link cable or a high-quality USB-C cable, connecting one end to your PC’s USB 3.0 port and the other end to your headset.
Connecting Oculus Quest 2 to PC using Oculus Link
If you want to connect your Oculus Quest 2 to a PC using Oculus Link, follow these simple steps. First, make sure your PC meets the compatibility requirements for Oculus Link. You’ll need a Windows PC with a compatible graphics card and USB 3.0 port. Once you’ve confirmed compatibility, plug in the USB cable provided with your Oculus Quest 2 or use a high-quality USB 3.0 cable.
Next, enable Oculus Link on your Quest 2 headset. Put on your headset and navigate to the Settings menu. Select the Device tab and then click on Oculus Link. A prompt will appear asking if you want to enable Oculus Link. Confirm by clicking “Enable” and you’re all set!
Now, your Oculus Quest 2 will be connected to your PC using Oculus Link. You can access PC-only VR experiences and enjoy enhanced visuals. Whether you’re gaming or watching immersive videos, Oculus Link provides a seamless wired connection between your headset and PC.
“Oculus Link allows for a wired connection, ensuring a stable and reliable experience for users. It’s a great option for those who want to take full advantage of PC-powered VR gaming.” – Oculus Support
Comparison between Oculus Link and Air Link
| Oculus Link | Air Link | |
|---|---|---|
| Connection Type | Wired (USB) | Wireless |
| Compatibility | Both Oculus Quest and Quest 2 | Quest 2 only |
| Setup Process | Plug in USB cable and enable Oculus Link | Ensure Quest 2 and PC are on the same network, enable Air Link in Quest 2 settings, and pair PC with headset |
| Performance | Stable and reliable | Dependent on network conditions |
Comparing Oculus Link and Air Link, it’s clear that both methods have their advantages. Oculus Link offers a wired connection, ensuring a stable and reliable experience for users. It’s a great option for those who want to take full advantage of PC-powered VR gaming. On the other hand, Air Link provides the convenience of a wireless connection, allowing for more freedom of movement without the need for cables.
Connecting Oculus Quest 2 to PC using Air Link
To connect your Oculus Quest 2 to a PC using Air Link, you need to follow a few simple steps. First, ensure that both your Quest 2 headset and the Oculus app on your PC are updated to the latest version. This is crucial for a seamless connection. Once you’ve done that, make sure that your PC and Quest 2 are connected to the same Wi-Fi network. This is crucial for Air Link to work properly.
Next, navigate to the settings in your Quest 2 headset. Scroll down to the “Experimental Features” section and look for the option to enable Air Link. Toggle it on, and you’re almost there. Now, open the Oculus app on your PC and select the Devices tab. You should see your Quest 2 listed there, ready to be paired.
To pair your PC with your Quest 2 headset, simply click on the Pair button next to the device name. A confirmation prompt will appear in your headset, asking if you want to allow the connection. Confirm it, and the pairing process will be complete. Your PC is now wirelessly connected to your Quest 2, and you can enjoy PC VR experiences without the need for a cable.
Benefits of Air Link
Air Link offers several advantages over a wired connection with Oculus Link. Firstly, it provides the freedom to move around without being tethered to your PC. This is particularly beneficial for games and experiences that require a large play area or involve a lot of movement.
Secondly, Air Link eliminates the need for a physical cable, which can be cumbersome and restrict movement. With Air Link, you can simply put on your Quest 2 headset and start playing without worrying about tripping over or getting tangled in cables.
Lastly, Air Link offers a convenient and hassle-free setup process. Once you’ve enabled Air Link and paired your PC with your Quest 2, the connection will be automatically established whenever your headset and PC are on the same Wi-Fi network. This means you can easily switch between wired and wireless connection options based on your preference or the requirements of the VR experience you’re playing.
| Connection Method | Wired (Oculus Link) | Wireless (Air Link) |
|---|---|---|
| Connection Type | Requires a cable | No cable required |
| Setup Process | Plug in the USB or Oculus Link cable | Enable Air Link and pair PC with headset |
| Physical Restrictions | Tethered to PC by the cable | Freedom to move around without cable |
| Convenience | Requires cable management | No cables to manage |
Oculus Quest 2 PC App and Connection Setup
If you’re looking to connect your Oculus Quest 2 to a PC, the first step is to download the Oculus Quest 2 PC app. This application is essential for establishing a connection between your headset and your computer. To get started, visit the Oculus website and locate the download link for the PC app. Once you’ve downloaded the app, follow the installation instructions to set it up on your computer.
After the Oculus Quest 2 PC app is installed, you may need to purchase an Oculus Link cable. This cable is used for a wired connection between your headset and your PC. The Oculus Link cable ensures a stable and high-quality connection, allowing you to enjoy PC-only VR experiences with your Oculus Quest 2.
To set up the connection, connect one end of the Oculus Link cable to your PC’s USB 3.0 port and the other end to your Oculus Quest 2 headset. This will establish a physical connection between the two devices. The Oculus Quest 2 PC app will guide you through the setup process, ensuring that the connection is properly established and tested for optimal performance.
| Steps to connect Oculus Quest 2 to PC using Oculus Link: |
|---|
| 1. Download and install the Oculus Quest 2 PC app from the Oculus website. |
| 2. Purchase an Oculus Link cable for a wired connection. |
| 3. Connect one end of the Oculus Link cable to your PC’s USB 3.0 port and the other end to your Oculus Quest 2 headset. |
| 4. Follow the onscreen instructions on the Oculus Quest 2 PC app to set up and test the connection. |
Connecting your Oculus Quest 2 to a PC using the Oculus Link cable opens up a world of VR gaming possibilities. With a stable wired connection, you’ll have access to a wider range of games and experiences that can only be enjoyed on a PC. Follow the steps above to ensure a seamless connection and start exploring the immersive world of PC VR on your Oculus Quest 2.
Why Use Oculus Link?
Oculus Link provides a wired connection between your Oculus Quest 2 and your PC, allowing you to play PC VR games and access PC-only experiences. Using the Oculus Link cable ensures a reliable and high-quality connection, delivering stunning visuals and smooth gameplay. Additionally, with Oculus Link, you can take advantage of the processing power and graphics capabilities of your PC, enhancing the overall VR experience.
- Access PC-only VR games and experiences
- Enjoy higher graphics quality and performance
- Utilize the power of your PC for enhanced VR gameplay
By connecting your Oculus Quest 2 to a PC using Oculus Link, you can take your VR gaming to the next level and immerse yourself in a world of cutting-edge visuals and immersive gameplay.
Connecting Oculus Quest 2 to PC using Oculus Link
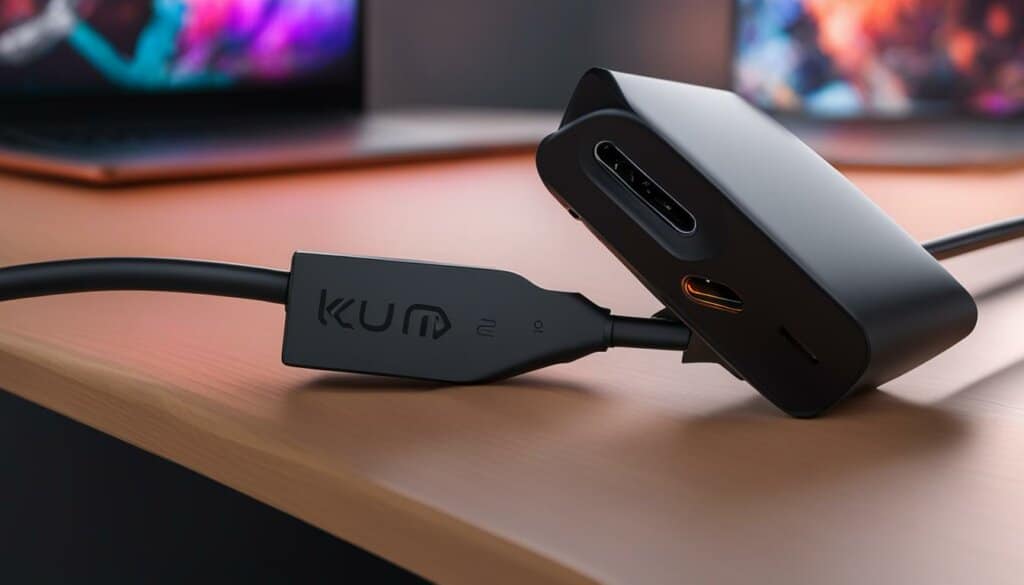
To connect your Oculus Quest 2 to a PC using Oculus Link, you will need an Oculus Link cable or a high-quality USB-C cable. Follow these steps to establish a wired connection:
Step 1: Check Compatibility
Before starting the setup process, ensure that your PC meets the Oculus Link compatibility requirements. Visit the Oculus website for detailed information on the system requirements.
Step 2: Connect the Cable
Take one end of the Oculus Link cable or USB-C cable and connect it to the USB 3.0 port on your PC. Then, connect the other end to the USB-C port on your Oculus Quest 2 headset.
Step 3: Enable Oculus Link
Put on your Oculus Quest 2 headset and navigate to the settings menu. Look for the option to enable Oculus Link and select it to activate the connection. The Oculus Quest 2 PC app will automatically launch on your PC.
Step 4: Setup and Testing
Follow the onscreen instructions provided by the Oculus Quest 2 PC app to complete the setup process. The app will guide you through testing the cable connection to ensure a stable and reliable link between your headset and PC.
Once you have successfully completed these steps, your Oculus Quest 2 will be connected to your PC using Oculus Link. This wired connection allows you to access PC-only VR experiences and enjoy enhanced visuals, immersing you in a whole new level of gaming and virtual reality.
Conclusion
Connecting your Oculus Quest 2 to a PC opens up a world of PC-only VR experiences and enhanced visuals. By following the step-by-step instructions, you can easily learn how to connect Oculus Quest 2 to PC, complete the Oculus Quest 2 PC connection, and set up your Oculus Quest 2 for PC gaming.
Whether you choose to use Oculus Link for a wired connection or Air Link for a wireless connection, you’ll be able to unlock new gaming possibilities and enjoy the best of both worlds. The Oculus Quest 2 PC setup process is straightforward, and with the correct cables and software updates, you can seamlessly connect your Quest 2 headset to your PC.
Don’t miss out on the immersive experiences and top-notch graphics that PC gaming can provide. Take the time to go through the necessary steps, and soon you’ll be enjoying a whole new level of virtual reality with your Oculus Quest 2 and PC connection!
FAQ
What are the two options to connect Oculus Quest 2 to a PC?
The two options are using Oculus Link or using Air Link.
How does Oculus Link connect the Oculus Quest 2 to a PC?
Oculus Link allows for a wired connection. You need to review the compatibility requirements, plug in the USB or Oculus Link cable, and enable Oculus Link.
How does Air Link connect the Oculus Quest 2 to a PC?
Air Link allows for a wireless connection. You need to ensure that your Quest 2 and the Oculus app on your PC are updated to the required version, connect to the same network, enable Air Link in the Quest 2 settings, and pair your PC with the headset.
What do I need to download before connecting my Oculus Quest 2 to a PC?
You need to download the Oculus Quest 2 PC app from the Oculus website.
Do I need to purchase anything for a wired connection?
You may need to purchase an Oculus Link cable or a high-quality USB-C cable for a wired connection.
How do I connect my Oculus Quest 2 to a PC using Oculus Link and a cable?
You need to use an Oculus Link cable or a high-quality USB-C cable, connect one end to your PC’s USB 3.0 port and the other end to your headset, and follow the setup process guided by the Oculus Quest 2 PC app, including testing the cable connection.

