Table of Contents
Are you wondering how to download pictures from your iPhone to your computer? In this guide, we will provide you with simple steps to transfer your precious memories. Whether you are using a Mac or Windows PC, there are multiple methods available for you to choose from. Let’s explore these options and find the one that suits your needs.
Key Takeaways:
- Downloading pictures from your iPhone to your computer is essential for backing up and organizing your photos.
- Methods like iCloud Photos, USB cable connection, AirDrop, third-party apps, and iTunes can help you transfer your pictures easily.
- Consider your preferences and device compatibility when choosing a method.
- Regularly backup your photos to external storage devices to ensure their safety.
- Follow the step-by-step instructions provided in this guide to download your pictures hassle-free.
How to Download Pictures from iPhone to Computer using iCloud Photos
To download pictures from your iPhone to your computer, one convenient method is to use iCloud Photos. This feature automatically stores your photos and videos on all of your Apple devices, including your PC. With iCloud Photos, you have the option to keep full-resolution originals or save space by using device-optimized versions. Here’s how you can set up and use iCloud Photos to effortlessly download your pictures:
Step 1: Check iCloud Storage
Before using iCloud Photos, ensure that you have enough storage space in your iCloud account. You can easily check your iCloud storage by going to Settings on your iPhone, tapping on your name, and selecting iCloud. From there, tap on “Manage Storage” to see how much space you have available.
Step 2: Download iCloud for Windows
To access your iCloud Photos on your PC, you’ll need to download and install the iCloud for Windows app. Go to the Apple website or Microsoft Store and search for “iCloud for Windows.” Once downloaded, follow the installation instructions to set it up on your PC.
Step 3: Enable iCloud Photos on iPhone
On your iPhone, open the Settings app, tap on your name, and select iCloud. Then, tap on “Photos” and toggle on the “iCloud Photos” option. This will ensure that your iPhone photos are automatically synced with your iCloud account.
Step 4: Access iCloud Photos on your PC
After installing iCloud for Windows on your PC, open the app and sign in with your Apple ID. Check the box next to “Photos” and choose the options that best suit your needs. You can select to download full-resolution originals or device-optimized versions. Once you’ve made your selections, click on the “Apply” button to save the changes.
With iCloud Photos set up on both your iPhone and PC, you can now easily download your pictures. Whenever you have Wi-Fi, your new photos will be automatically downloaded to your computer, allowing you to access and manage your iPhone pictures effortlessly.
How to Import Pictures from iPhone to Mac or Windows PC
Importing pictures from your iPhone to your computer is a straightforward process that allows you to transfer your precious memories and organize them in a secure location. Whether you are using a Mac or a Windows PC, there are different methods available for importing your photos. In this section, we will explore the step-by-step process for both operating systems.
Importing Pictures from iPhone to Mac
If you own a Mac, you can easily import pictures from your iPhone using the built-in Photos app. Simply connect your iPhone to your Mac using a USB cable. Once connected, the Photos app will automatically launch.
In the Photos app, you’ll see your iPhone listed in the sidebar. Click on it to view the photos and videos on your iPhone. Select the specific photos you want to import or choose “Import All New Items” to import all the new photos since the last import. Finally, click on the “Import Selected” or “Import All” button to start the import process.
Importing Pictures from iPhone to Windows PC
If you are using a Windows PC, there are multiple methods for importing pictures from your iPhone. One option is to use the Photos app, which is available for free in the Microsoft Store. Connect your iPhone to your PC using a USB cable and open the Photos app. Click on the “Import” button in the top-right corner, and the app will detect your iPhone. Select the photos you want to import and click on the “Import Selected” button to start the import process.
Another method is to use the Windows File Explorer. Connect your iPhone to your PC using a USB cable, and your iPhone will appear as a portable device in the File Explorer. Open the device, navigate to the “DCIM” folder, and copy the desired photos to your computer’s local storage.
| Operating System | Method |
|---|---|
| Mac | Photos app |
| Windows PC | Photos app or File Explorer |
Whether you are using a Mac or a Windows PC, importing pictures from your iPhone is a simple process that allows you to easily access and organize your photos on your computer. Choose the method that suits your needs and follow the step-by-step instructions to import your pictures hassle-free.
How to Use AirDrop to Transfer Photos from iPhone to Mac
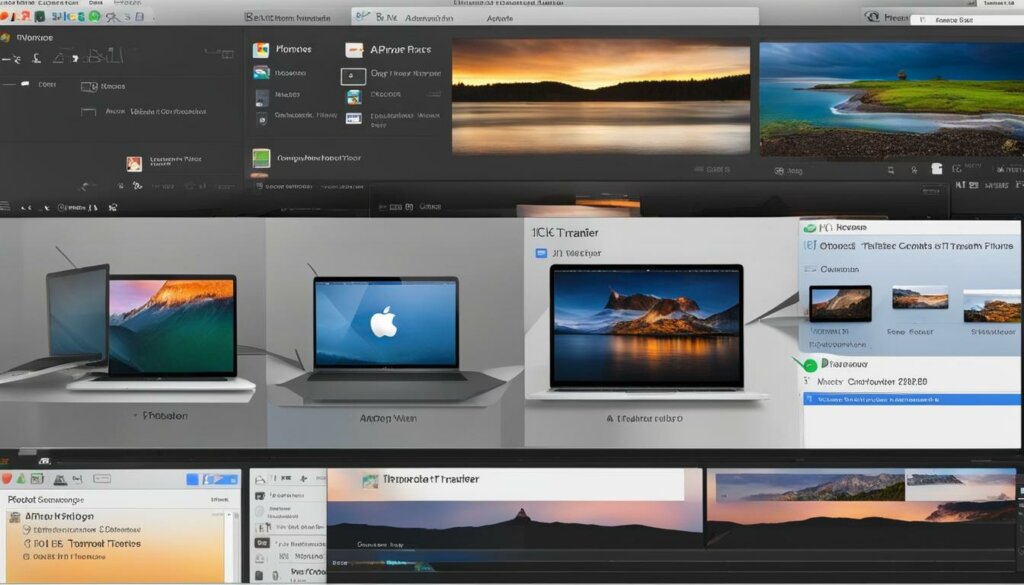
When it comes to transferring photos from your iPhone to your Mac, AirDrop offers a convenient and wireless solution. With AirDrop, you can easily send photos and other files between Apple devices without the need for cables or additional apps. Here’s how you can use AirDrop to transfer your photos from your iPhone to your Mac:
- Ensure that both your iPhone and Mac have Wi-Fi and Bluetooth enabled. These settings can be found in the Control Center on your iPhone and the System Preferences on your Mac.
- On your iPhone, open the Photos app and select the photos you want to transfer. You can tap on the Select button and choose multiple photos or select individual photos by tapping on them.
- Once you have selected the photos, tap on the Share button, which looks like a square with an upward arrow. In the Share menu, you’ll see an AirDrop section at the top.
- Tap on the AirDrop section, and you’ll see a list of nearby Apple devices that have AirDrop enabled. Select your Mac from the list.
- On your Mac, you’ll see a notification requesting to accept the incoming photos. Click Accept, and the selected photos will be transferred to your Mac via AirDrop.
It’s important to note that both devices should be within close proximity to ensure a successful transfer. AirDrop uses a combination of Wi-Fi and Bluetooth to establish a secure connection between your iPhone and Mac. Once the transfer is complete, you can find the photos in your Downloads folder or the location specified during the transfer.
Using AirDrop provides a hassle-free method to wirelessly transfer photos from your iPhone to your Mac. Whether you want to share vacation snapshots, memorable moments, or professional images, AirDrop simplifies the process and allows you to quickly access your photos on your Mac.
Benefits of Using AirDrop:
There are several benefits to using AirDrop for transferring photos from your iPhone to your Mac:
- Wireless Convenience: AirDrop eliminates the need for cables or third-party apps, making it a quick and convenient method to transfer photos.
- Fast Transfer Speeds: AirDrop uses high-speed Wi-Fi to transfer files, ensuring that your photos are transferred quickly, even large files.
- Secure and Private: AirDrop uses encryption and peer-to-peer connections, ensuring that your photos are transferred securely without the need for an internet connection.
In conclusion, AirDrop is a reliable and efficient method to transfer photos from your iPhone to your Mac wirelessly. By following the steps outlined above, you can easily share your precious moments and memories with your Mac, making it convenient to access and organize your photos.
How to Use Third-Party Apps for Wireless Photo Transfer

If you’re looking for an alternative method to transfer photos wirelessly from your iPhone to your computer, third-party apps can provide a convenient solution. These apps are available for both iOS and computer platforms and offer a range of features to facilitate seamless photo transfer. Here are some popular third-party apps you can use:
- Google Photos: With Google Photos, you can back up your iPhone photos to the cloud and access them on any device. The app offers unlimited storage for high-quality photos and provides an intuitive interface to organize and share your pictures.
- Dropbox: Dropbox is a cloud storage service that allows you to upload and sync your photos across multiple devices. You can easily transfer pictures from your iPhone to your computer by saving them to a Dropbox folder and accessing them from your PC or Mac.
- Microsoft OneDrive: OneDrive is another cloud storage option that enables you to store and access your photos from anywhere. You can upload your iPhone photos to OneDrive and transfer them to your computer using the OneDrive app or website.
To use these apps, simply download and install them from the App Store on your iPhone and the respective app from the developer’s website on your computer. Sign in to your account, choose the photos you want to transfer, and follow the app’s instructions to complete the process. These apps often offer additional features like automatic backup, photo editing, and sharing options, providing a comprehensive solution for managing your iPhone photos.
Benefits of Using Third-Party Apps
Using third-party apps for wireless photo transfer offers several advantages:
- Convenience: With these apps, you can transfer photos wirelessly without the need for a USB cable or any physical connection between your iPhone and computer.
- Accessibility: Storing your photos in the cloud allows you to access them from any device with an internet connection, providing flexibility and convenience.
- Organization: Many third-party apps offer robust organization features, allowing you to categorize and tag your photos for easy navigation and searchability.
- Additional Features: In addition to photo transfer, these apps often provide additional features like automatic backup, photo editing tools, and sharing options, enhancing your overall photo management experience.
By utilizing third-party apps for wireless photo transfer, you can simplify the process of transferring and managing your iPhone photos, ensuring they are easily accessible and securely stored.
How to Transfer Photos from iPhone to PC using iTunes
If you prefer to use iTunes for transferring photos from your iPhone to your PC, you can easily do so by following these simple steps:
- Connect your iPhone to your PC using a USB cable.
- Open iTunes on your PC. Make sure you have the latest version installed.
- Once iTunes detects your iPhone, select it from the devices list.
- In the left sidebar, click on the “Photos” tab.
- Check the box next to “Sync Photos” to enable photo syncing.
- Choose the folder or app you want to sync with from the drop-down menu.
- Click on the “Apply” button to start the sync process. iTunes will transfer the selected photos from your iPhone to your PC.
Using iTunes to transfer photos allows you to manage and organize your iPhone photo library directly from your computer. It provides a convenient way to backup your photos and keep them in sync with your PC. Remember to regularly connect your iPhone to your PC and sync to ensure all your latest photos are transferred.
However, it’s important to note that iTunes is primarily designed for media management and may not offer advanced features like selective photo transfer or automatic syncing. If you prefer more flexibility and control over your photo transfer process, you can explore alternative methods like iCloud Photos or third-party apps.
By following these steps, you can easily transfer your photos from your iPhone to your PC using iTunes. Whether you’re looking to backup your precious memories or free up space on your iPhone, iTunes provides a reliable and straightforward solution for photo transfer.
How to Backup iPhone Photos to External Storage Devices
Backing up your iPhone photos to external storage devices is essential to ensure the safety and preservation of your precious memories. While cloud storage and computer backups are popular options, using external storage devices provides an additional layer of security. Here, we’ll explore different methods and devices to backup your iPhone photos.
1. External Hard Drives
An external hard drive is a reliable option for backing up your iPhone photos. These portable devices offer ample storage capacity and can be easily connected to your computer via a USB or Thunderbolt cable. Simply transfer your photos from your iPhone to the external hard drive using file explorer or dedicated backup software. Make sure to organize your photos in folders for easier access and management.
2. USB Flash Drives
If you’re looking for a more compact and portable option, USB flash drives are an excellent choice. These small devices can be easily plugged into your iPhone’s lightning port using a suitable adapter. With the help of specialized apps, you can transfer and backup your photos directly to the USB flash drive. Just remember to choose a reliable and high-capacity flash drive to accommodate all your photos.
3. Network Attached Storage (NAS)
If you want to access your iPhone photos from multiple devices and locations, a network attached storage (NAS) solution might be ideal for you. NAS devices act as personal cloud servers, allowing you to store and access your photos wirelessly. Simply connect your iPhone to the same Wi-Fi network as the NAS, and use dedicated apps or file transfer protocols to backup your photos. NAS devices offer the advantage of expandable storage and advanced features like RAID for data redundancy.
By utilizing external storage devices like external hard drives, USB flash drives, or NAS solutions, you can easily backup your iPhone photos and keep them safe from accidental loss or device failure. Remember to regularly update and maintain your backups to ensure the longevity of your precious memories.
| Backup Method | Pros | Cons |
|---|---|---|
| External Hard Drives | – Ample storage capacity – Reliable and durable – Easy to connect to a computer |
– Requires manual transfer – Risk of physical damage or loss |
| USB Flash Drives | – Compact and portable – Easy to use – Can be directly connected to iPhone |
– Limited storage capacity – Risk of misplacing or losing the device |
| Network Attached Storage (NAS) | – Wireless access from multiple devices – Expandable storage capacity – Advanced features like RAID |
– Initial setup and configuration required – Requires a stable Wi-Fi network |
Choose the backup method that best suits your needs and preferences. Remember to keep multiple copies of your backups in different locations for added security. With the right external storage device, you can rest assured knowing that your iPhone photos are safe and secure.
Conclusion
Transferring pictures from your iPhone to your computer is a simple process that can be done in various ways. Whether you choose to use iCloud Photos, a USB cable, wireless methods like AirDrop, or third-party apps, you can easily download and backup your precious memories. Select the method that best suits your needs and follow the step-by-step instructions provided to transfer your photos hassle-free. Remember to regularly backup your photos to ensure their safety. With these methods, you can quickly and securely download pictures from your iPhone to your computer.
FAQ
How can I download pictures from my iPhone to my computer?
There are several methods you can use to download pictures from your iPhone to your computer. You can use iCloud Photos, import pictures using a USB cable, use wireless methods like AirDrop, or use third-party apps. Choose the method that suits your needs and follow the step-by-step instructions provided.
How do I download pictures from my iPhone to my computer using iCloud Photos?
To download pictures from your iPhone to your computer using iCloud Photos, make sure you have enough storage space in your iCloud account and download the iCloud for Windows app on your PC. Once set up, all your new photos will be automatically downloaded to your PC whenever you have Wi-Fi.
How do I import pictures from my iPhone to my Mac or Windows PC using a USB cable?
On a Mac, simply connect your iPhone to your Mac using a USB cable and open the Photos app. The app will automatically show an import screen with all the photos and videos on your iPhone. On a Windows PC, you can use the Photos app or the Windows File Explorer. With the Photos app, connect your iPhone to your PC and click the import icon. In File Explorer, right-click your connected iPhone and select Import pictures and videos.
How can I use AirDrop to transfer photos from my iPhone to my Mac?
To use AirDrop, make sure both devices have Wi-Fi and Bluetooth turned on and are in close proximity to each other. On your iPhone, select the photos you want to transfer and tap the Share button. From the AirDrop section, choose your Mac as the destination. On your Mac, a notification will appear requesting to accept the incoming photos. Click Accept to start the transfer.
What are some third-party apps I can use for wireless photo transfer?
There are many options available in the App Store, such as Google Photos, Dropbox, and Microsoft OneDrive. Install the app on your iPhone and computer, sign in to your account, and follow the app’s instructions to transfer your photos. These apps often provide additional features like automatic backup and synchronization.
How can I transfer photos from my iPhone to my PC using iTunes?
Connect your iPhone to your PC using a USB cable and open iTunes. Select your iPhone and go to the Photos tab. Check the box next to “Sync Photos” and choose the folder or app you want to sync with. Click Apply to start the sync process. Your selected photos will be transferred from your iPhone to your PC.
How can I backup my iPhone photos to external storage devices?
One way to do this is by using a scanner and Image Capture to import photos taken with a film camera. Another option is to use Time Machine on a Mac to back up all your files, including photos and videos, to an external hard drive. Additionally, you can manually transfer photos to a folder on your Mac or PC using Image Capture or Windows File Explorer. This method allows you to have full control over your photo backup process.


