Table of Contents
Welcome to our step-by-step guide on how to transfer photos from your iPhone to your PC. As technology advances, capturing precious moments on our iPhones has become a common practice. However, it’s important to have a backup of these photos and free up storage space on your device. In this article, we’ll explore various methods to help you easily transfer your iPhone photos to your computer. Whether you want to use iCloud Photos, import directly through a USB cable, or utilize third-party apps and cloud storage services, we’ve got you covered. Let’s get started!
To begin with, let’s understand the different options available for transferring photos from your iPhone to your PC. One method is to use iCloud Photos, a cloud-based solution that allows you to store and access your photos across all your Apple devices. Another option is to import photos directly to your Mac or Windows PC using a USB cable. Additionally, there are third-party apps and cloud storage services that offer photo transfer functionality. We’ll discuss all these methods in detail, so you can choose the one that best suits your needs.
Now that we have covered the basics, let’s dive into the detailed step-by-step instructions for each method. Whether you’re using iCloud Photos, importing to your Mac or Windows PC, utilizing third-party apps, or exploring additional ways to transfer photos, we’ll guide you through the entire process. We’ll also provide troubleshooting tips if you encounter any issues along the way.
So, if you’re ready to transfer your precious memories from your iPhone to your PC, let’s begin with Section 2: Use iCloud Photos. Click on the link below to get started.
Use iCloud Photos
To transfer and access your photos across all your Apple devices, you can make use of iCloud Photos. This cloud-based solution automatically uploads and stores your photos and videos, making them available on all your devices as well as on iCloud.com. With iCloud Photos, you have the option to keep full-resolution originals on each device or save space by using device-optimized versions.
One of the benefits of using iCloud Photos is that any edits or organizational changes you make are synced across all your devices. This means that if you delete a photo on your iPhone, it will also be deleted from your iPad and Mac. Similarly, if you create an album on your Mac, it will be available on your iPhone and iPad as well.
To set up iCloud Photos, you’ll need to ensure that you have enough storage space available. If needed, you can upgrade your storage plan to accommodate your photo library. Once you have iCloud Photos set up and enabled on your devices, your photos will automatically start syncing, and you’ll be able to access them seamlessly across all your Apple devices.
Table: Comparison of iCloud Photos and Other Methods
| iCloud Photos | Other Methods | |
|---|---|---|
| Accessibility | Access photos on multiple devices | Limited to the device photos are imported to |
| Automatic Syncing | Edits and changes synced across all devices | Manual syncing required |
| Storage Options | Full-resolution or device-optimized versions | Depends on device storage |
| Device Compatibility | Works seamlessly with Apple devices | May require third-party apps or additional steps |
This table provides a comparison between using iCloud Photos and other methods for transferring and accessing your photos. While iCloud Photos offers convenience and integration with Apple devices, other methods may be suitable depending on your needs and preferences.
Import to your Mac
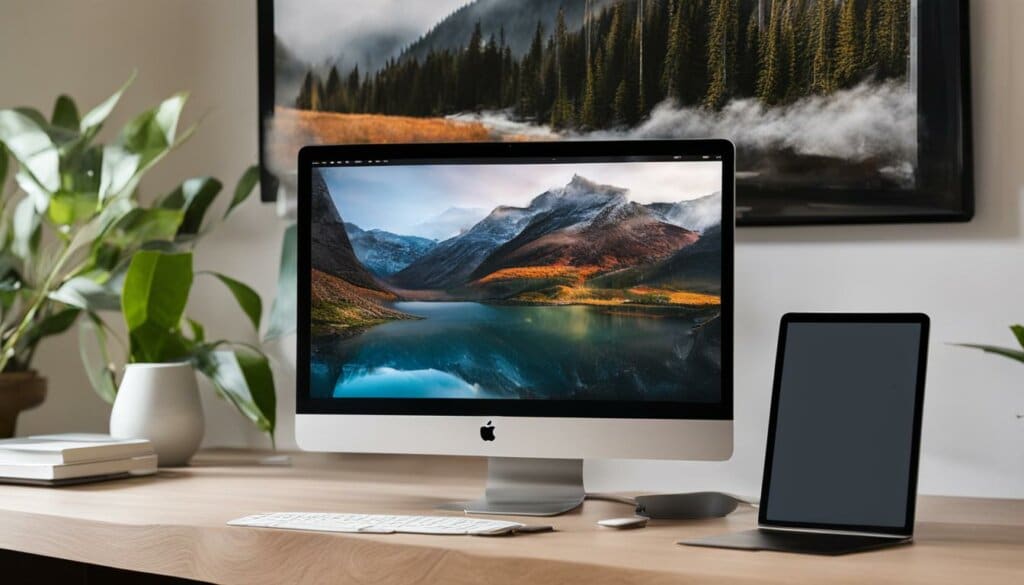
To import photos from your iPhone to your Mac, you can use the Photos app. Follow the step-by-step guide below:
- Connect your iPhone to your Mac using a USB cable.
- Open the Photos app on your Mac. It should automatically detect your iPhone.
- Click on the Import tab at the top of the Photos app.
- Choose the photos you want to import by selecting the checkboxes next to them. You can also choose to import all photos by clicking on the Import All New Photos button.
- Select the location where you want to import the photos. You can create a new album or import them to an existing one.
- Click on the Import Selected or Import All button to start the import process.
- Wait for the import to complete. Once it’s done, you can disconnect your iPhone from your Mac.
By following these steps, you can easily import your photos from your iPhone to your Mac using the Photos app. This method allows you to organize your photos into albums and easily access them on your Mac.
However, it’s important to note that the Photos app may not be the only option available to you. Depending on your preferences, you may also consider using third-party apps or cloud storage services to transfer your photos. These alternatives provide additional features and flexibility in managing your photo library.
Now that you know how to import photos to your Mac, you can easily transfer your iPhone photos to your computer and enjoy them on a larger screen.
Import Photos to Your Windows PC
To import photos from your iPhone to your Windows PC, you can use the Windows Photos app. This built-in application allows you to transfer photos using a USB cable, providing a straightforward and convenient method for managing your iPhone photo library on your computer.
Here is a step-by-step guide on how to import your photos:
- Connect your iPhone to your Windows PC using a USB cable. Ensure that you have the latest version of iTunes installed.
- Unlock your iPhone and trust the computer if prompted.
- Open the Windows Photos app. You can do this by typing “Photos” in the search bar and selecting the Photos app from the search results.
- In the Photos app, click on the import icon located in the top-right corner. It resembles a square with a downward arrow.
- Select the photos and videos you want to import. You can either choose individual items or select all by clicking on the “Select All” button.
- Choose the import destination where you want to save your photos on your Windows PC. You can create a new folder or select an existing one.
- Click the “Import” button to start the import process.
- Wait for the Photos app to import your selected photos. The progress will be shown on the screen.
- Once the import is complete, you can click on the “Open folder” button to view your imported photos.
- Disconnect your iPhone from your Windows PC.
By following these steps, you can easily import your photos from your iPhone to your Windows PC using the Windows Photos app. This method provides a seamless way to transfer your photos and organize them on your computer.
Table: Comparison of Methods to Import Photos to Windows PC
| Windows Photos App | iCloud Photos | Third-Party Apps or Cloud Storage Services | |
|---|---|---|---|
| Method | USB Cable | Cloud Sync | App Installation / Cloud Upload |
| Requirements | Windows PC, iTunes, USB Cable | iCloud Account, Internet Connection | App Installation, Account Setup, Internet Connection |
| Storage Limitations | Depends on available disk space | Depends on iCloud storage plan | Depends on app or cloud storage service |
| Offline Access | Yes | No (requires internet access) | Yes, depending on app or service |
Table: A comparison of different methods to import photos to your Windows PC. It highlights the key features and considerations for each method, allowing you to choose the most suitable one for your needs.
Use Third-Party Apps or Cloud Storage Services
If you prefer not to use iCloud or the native software on your computer, there are third-party apps and cloud storage services that offer photo transfer functionality. These options provide a convenient way to download photos from your iPhone and transfer them to your PC. Let’s explore some popular third-party apps and cloud storage services that you can use for photo transfer.
Third-Party Apps for Photo Transfer
There are several third-party apps available that allow you to transfer photos from your iPhone to your computer. These apps provide an easy-to-use interface and offer additional features for managing your photos. Here are some popular choices:
- Dropbox: Dropbox is a widely used cloud storage service that provides seamless photo transfer. Simply install the Dropbox app on your iPhone, sign in with your account, and upload the photos you want to transfer. You can then access them on your computer by logging in to your Dropbox account.
- Google Photos: Google Photos offers unlimited storage for high-quality photos. Install the Google Photos app on your iPhone, sign in with your Google account, and enable the backup feature. Your photos will be automatically uploaded to your Google Photos account, and you can access them on your computer through the Google Photos website.
- OneDrive: OneDrive is Microsoft’s cloud storage service that allows you to store, share, and transfer photos. Install the OneDrive app on your iPhone, sign in with your Microsoft account, and upload your photos. You can then access them on your computer using the OneDrive website or the OneDrive app for Windows.
Cloud Storage for Photo Transfer
In addition to third-party apps, there are also cloud storage services that offer photo transfer functionality. These services provide a secure and convenient way to store and transfer your photos. Here are some popular cloud storage options:
- iCloud Drive: iCloud Drive is Apple’s cloud storage service that allows you to store and access your files, including photos. Enable iCloud Drive on your iPhone and upload your photos to iCloud. You can then access them on your computer using iCloud Drive on macOS or the iCloud website on Windows.
- Amazon Drive: Amazon Drive offers secure cloud storage for your photos. Install the Amazon Drive app on your iPhone, sign in with your Amazon account, and upload your photos. You can access them on your computer using the Amazon Drive website or the Amazon Drive app for Windows.
- Box: Box is a cloud content management and file sharing service that allows you to store and transfer photos. Install the Box app on your iPhone, sign in with your Box account, and upload your photos. You can then access them on your computer through the Box website or the Box app for Windows.
Using third-party apps and cloud storage services provides you with alternative methods for transferring photos from your iPhone to your PC. Whether you choose to use a dedicated photo transfer app or a cloud storage service, these options give you flexibility and convenience in managing your photos. Choose the option that best suits your needs and preferences, and enjoy seamless photo transfer between your iPhone and PC.
Additional Ways to Transfer Photos to Your Computer
Aside from the methods mentioned above, there are several other ways to transfer photos from your iPhone to your computer. These methods offer alternative options and flexibility depending on your preferences and specific requirements. Let’s explore some additional ways to transfer your precious memories:
AirDrop
AirDrop is a convenient feature that allows you to wirelessly transfer photos and other files between Apple devices, including your iPhone and Mac. Simply enable AirDrop on both devices, select the photos you want to transfer on your iPhone, and choose your Mac as the destination. The photos will be transferred instantly, without the need for cables or additional software.
Import from Storage Media
If you have photos stored on external storage media, such as a USB flash drive or an SD card, you can easily import them to your computer using the Photos app. Connect the storage media to your computer, open the Photos app, and click on the “Import” option. Select the photos you want to transfer and choose the import destination. The Photos app will copy the photos from the storage media to your computer.
Scanner and Image Capture
If you have physical photos captured with a film camera, you can use a scanner and the Image Capture app on your Mac to import them to your computer. Connect the scanner to your computer, open the Image Capture app, and select the connected scanner. Place the photos on the scanner bed, adjust the settings if necessary, and click on the “Scan” button to import the photos as digital files.
Direct Import using Image Capture
If you prefer a more direct approach, you can use the Image Capture app on your Mac to import photos from your iPhone to a specific folder on your computer. Connect your iPhone to your Mac using a USB cable, open the Image Capture app, and select your iPhone from the list of connected devices. Choose the folder where you want to save the photos, select the photos you want to transfer, and click on the “Import” button to copy the photos from your iPhone to your computer.
Sync with iTunes
For those who still prefer using iTunes, you can sync your iPhone with iTunes to transfer photos to your computer. Connect your iPhone to your computer using a USB cable, open iTunes, and select your iPhone from the device menu. Go to the “Photos” tab in the device settings, choose the photos you want to sync, and click on the “Apply” button to start the synchronization process. iTunes will transfer the selected photos from your iPhone to your computer.
Use Time Machine for Backup
Lastly, if you want to ensure the safety of your photos, including backups of all your files, you can use Time Machine on your Mac. Connect an external hard drive to your Mac, open Time Machine preferences, and select the external hard drive as the backup destination. Time Machine will automatically back up your files, including your photos, at regular intervals, providing you with peace of mind and a reliable backup solution.
| Method | Pros | Cons |
|---|---|---|
| AirDrop | – Wireless transfer | – Limited to Apple devices |
| Import from Storage Media | – Suitable for external storage | – Requires external storage media |
| Scanner and Image Capture | – Suitable for physical photos | – Requires a scanner |
| Direct Import using Image Capture | – Quick and direct transfer | – Requires a USB cable |
| Sync with iTunes | – Syncs other data as well | – Requires iTunes |
| Use Time Machine for Backup | – Automatic and reliable backups | – Requires an external hard drive |
Troubleshooting Tips for Photo Transfer
Transferring photos from your iPhone to your PC is usually a smooth process, but sometimes you may encounter issues along the way. Here are some troubleshooting tips to help you overcome common problems and ensure a successful photo transfer.
iPhone Not Recognized by Computer
If your iPhone is not being recognized by your computer, there are a few steps you can take to resolve this issue. First, make sure your iPhone is unlocked and trust the computer you’re connecting to. If it still isn’t recognized, try disconnecting and reconnecting the device. You can also try refreshing the system by restarting both your iPhone and computer. If the problem persists, try using a different USB cable or port to see if that resolves the issue.
iTunes Not Working
If you’re experiencing problems with iTunes during the photo transfer process, there are a few things you can try. First, ensure that you have the latest version of iTunes installed on your computer. If you’re using a Windows PC, updating iTunes can often resolve compatibility issues. Additionally, restart your computer and iPhone to refresh the system. If iTunes still isn’t working, consider seeking help from Apple support or consulting online forums where you may find solutions to specific technical issues.
I was having trouble transferring my photos from my iPhone to my computer, but after restarting both my devices and updating iTunes, the problem was resolved. I’m glad I found a simple solution.” – Sam
Remember, troubleshooting tips may vary depending on your specific devices and software versions. If you’re still experiencing difficulties, don’t hesitate to seek assistance from official support channels or knowledgeable online communities. With a little patience and troubleshooting, you’ll be able to successfully transfer your photos from your iPhone to your PC.
| Problem | Troubleshooting Steps |
|---|---|
| iPhone not recognized by computer |
|
| iTunes not working |
|

Conclusion
Transferring photos from your iPhone to your PC is essential for backing up your precious memories and freeing up storage space on your device. With the various methods available, from using iCloud Photos to importing directly using USB cables, you can easily transfer your photos and videos to your computer.
Choose the method that suits your needs and preferences, and ensure that you follow the step-by-step guide provided for a successful transfer process. Now you can enjoy your photos on a larger screen and have peace of mind knowing that your memories are safely stored.
In summary, whether you prefer to use iCloud Photos for seamless synchronization across your Apple devices, import photos directly to your Mac or Windows PC, utilize third-party apps or cloud storage services, or explore additional transfer options, the choice is yours. The important thing is to find a method that works best for you and enables you to conveniently manage and preserve your photo collection.
In conclusion, transferring photos from your iPhone to your PC is a straightforward process that allows you to organize, share, and preserve your memories. By following the methods and troubleshooting tips outlined in this guide, you can easily transfer your photos and have them readily accessible on your computer, ensuring that your memories are safe and secure.
FAQ
Can I transfer my iPhone photos to my PC using iCloud Photos?
Yes, iCloud Photos allows you to store and access your photos across all your Apple devices, including your PC. Simply set up and use iCloud Photos to transfer your photos.
How do I import photos from my iPhone to my Mac?
Connect your iPhone to your Mac using a USB cable, then open the Photos app. The app will detect your iPhone, and you can choose where to import your photos and select the ones you want to transfer.
Can I import photos from my iPhone to my Windows PC?
Yes, you can. Connect your iPhone to your Windows PC using a USB cable, ensure you have the latest version of iTunes installed, then open the Windows Photos app to import your photos.
Are there any third-party apps or cloud storage services I can use to transfer my iPhone photos?
Yes, you can use apps like Dropbox, Google Photos, or OneDrive to upload and download photos from your iPhone to their respective platforms.
Are there other ways to transfer photos from my iPhone to my computer?
Yes, aside from iCloud and direct import using USB cables, you can also use AirDrop, import photos from storage media, use a scanner and Image Capture, directly import images to a folder on your Mac with Image Capture, sync your iPhone with iTunes, or use Time Machine for backup.
What should I do if I encounter issues while transferring photos?
Make sure your iPhone is unlocked and trust the computer you’re connecting to. Update to the latest version of iTunes on your Windows PC if needed. If your iPhone is not recognized, try unplugging and reconnecting the device or refreshing the system. You can also seek help from Apple support or consult online forums for specific technical issues.

