Table of Contents
Welcome to our comprehensive guide on how to connect your Nintendo Switch to your PC. Whether you want to enhance your gameplay experience or start streaming your favorite games, we’ve got you covered. In this guide, we’ll walk you through three easy methods to connect your Nintendo Switch to your PC, allowing you to enjoy your games on a larger screen and effortlessly share your gaming moments.
Connecting your Nintendo Switch to your PC opens up a world of possibilities. With the right setup, you can capture and record gameplay, stream your gaming sessions, or simply enjoy playing on a bigger screen. Let’s dive into the details of each method.
Method 1: Using a Video Capture Card
If you’re looking to connect your Nintendo Switch to your PC for seamless gameplay and recording, using a video capture card is a perfect solution. This method allows you to capture and stream your gameplay directly from your Switch to your PC, giving you the flexibility to share your gaming experiences with others.
To get started, you will need the following equipment:
- Nintendo Switch dock
- HDMI cable
- Video capture card
- Capture software
Once you have all the necessary equipment, follow these step-by-step instructions to set up your Nintendo Switch with a video capture card:
- Connect your Nintendo Switch dock to your PC using an HDMI cable.
- Insert the HDMI cable into the input port of the video capture card.
- Connect the video capture card to your PC using a USB cable.
- Download and install the capture software provided with the video capture card.
- Launch the capture software on your PC and open the settings menu.
- Configure the settings to match your desired recording and streaming preferences.
- Connect your Nintendo Switch to the dock.
- Turn on your Nintendo Switch and wait for the signal to appear on your PC screen.
- Start playing your favorite games on your Nintendo Switch, and the capture software will capture and display the gameplay on your PC.
With this setup, you can record, stream, and even add commentary to your gameplay videos. The video capture card ensures high-quality video and audio transmission, allowing you to showcase your gaming skills with clarity and precision.
Whether you’re a content creator or simply want to relive your favorite gaming moments, using a video capture card to connect your Nintendo Switch to your PC opens up a world of possibilities. So, grab your equipment, follow the instructions, and start capturing your epic gaming adventures!
Method 2: Connecting to a PC Monitor
If you prefer playing your Switch games on a larger screen, you can connect your Switch to a PC monitor using an HDMI cable. This method doesn’t require any additional hardware and allows you to enjoy your games on a bigger display. Make sure to check game compatibility before playing on a PC monitor.
Connecting your Switch to a PC monitor is a straightforward process that enhances your gaming experience. With the HDMI cable, you can connect your Switch to the PC monitor, allowing you to view gameplay on a larger screen. Whether you’re playing intense action games or exploring immersive open-world environments, a PC monitor provides a more immersive and visually stunning experience.
When connecting your Switch to a PC monitor, ensure that you have the necessary equipment. You will need an HDMI cable, which is a standard cable for transmitting high-definition video and audio signals. Most PC monitors have an HDMI input, making it easy to connect your Switch to the monitor.
Here is a step-by-step guide to connecting your Switch to a PC monitor:
- Turn off your Switch and PC monitor.
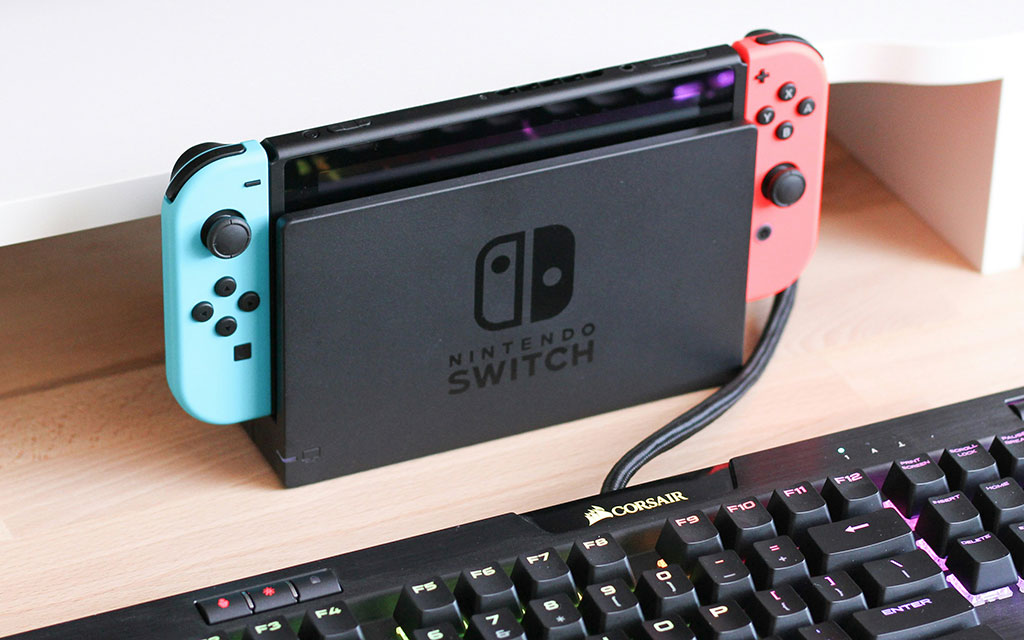
- Connect one end of the HDMI cable to the HDMI output port on your Switch dock.
- Connect the other end of the HDMI cable to the HDMI input port on your PC monitor.
- Turn on your PC monitor and set it to the appropriate input source.
- Turn on your Switch and enjoy playing your games on the larger screen.
Remember to adjust the display settings on your Switch to optimize the visual quality on the PC monitor. You can customize the screen size, resolution, and aspect ratio to suit your preferences.
Benefits of Connecting to a PC Monitor
Connecting your Switch to a PC monitor offers several benefits:
- Enhanced Gameplay: Playing games on a larger screen provides a more immersive and detailed gameplay experience.
- Better Visuals: PC monitors often have higher resolutions and better color accuracy, resulting in sharper and more vibrant visuals.
- Improved Performance: Some PC monitors offer faster response times and higher refresh rates, reducing input lag and motion blur for smoother gameplay.
- Shared Screen Experience: Connecting your Switch to a PC monitor allows you to enjoy multiplayer games with friends or family on a larger screen.
Whether you’re seeking a more cinematic gaming experience or want to showcase your gameplay to others, connecting your Switch to a PC monitor is a convenient and effective solution.
| PC Monitor Connection | Advantages | Disadvantages |
|---|---|---|
| HDMI Cable |
|
|
Connecting your Nintendo Switch to a PC monitor using an HDMI cable is a simple yet effective method to enjoy your games on a larger screen. With the right setup and game compatibility, you can take your gaming experience to the next level.
Method 3: USB Connection
If you’re looking to transfer screenshots and videos from your Nintendo Switch to your PC, using a USB connection can be a convenient option. Thanks to the latest Switch System Software, you can easily connect your Switch to your PC using a USB-C cable.
To begin, make sure you have the necessary hardware – a USB-C cable that is compatible with your Switch and PC. Once you have everything ready, follow these simple steps to manage your media files on your PC:
- Connect one end of the USB-C cable to your Nintendo Switch and the other end to your PC’s USB port.
- On your Nintendo Switch, go to the System Settings and select “Data Management.”
- Choose “Manage Screenshots and Videos” and select the files you want to transfer.
- Press the “Copy to a Computer via USB Connection” option.
- On your PC, open the File Explorer or Finder and select your Nintendo Switch from the available devices.
- Navigate to the “Nintendo” folder and find the “Album” folder for your screenshots and videos.
- Copy the desired media files to a location on your PC, such as a folder or desktop.
Alternatively, if you prefer using a smart device, you can also transfer your screenshots and videos by using the Smart Device transfer function. Additionally, if you have an SD card inserted in your Switch, you can directly access the data by removing the SD card and connecting it to your PC using an SD card reader.
By using the USB connection method, you can easily manage and transfer your screenshots and videos from your Nintendo Switch to your PC, giving you more flexibility in organizing and sharing your gaming memories.
FAQ
How can I connect my Nintendo Switch to a PC?
There are several methods to connect your Nintendo Switch to a PC. You can use a video capture card, connect to a PC monitor, or use a USB connection.
What do I need to connect my Switch to a PC using a video capture card?
To connect your Switch to a PC using a video capture card, you will need a Switch dock, HDMI cable, video capture card, and capture software.
How do I connect my Switch to a PC using a video capture card?
Follow these step-by-step instructions:
1. Connect your Switch to the Switch dock, and connect the dock to your PC using an HDMI cable.
2. Install the capture software on your PC and open it.
3. Turn on your Switch and navigate to the gameplay you want to record.
4. In the capture software, select the input source as the video capture card and start recording or streaming your gameplay.
Can I connect my Switch to a PC monitor?
Yes, you can connect your Switch to a PC monitor using an HDMI cable.
Do I need any additional hardware to connect my Switch to a PC monitor?
No, you don’t need any additional hardware. Just connect your Switch to the PC monitor using an HDMI cable.
How do I transfer screenshots and videos from my Switch to my PC using a USB connection?
There are a few options to transfer media files from your Switch to your PC using a USB connection.
1. With the latest Switch System Software, you can connect your Switch to your PC using a USB-C cable. Enable “USB Connection” in the Switch settings, and your Switch will appear as a storage device on your PC.
2. Alternatively, you can use the Smart Device transfer function to transfer screenshots and videos from your Switch to your smartphone and then to your PC.
3. You can also directly access the data from the SD card by removing it from the Switch and using an appropriate SD card reader on your PC.
Are all Switch games compatible for playing on a PC monitor?
Not all Switch games are compatible for playing on a PC monitor. Some games may require specific features or controls that are only available on the Switch’s handheld or docked mode.

