Table of Contents
Are you looking to capture screenshots on your computer? Whether you need to save an important image, share a funny moment, or document an error message, knowing how to take a screenshot is an essential skill for any computer user. Don’t worry, it’s much simpler than you might think!
In this comprehensive screenshot tutorial, we’ll guide you through the various methods to capture screenshots on different devices, including computers running Windows or Mac operating systems, as well as Android and iPhone devices. From built-in tools to third-party software, we’ll cover it all.
Before we dive in, let’s explore some of the key methods for capturing screenshots on your computer:
Key Takeaways:
- Learn how to capture screenshots on Windows computers using the Windows Key+PrtScn, PrtScn, or Alt+PrtScn combinations
- Discover the Windows Snipping Tool and Snip & Sketch for more precise screen captures
- Explore the use of Microsoft Paint for effortless screenshot saving
- Consider third-party screenshot tools such as PrtScr and WinSnap for advanced features
- Find out the easy ways to take screenshots on Mac, Android, and iPhone devices
Using the Windows Snipping Tool
When it comes to capturing your computer screen, the Windows Snipping Tool is a handy built-in tool that offers versatility and convenience. Whether you need to capture specific parts of the screen or the entire screen itself, the Snipping Tool has got you covered.
To access the Snipping Tool in Windows 10, simply type “snipping tool” in the search box on the taskbar and select it from the list of results. In Windows 8, you can swipe in from the right edge of the screen, select Search, type “snipping tool,” and choose it from the results. In Windows 7, select the Start button, type “snipping tool” in the search box, and select it from the list of results.
Once you have the Snipping Tool open, you can capture specific parts of the screen by drawing a shape around the desired area. This allows for precise and targeted screenshots, making it ideal for illustrating tutorials, sharing specific information, or highlighting important details.
The Snipping Tool is a convenient and straightforward method to capture screenshots on your Windows computer. It offers a user-friendly interface and allows for easy customization of your captures, making it a valuable tool for various screen capture needs.
Using Snip & Sketch
Snip & Sketch is a built-in screenshot tool available on Windows computers. It offers a variety of capturing options and editing features, making it a versatile tool for computer screen capture.
To use Snip & Sketch, simply press the Windows Key+Shift+S to open the Snip & Sketch toolbar. From here, you can select the capturing mode that suits your needs. You can choose to capture the full screen, a rectangular selection, a freehand selection, or an individual program window.
After capturing the screenshot, Snip & Sketch allows you to make quick edits and annotations before saving the image as an image file. You can crop, highlight, draw, and add text to the screenshot, making it easy to emphasize important details or provide context.
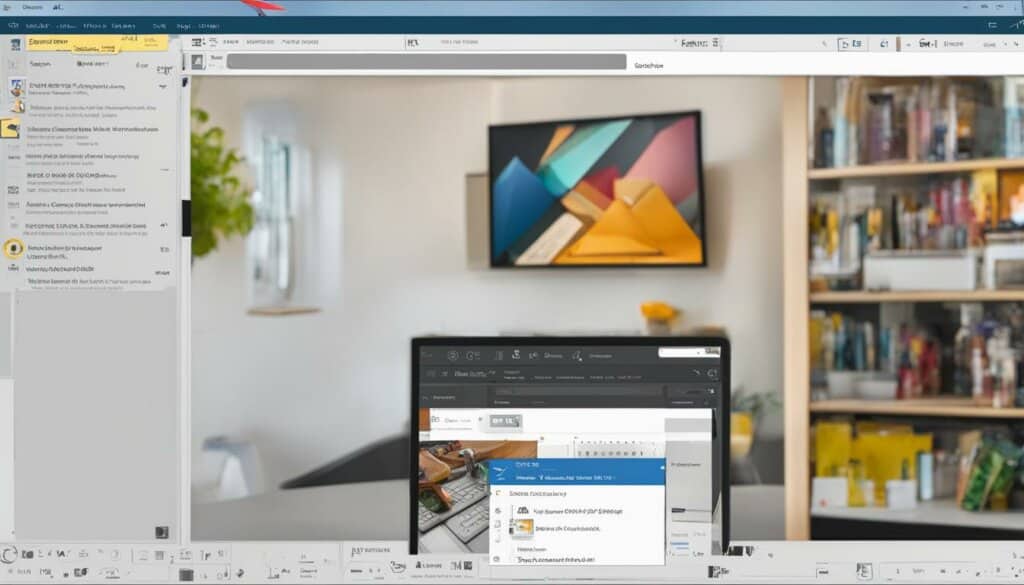
In addition to its editing capabilities, Snip & Sketch also offers convenient sharing options. You can quickly share your screenshot with others by clicking on the Share button, which allows you to send the image via email, social media, or other compatible apps.
Snip & Sketch is a powerful and user-friendly tool for capturing and editing screenshots on your Windows computer. Whether you need to capture an entire screen or focus on specific areas, Snip & Sketch provides the flexibility and functionality to meet your needs.
Capturing Modes in Snip & Sketch
| Capturing Mode | Description |
|---|---|
| Full Screen | Captures the entire screen, including all open windows and apps. |
| Rectangular Selection | Allows you to draw a rectangle around the desired area to capture. |
| Freehand Selection | Enables you to draw a freehand shape around the desired area to capture. |
| Individual Program Window | Captures only the active window of a specific program. |
Using Microsoft Paint
If you prefer a simple and straightforward method to save a screenshot on your computer, Microsoft Paint is a handy tool that comes pre-installed with Windows. With Microsoft Paint, you can easily capture and save screenshots without the need for any additional software or complicated steps.
To use Microsoft Paint to take a screenshot, follow these steps:
- Press the Windows Key+R to open the Run dialog box.
- Type “mspaint” in the Run field and press Enter.
- Once Microsoft Paint is open, press Ctrl+V to paste the screenshot from the clipboard.
- To save the screenshot, press Ctrl+S or select File > Save as.
Note that when pasting the screenshot into Paint, it may not fill the entire canvas. In this case, you can resize the image by dragging the corners of the canvas to ensure a perfect fit. Once you’re satisfied with the screenshot, save it as an image file in your desired location.
Microsoft Paint offers a simple and intuitive interface, making it a great option for quick and easy screenshot capture. Whether you need to capture an error message, save an image from the web, or document an important document, Microsoft Paint has got you covered.
Using Third-Party Screenshot Tools
Taking screenshots on your computer can be made even easier and more efficient with the use of third-party screenshot tools. These software options provide advanced features and functionalities that go beyond what the built-in Windows tools offer. Whether you need more editing capabilities, additional capture options, or specialized tools for specific tasks, third-party screenshot software has got you covered.
One popular option is PrtScr, a free tool that offers a user-friendly interface and a range of powerful features. With PrtScr, you can not only capture screenshots but also record videos of your screen. This tool allows for quick editing and annotation of your screenshots, making it ideal for professional use or creating tutorials.
Another noteworthy option is WinSnap, which offers a premium version with advanced features. WinSnap provides a range of capture modes, including full screen, window, object, and region. It also offers various editing tools and the ability to add watermarks and effects to your screenshots. With its intuitive interface and customizable hotkeys, WinSnap is a powerful tool for capturing and editing screenshots on your computer.
By utilizing these third-party screenshot tools, you can enhance your screenshot-taking experience and streamline your workflow. Whether you opt for a free tool like PrtScr or invest in premium software like WinSnap, these third-party options provide the flexibility and functionality to meet your unique screenshot needs.
Table: Comparison of Third-Party Screenshot Tools
| Software | Features | Price |
|---|---|---|
| PrtScr | – Capture screenshots and record videos | Free |
| WinSnap | – Capture full screen, window, object, and region – Editing tools for annotations and effects – Customizable hotkeys |
Premium version available |
| Snagit | – Advanced capture and editing capabilities – Screen recording and GIF creation – Team collaboration features |
Premium version available |
As shown in the table above, these third-party screenshot tools offer a range of features at different price points. Whether you need basic screenshot capabilities or advanced editing and collaboration features, there is a tool that fits your requirements and budget.
Taking Screenshots on Mac
Mac computers provide several simple methods for taking screenshots. Whether you want to capture the entire screen or just a specific area, Mac offers convenient options to meet your needs. Knowing how to screenshot on a Mac is essential for capturing and sharing images effortlessly.
Simplified Keyboard Shortcuts
Mac offers intuitive keyboard shortcuts for taking screenshots. To capture the entire screen, press Command+Shift+3. If you only want to capture a specific area, press Command+Shift+4 and then drag the cursor to select the desired region. These shortcuts enable quick and efficient screenshot capture on your Mac.
If you prefer more control over your screenshots, you can access additional options by pressing Command+Shift+5. This shortcut opens a powerful screenshot toolbar that allows you to select specific windows, capture a specific portion of the screen, or even record your screen. Mac’s comprehensive screenshot functionalities ensure you have the tools you need for any screenshot-taking scenario.
Taking Screenshots on Android
Capturing screenshots on an Android device is a simple process that can be done using a variety of methods. One common method is to press the power button and volume down button simultaneously. This will capture a screenshot of the entire screen and save it to your device’s storage. Some Android devices also have a dedicated screenshot button in the pull-down shade for easy access.
If you prefer a hands-free approach, you can use voice commands to take a screenshot. Simply say “OK Google, take a screenshot” and your device will capture the screen automatically. This method can be useful when you need to take a screenshot quickly.
For Samsung devices that come with the S Pen stylus, you can use specific gestures to capture screenshots. Simply remove the S Pen from its slot and hover it over the screen. Press the button on the S Pen, and it will capture a screenshot of the area you selected. This feature is handy for precise screenshot capturing.
Methods for Taking Screenshots on Android:
- Press the power button and volume down button simultaneously
- Use voice commands by saying “OK Google, take a screenshot”
- Utilize specific gestures with the S Pen on Samsung devices
Taking screenshots on Android devices is essential for capturing and sharing information, images, and moments from your screen. Whether you need to save a conversation, capture important information, or share something interesting, knowing how to take a screenshot on your Android device will make the process quick and effortless.
| Method | Description |
|---|---|
| Pressing the power button and volume down button simultaneously | Captures a screenshot of the entire screen |
| Using voice commands | Allows hands-free screenshot capturing by saying “OK Google, take a screenshot” |
| Utilizing specific gestures with the S Pen on Samsung devices | Enables precise screenshot capturing by using the S Pen gestures |
Taking Screenshots on iPhone
Are you wondering how to capture screenshots on your iPhone? It’s easier than you think! With just a simple combination of buttons, you can quickly capture and save anything on your iPhone screen. Whether you want to share a funny conversation, save important information, or capture a memorable moment in a game, taking screenshots on your iPhone is a handy feature that comes in useful in many situations.
To take a screenshot on an iPhone, simply press the side button (also known as the sleep/wake button) and the volume up button simultaneously. Make sure to press both buttons at the same time and hold them for a moment. You will see a flash on the screen and hear a camera shutter sound, indicating that the screenshot has been successfully captured. The screenshot will be automatically saved to your Photos app, where you can access it anytime.
Whether you have the latest iPhone model or an older version with a home button, the process remains the same. Just press the home button (or the side button) and the sleep/wake button simultaneously to capture the screen. It’s a simple and convenient method to capture and store important information or share interesting content with others.
Now that you know how to take screenshots on your iPhone, you can easily capture and share anything you want. It’s a useful feature that allows you to save important information, capture funny moments, or document anything that catches your interest on your iPhone screen. Start exploring the world of screenshots and discover how this simple feature can enhance your iPhone experience.
Taking Screenshots on Windows 10 PC
Windows 10 provides several methods for capturing screenshots. Whether you want to capture the entire screen, a specific window, or a selected area, there are built-in tools that can help you get the job done. Let’s explore the different methods:
Method 1: Print Screen Button
The Print Screen button is a simple and quick way to capture the entire screen on your Windows 10 PC. Just press the Print Screen (PrtScn) button on your keyboard, and the screenshot will be saved to your clipboard. You can then paste it into an image editing software or a document to save or share.
Method 2: Alt+Print Screen
If you only want to capture the active window instead of the entire screen, you can use the Alt+Print Screen key combination. Pressing Alt+Print Screen will capture only the window that is currently in focus, allowing you to capture specific content without any distractions.
Method 3: Snip & Sketch
Windows 10 also offers a more advanced tool called Snip & Sketch, which provides additional options for capturing screenshots. You can open Snip & Sketch by pressing the Windows key + Shift + S. This will open a toolbar with options to capture the full screen, a rectangular selection, a freehand selection, or an individual program window. After capturing the screenshot, you can annotate and save it using the Snip & Sketch app.
Method 4: Xbox Game Bar
For gamers or those who want more advanced capturing options, Windows 10 has the Xbox Game Bar. To open the Xbox Game Bar, press the Windows key + G. From there, you can access various features, including capturing screenshots and recording videos. The Xbox Game Bar is especially useful for capturing gameplay moments or creating video tutorials.
| Method | Shortcut | Description |
|---|---|---|
| Print Screen Button | Print Screen (PrtScn) | Captures the entire screen and saves it to the clipboard |
| Alt+Print Screen | Alt+Print Screen | Captures the active window only |
| Snip & Sketch | Windows key + Shift + S | Opens a toolbar with options for capturing specific parts of the screen |
| Xbox Game Bar | Windows key + G | Allows for capturing screenshots and recording videos, especially useful for gamers |
With these methods, you can easily capture screenshots on your Windows 10 PC. Whether you need to share something important, document a bug, or create visual content, Windows 10 provides the tools to help you get the job done.
Taking Screenshots on Windows 11 PC
Windows 11 introduces several methods to capture screenshots on your PC. Whether you want to capture the entire screen, a specific window, or a selected portion, Windows 11 offers convenient options for all your screenshot needs.
To capture the entire screen, you can still use the Print Screen button or the shortcut key Alt+Print Screen. For a more streamlined approach, Windows 11 introduces a new shortcut, Windows Key+Print Screen. This shortcut automatically saves the screenshot to the Pictures > Screenshots folder, making it easily accessible for future use.
Windows 11 also brings a revamped version of the Snipping Tool, combining the features of the Snipping Tool and Snip & Sketch. This powerful tool allows you to capture specific parts of the screen by selecting rectangular, freehand, or window snips. With the Snipping Tool in Windows 11, you have more flexibility and control over your screenshots.
If you’re a gamer or want to capture screenshots during gameplay, you can make use of the Xbox Game Bar. Simply press Windows Key+G to open the game bar, then click on the camera icon to capture screenshots. The Xbox Game Bar also offers additional features, such as recording videos and streaming content, making it a versatile tool for gamers and content creators.
With the variety of screenshot options available on Windows 11, you can easily capture and save important information, share memorable moments, or document important findings. Whether you prefer the traditional Print Screen button, the new Windows Key+Print Screen shortcut, or the enhanced Snipping Tool, Windows 11 provides a seamless and efficient screenshot experience.
Using Third-Party Screenshot Tools in Windows 10 and 11
While the built-in screenshot tools in Windows 10 and 11 provide basic functionality, you may find that third-party screenshot tools offer a wider range of advanced features. These tools can enhance your screen capture experience and provide additional options for editing and sharing your screenshots.
One popular third-party screenshot tool is Snagit. Snagit offers a comprehensive set of features for capturing screenshots and recording videos. With Snagit, you can capture screenshots of specific windows, regions, or even scrolling web pages. The software also includes powerful editing capabilities, allowing you to annotate and enhance your screenshots with text, arrows, and other visual elements. Snagit supports various output formats and provides seamless integration with popular applications like Microsoft Word, PowerPoint, and Google Drive.
Another useful third-party tool is Ashampoo Snap. This software offers a range of advanced features for capturing and editing screenshots. With Ashampoo Snap, you can capture screenshots of specific windows, regions, or even entire web pages. The software includes a built-in editor that allows you to enhance your screenshots with annotations, highlights, and effects. Ashampoo Snap also offers screen recording capabilities, enabling you to create screencasts and tutorials.
If you’re looking for a simple and intuitive screenshot tool, you might consider Droplr. This software allows you to capture screenshots with a single click and instantly share them with others. Droplr also offers features like annotation and image editing, making it easy to add comments and highlights to your screenshots. Additionally, Droplr provides cloud storage for your screenshots, allowing you to access and share them from any device.
| Software | Features | Price |
|---|---|---|
| Snagit | Capture screenshots and record videos Advanced editing capabilities Integration with popular applications |
Free trial available Starting from £49.95 per year |
| Ashampoo Snap | Capture screenshots and record videos Built-in editor with annotations and effects Screen recording capabilities |
Free trial available Starting from £29.99 per year |
| Droplr | One-click screenshot capture and instant sharing Annotation and image editing Cloud storage for screenshots |
Free plan available Starting from £6.95 per month |
These are just a few examples of the many third-party screenshot tools available for Windows 10 and 11. Depending on your specific needs and preferences, you may find other tools that better suit your requirements. Whether you need advanced editing capabilities, seamless integration with other software, or simple and intuitive screenshot capture, there is a third-party tool out there that can enhance your screen capture experience.
Conclusion
Taking screenshots on your computer may seem like a daunting task, but it’s actually much simpler than you think. With the built-in tools provided by Windows, Mac, Android, and iPhone devices, capturing and sharing images has never been easier.
For Windows users, options like the Snipping Tool, Snip & Sketch, and even Microsoft Paint offer convenient ways to capture screenshots. Additionally, third-party tools like Snagit, Ashampoo Snap, Droplr, and Screencast-O-Matic provide advanced features for those who require more functionality.
Mac users can effortlessly capture screenshots using the keyboard shortcuts and have them saved in the Photos app for easy access. Android and iPhone users also have their own specific methods, including button combinations, voice commands, and stylus gestures.
So, experiment with these different methods to find the one that suits your needs best. Whether you’re a professional needing to capture screenshots for work or simply want to share something interesting with a friend, taking screenshots is an essential skill for everyone using a computer.
FAQ
How can I capture the entire screen on Windows 10 and 8?
On Windows 10 and 8, you can press the Windows Key+PrtScn to capture the entire screen.
How can I capture the entire screen on Windows 7 and earlier?
On Windows 7 and earlier, simply press PrtScn to capture the entire screen.
How can I capture the active window on Windows?
To capture the active window, use the combination Alt+PrtScn.
How can I capture specific parts of the screen on Windows?
To capture specific parts of the screen, you can use the Windows Snipping Tool or Snip & Sketch.
How do I capture the entire screen on a Mac?
Press Command+Shift+3 to capture the entire screen on a Mac.
How do I capture a specific area on a Mac?
Press Command+Shift+4 to draw and select an area to screenshot on a Mac.
How do I capture a screenshot on an Android device?
On most Android devices, press the power button and volume down button simultaneously, or use the screenshot button in the pull-down shade.
How do I take a screenshot on an iPhone?
Press the side button and volume up button simultaneously on newer models, or the home button and sleep/wake button simultaneously on older models.
How do I capture the entire screen on a Windows 10 PC?
Use the Print Screen button to capture the entire screen on a Windows 10 PC.
How do I capture a specific area on a Windows 10 PC?
Use the Snip & Sketch tool or the Snipping Tool to capture specific parts of the screen on a Windows 10 PC.
How do I capture a screenshot on a Windows 11 PC?
Use the Print Screen button or Alt+Print Screen to capture screenshots on a Windows 11 PC. The new Snipping Tool in Windows 11 combines the features of Snipping Tool and Snip & Sketch.
What are some third-party screenshot tools for Windows?
Some popular options include PrtScr, WinSnap, Snagit, Ashampoo Snap, Droplr, and Screencast-O-Matic.
What is the easiest way to capture a screenshot on a computer?
The easiest way is to press the PrtScn key to save a screenshot of the entire screen, and then paste it into Microsoft Paint to save and edit.

