Table of Contents
Taking a screenshot on a PC is a simple process that can be done using built-in tools and keyboard shortcuts. Whether you’re using Windows 10 or Windows 11, there are multiple methods to capture all or part of your screen. By following this step-by-step guide, you’ll learn how to easily take screenshots on a PC.
Using the Snip & Sketch Tool
One of the easiest ways to take screenshots on a PC is by using the Snip & Sketch tool. This tool, available on both Windows 10 and Windows 11, allows you to capture screenshots of windows, rectangular areas, or the entire screen. You can access Snip & Sketch by using the keyboard shortcut Windows key + Shift + S or by searching for it in the Start menu. Once a screenshot is taken, it is saved to your clipboard and can be opened in the Snip & Sketch app for annotation and sharing.
Key Takeaways:
- The Snip & Sketch tool is a convenient way to take screenshots on a PC running Windows 10 or Windows 11.
- It allows you to capture windows, rectangular areas, or the entire screen.
- Use the keyboard shortcut Windows key + Shift + S or search for it in the Start menu to access the tool.
- Screenshots taken with Snip & Sketch are saved to the clipboard and can be annotated and shared using the Snip & Sketch app.
- Snip & Sketch is a versatile tool for capturing and editing screenshots on a PC.
Using the Snip & Sketch Tool
One of the easiest ways to take screenshots on a PC is by using the Snip & Sketch tool. This tool, available on both Windows 10 and Windows 11, allows you to capture screenshots of windows, rectangular areas, or the entire screen. You can access Snip & Sketch by using the keyboard shortcut Windows key + Shift + S or by searching for it in the Start menu. Once a screenshot is taken, it is saved to your clipboard and can be opened in the Snip & Sketch app for annotation and sharing.
Snip & Sketch Shortcut
Using the Snip & Sketch tool is made even easier with the Windows key + Shift + S shortcut. This keyboard combination allows you to quickly access the tool and capture your desired screenshot. Simply press the Windows key, Shift key, and S key simultaneously, and your screen will be dimmed, indicating that you can select the area you want to capture. Once you release the mouse button, the screenshot will be automatically saved to your clipboard, ready for further editing or sharing.
Annotations and Sharing
The Snip & Sketch tool also provides useful annotation features, allowing you to highlight, draw, or add text to your screenshots. After capturing a screenshot, open the Snip & Sketch app by clicking on the notification that appears in the lower-right corner of your screen. In the app, you can use the pen, highlighter, or text options to annotate your screenshot. Once you are done, save the annotated screenshot as an image file or copy it to your clipboard for easy sharing via email, messaging apps, or social media.
Summary
The Snip & Sketch tool is a convenient and versatile tool for capturing screenshots on a PC. With its easy accessibility through keyboard shortcuts and a user-friendly interface, taking and editing screenshots has never been easier. Whether you need to capture a specific window, a rectangular area, or the entire screen, Snip & Sketch has got you covered. Try it out and enhance your screenshot-taking experience on your PC.
Using the Snipping Tool
The Snipping Tool is a handy built-in tool that allows you to capture screenshots on a PC running Windows 10 or Windows 11. With the Snipping Tool, you can take rectangular, free-form, full-screen, or window snips, depending on your specific needs.
To access the Snipping Tool, you have a couple of options. You can search for it in the Start menu by typing “Snipping Tool,” or you can use the convenient keyboard shortcut Windows key + Shift + S. Once the Snipping Tool is open, you’ll see various options for capturing your desired snip.
Unlike the Snip & Sketch tool, the Snipping Tool does not automatically save screenshots. After you’ve taken a snip, you’ll need to manually save it by clicking on the floppy disk icon in the Snipping Tool window. This allows you to choose the location and file name for your screenshot.
The Snipping Tool is a versatile tool for capturing screenshots on a PC. Whether you need to quickly capture a rectangular area, a full-screen snip, or a specific window, the Snipping Tool has got you covered. Just remember to save your snips before closing the tool!
Snipping Tool Options
When using the Snipping Tool, you have several options to customize your snips. Here are the available modes:
- Rectangular Snip: This mode allows you to drag the cursor to create a rectangular snip of your desired area.
- Free-form Snip: With this mode, you can freely draw a shape around the area you want to capture.
- Full-screen Snip: This mode captures the entire screen, including all open windows.
- Window Snip: Use this mode to capture a specific window or dialog box. After selecting this mode, click on the window you want to capture.
These different snip modes provide flexibility and precision when capturing screenshots with the Snipping Tool. Whether you need to capture a specific section of a webpage, highlight important information, or save a full-screen image, the Snipping Tool has the right snipping mode for you.
| Snip Mode | Use Case |
|---|---|
| Rectangular Snip | Perfect for capturing a specific section of a webpage or document |
| Free-form Snip | Great for highlighting and capturing irregular shapes or areas |
| Full-screen Snip | Ideal for capturing an entire webpage or screen |
| Window Snip | Useful for capturing a specific window or dialog box |
The Snipping Tool is a versatile and user-friendly tool for capturing screenshots on a PC. Whether you’re a professional designer, a student, or someone who frequently needs to capture and save information from your screen, the Snipping Tool is an essential tool in your arsenal.
Using the Print Screen Key
The Print Screen key, also known as PrtScn, is a convenient method for capturing screenshots on a PC. When pressed, the Print Screen key captures the entire screen and copies it to the clipboard. To save the screenshot, simply open an image editing program such as Microsoft Paint and paste the screenshot into the editor. From there, you can edit and save the screenshot as a file.
Using the Print Screen key is a straightforward way to capture screenshots on your desktop. It is especially useful when you want to capture the entire screen without any cropping or selecting specific areas. Additionally, it allows you to easily paste the screenshot into an image editing program for further modifications.
While the Print Screen key captures the entire screen, it may not be the most efficient method if you only need to capture a specific window or a portion of the screen. In such cases, other tools or keyboard shortcuts may be more suitable.
Keyboard Shortcuts for Screenshots
In addition to using the various built-in tools for taking screenshots on a PC, there are also handy keyboard shortcuts that can make the process even faster. These shortcuts allow you to capture specific areas of the screen or quickly save screenshots without having to open any additional applications. Here are some keyboard shortcuts you can use:
Windows key + Print Screen
The Windows key + Print Screen shortcut captures the entire screen and automatically saves the screenshot to the Pictures > Screenshots folder. This is a convenient way to quickly take a screenshot without having to manually save it or open any image editing programs. Once saved, you can easily access and view the screenshot in the designated folder.
Alt + Print Screen
If you only need to capture the active window instead of the entire screen, you can use the Alt + Print Screen shortcut. This captures the window that is currently in focus and copies the screenshot to the clipboard. You can then paste the screenshot into an image editing program or other applications for further use.
Fn + Windows logo key + Space Bar
For those using a laptop or keyboard without a dedicated Print Screen key, the Fn + Windows logo key + Space Bar shortcut can be used to take a screenshot. This shortcut works similarly to the Windows key + Print Screen and captures the entire screen, automatically saving the screenshot to the designated folder.
By familiarizing yourself with these keyboard shortcuts, you can easily and efficiently capture screenshots on your PC without the need for additional tools or software.
| Shortcut | Description |
|---|---|
| Windows key + Print Screen | Captures the entire screen and saves the screenshot to the designated folder |
| Alt + Print Screen | Captures the active window and copies the screenshot to the clipboard |
| Fn + Windows logo key + Space Bar | Captures the entire screen and saves the screenshot to the designated folder (for devices without a dedicated Print Screen key) |
Keyboard shortcuts provide a quick and efficient way to capture screenshots on a PC. Whether you need to capture the entire screen or just the active window, these shortcuts can save you time and effort. By incorporating these shortcuts into your workflow, you’ll be able to easily capture and save screenshots for various purposes.
Using the Game Bar
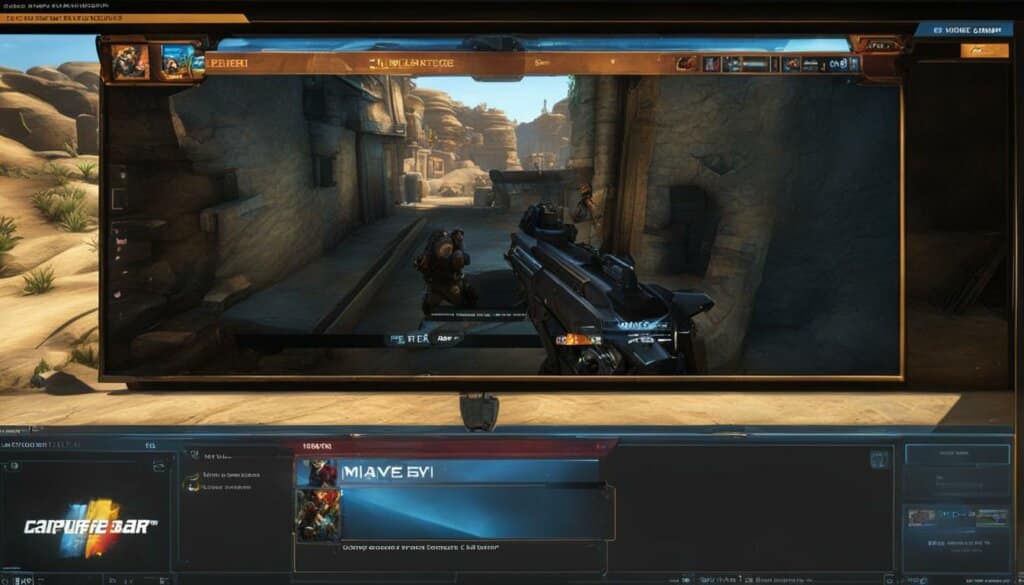
The Game Bar is a powerful tool available on Windows 10 and Windows 11 that allows users to capture screenshots and record videos while playing games or using other applications. It provides convenient shortcuts and features that make capturing screenshots in games a breeze. Whether you want to capture a great gaming moment or document an issue for troubleshooting, the Game Bar has got you covered.
To access the Game Bar, simply press the Windows key + G on your keyboard. This will bring up the Game Bar overlay, where you’ll find various options for capturing screenshots and recording videos. Clicking on the Capture button will instantly take a screenshot of the current screen, which is automatically saved in the PNG format. You can then find your captured screenshots in the Videos > Captures folder.
The Game Bar also offers screen recording tools for those who want to capture gameplay footage or create video tutorials. By clicking on the record button in the Game Bar overlay, you can start recording your screen and audio. This is especially useful for content creators or gamers who want to share their gaming experiences with others. The recorded videos are saved in the MP4 format and can be found in the Videos > Captures folder.
Capturing Screenshots in Games
The Game Bar provides a seamless way to capture screenshots in games without interrupting your gameplay. With just a few simple keyboard shortcuts or clicks, you can capture and save your favorite gaming moments. Whether you want to showcase your achievements, document a bug, or share your gameplay with friends, the Game Bar is the perfect tool for the job.
| Keyboard Shortcut | Action |
|---|---|
| Windows key + G | Open the Game Bar overlay |
| Click Capture button | Take a screenshot |
| Click Record button | Start recording a video |
With the Game Bar, you can also customize various settings such as audio recording, video quality, and more. This allows you to tailor your screenshot and video capturing experience to your preferences. Whether you’re a casual gamer or a professional content creator, the Game Bar provides the necessary tools to capture and share your gaming moments effortlessly.
Taking Screenshots on a Mac
“If you’re using a Mac, you can also take screenshots using built-in tools. Pressing Command + Shift + 3 captures the entire screen and saves the screenshot to the desktop. Command + Shift + 4 allows you to capture a selected area of the screen. Additionally, Mac users can use the Grab tool, which provides more options for capturing and editing screenshots.”
Mac users have the convenience of built-in screenshot tools that make capturing and editing screenshots a breeze. The first method is to press Command + Shift + 3, which captures the entire screen and automatically saves the screenshot to the desktop. This is useful when you want to capture everything that’s currently displayed on your Mac’s screen.
If you prefer to capture only a specific area of the screen, you can use the Command + Shift + 4 shortcut. This turns your cursor into a crosshair, allowing you to select the desired area. Simply click and drag to create a rectangular selection, and once you release the mouse button, the screenshot will be saved to the desktop.
For those who require more advanced screenshot options, Mac offers the Grab tool. This tool can be accessed by searching for it in the Applications folder or through Spotlight search. Grab provides additional features, such as timed screenshots and the ability to capture specific windows or menus. With Grab, you can have even more control over your screenshots and tailor them to your specific needs.
Capturing Screenshots on a Mac – Keyboard Shortcuts
If you find the keyboard shortcuts mentioned above to be too cumbersome, there are alternative keyboard shortcuts you can use to take screenshots on a Mac:
- Command + Shift + 5: This brings up the screenshot toolbar, which allows you to choose between capturing the entire screen, a selected portion, or a specific window.
- Command + Control + Shift + 3: This shortcut captures the entire screen and saves it to the clipboard, allowing you to paste it into an application of your choice.
- Command + Control + Shift + 4: Similar to the previous shortcut, this captures a selected area of the screen and saves it to the clipboard.
By utilizing these keyboard shortcuts or the Grab tool, Mac users can easily capture and save screenshots for various purposes, whether it’s for work, personal use, or sharing with others.
| Keyboard Shortcut | Description |
|---|---|
| Command + Shift + 3 | Captures the entire screen and saves to the desktop |
| Command + Shift + 4 | Captures a selected area of the screen and saves to the desktop |
| Command + Shift + 5 | Brings up the screenshot toolbar for more options |
| Command + Control + Shift + 3 | Captures the entire screen and saves to the clipboard |
| Command + Control + Shift + 4 | Captures a selected area of the screen and saves to the clipboard |
Conclusion
Taking screenshots on a PC is a valuable skill that can come in handy for various purposes. Whether you prefer using the built-in tools like Snip & Sketch or the Snipping Tool, or opt for keyboard shortcuts like Print Screen or the Game Bar, capturing screenshots on a PC is a straightforward process.
However, if you’re looking for more advanced features and customization options, you may want to consider using a dedicated screenshot utility or screen capture software. These tools offer a wide range of functionalities such as capturing specific areas, annotating screenshots, and even recording screen videos.
By mastering these methods and exploring additional screenshot utilities and screen capture software, you’ll be able to easily capture and save anything displayed on your screen for future reference or sharing purposes. Whether you’re a professional or a casual user, having the ability to quickly and efficiently capture screenshots is a valuable skill in today’s digital world.
FAQ
How do I take a screenshot on a PC?
There are several methods to take a screenshot on a PC. You can use built-in tools like Snip & Sketch or the Snipping Tool, or use keyboard shortcuts like Print Screen or the Game Bar. The method you choose depends on your preference and the version of Windows you are using.
What is the Snip & Sketch tool?
The Snip & Sketch tool is a built-in tool in Windows 10 and Windows 11 that allows you to capture screenshots of windows, rectangular areas, or the entire screen. It can be accessed using the keyboard shortcut Windows key + Shift + S or by searching for it in the Start menu.
How do I access the Snipping Tool?
The Snipping Tool is a built-in tool in Windows 10 and Windows 11 that allows you to capture screenshots. You can access it by searching for it in the Start menu or using the keyboard shortcut Windows key + Shift + S.
How do I use the Print Screen key to take a screenshot?
Pressing the Print Screen key captures the entire screen and copies it to the clipboard. To save the screenshot, you can open an image editing program like Microsoft Paint and paste the screenshot into the editor. From there, you can edit and save the screenshot as a file.
Can I use keyboard shortcuts for screenshots?
Yes, there are several keyboard shortcuts you can use to capture screenshots. The Windows key + Print Screen captures the entire screen and saves the screenshot to the Pictures > Screenshots folder. The Alt + Print Screen shortcut captures the active window and copies the screenshot to the clipboard. If your computer does not have the Print Screen key, you can use the Fn + Windows logo key + Space Bar shortcut to take a screenshot.
How do I use the Game Bar to capture screenshots?
The Game Bar is a built-in tool in Windows 10 and Windows 11 that can be used to capture screenshots and record videos while playing games or using other applications. You can access the Game Bar by pressing the Windows key + G. From there, you can click the Capture button to take a screenshot of the current screen or use the record button to capture a video.
Can I take screenshots on a Mac?
Yes, Mac users can also take screenshots using built-in tools. Pressing Command + Shift + 3 captures the entire screen and saves the screenshot to the desktop. Command + Shift + 4 allows you to capture a selected area of the screen. Additionally, Mac users can use the Grab tool, which provides more options for capturing and editing screenshots.
Why are screenshots useful?
Taking screenshots on a PC is a valuable skill that can be useful for various purposes. Screenshots can be used to capture important information, share visual content, troubleshoot technical issues, document online transactions, and much more. Mastering the methods of capturing screenshots allows you to easily save and share anything displayed on your screen for future reference or sharing purposes.

