Table of Contents
Do you ever find yourself wanting to capture what’s on your computer screen? Whether it’s an important document, an interesting image, or a memorable moment from a video, knowing how to take a screenshot on your computer is a valuable skill. In this article, we’ll explore the different methods and shortcuts for capturing screenshots on both Windows computers and mobile devices like Android phones and iPhones.
Key Takeaways:
- Learn the various methods for taking screenshots on Windows computers, including keyboard shortcuts and built-in tools.
- Discover how to capture screenshots of the entire screen, specific windows, or selected areas using Windows Snipping Tool and Snip & Sketch.
- Find out how to save and edit screenshots using Microsoft Paint, a basic image editing program available on Windows computers.
- Explore alternative screen capture tools for more advanced features and functionalities.
- Get tips on capturing screenshots on Android devices and iPhones, including voice commands and hardware button combinations.
How to Take a Screenshot on Windows 10 and 8
To capture a screenshot on Windows 10 and 8, you can use a simple keyboard shortcut.
Press the Windows key + PrtScn simultaneously, and the entire screen will be saved as an image file in the default Pictures folder. The screenshot will be stored in a subfolder called Screenshots.
This method provides a quick and convenient way to capture a screenshot without the need for any additional software or tools.
Whether you want to capture an image, record a moment, or save important information, taking a screenshot on Windows 10 and 8 is a simple process that allows you to easily capture and save what’s on your screen.
How to Take a Screenshot on Windows 7 and Earlier
If you’re using Windows 7 or an earlier version of Windows, capturing a screenshot is a straightforward process. Simply press the PrtScn key on your keyboard, and Windows will save a screenshot of the entire screen, including all open windows and menus. This screenshot will be copied to the clipboard, allowing you to paste it into a program like Microsoft Paint to save it as an image file.
This method of taking screenshots works consistently across multiple versions of Windows and provides a quick and efficient way to capture what’s on your screen. Whether you’re working on Windows 7, Windows Vista, or an even older version, the PrtScn key is a reliable option for capturing screenshots.
To ensure easy access to the screenshot, it is recommended to paste it into a program like Microsoft Paint or an image editing software. From there, you can save the screenshot as an image file, making it easy to view and share as needed.
Windows 7 Screenshot Shortcut
In addition to the PrtScn key method, there is another shortcut you can use to capture screenshots on Windows 7. By using the combination of the Alt + PrtScn keys, you can capture a screenshot of only the active window. This is useful when you want to focus on a specific window without including the entire screen.
After pressing Alt + PrtScn, the screenshot will be copied to the clipboard, allowing you to paste it into an image editing program to save it. This method provides flexibility and precision when capturing screenshots on Windows 7.
| Keyboard Shortcut | Description |
|---|---|
| PrtScn | Captures the entire screen |
| Alt + PrtScn | Captures the active window only |
By using these methods, you can easily capture screenshots on Windows 7 and earlier versions, making it convenient to document and share important information.
How to Take a Screenshot of the Active Window
Taking a screenshot of the active window can be done with a simple keyboard shortcut – Alt + PrtScn. This combination of keys allows you to capture the currently focused window, whether it’s a browser, an application, or any other window you are working on. This method is particularly useful when you only want to capture a specific window without including the entire screen.
To take a screenshot of the active window using Alt + PrtScn, follow these steps:
- Ensure the window you want to capture is in focus.
- Press and hold the Alt key on your keyboard.
- While holding the Alt key, press the PrtScn key.
Once you have pressed the Alt + PrtScn keys, the screenshot of the active window will be copied to the clipboard. You can then open a program like Microsoft Paint, Word, or any image editing software, and paste the screenshot into it using the CTRL + V shortcut. From there, you can save the screenshot as an image file and use it as needed.
Example:
“Capturing a screenshot of the active window has never been easier. With the Alt + PrtScn shortcut, you can quickly and effortlessly capture the window you need without any hassle. Whether you want to share important information from a specific application or document or simply keep a record of your work, this method allows you to capture what matters most.”
| Advantages | Disadvantages |
|---|---|
| Quick and easy method | Only captures the active window |
| No additional software required | Cannot capture multiple windows at once |
| Compatible across all Windows versions |
How to Use the Windows Snipping Tool
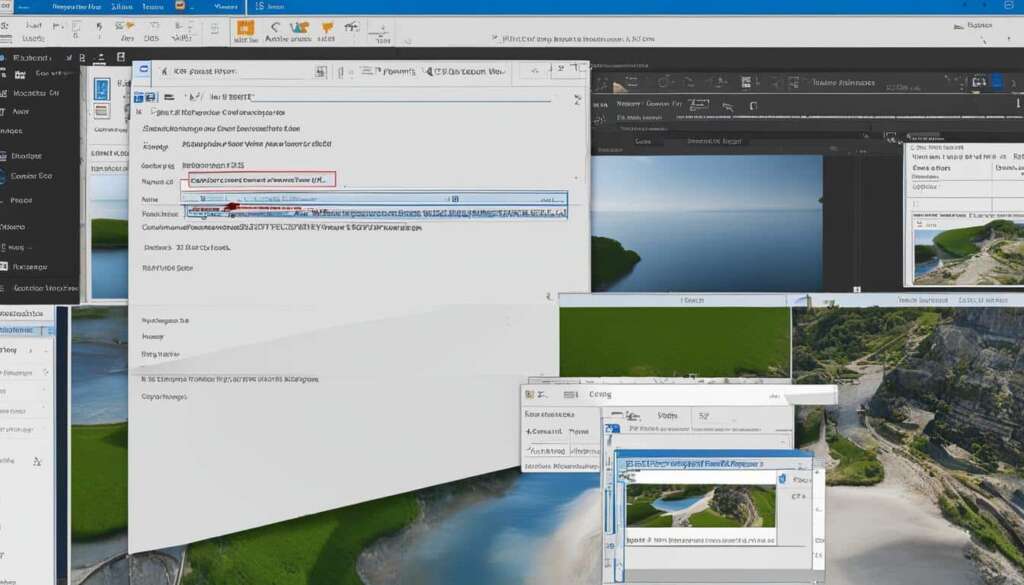
When it comes to capturing specific parts of the screen, the Windows Snipping Tool is a handy tool that provides both convenience and versatility. With this screen capture tool, you can easily select an area and save it as an image file. Let’s explore how to use the Snipping Tool to capture screenshots on Windows.
To access the Snipping Tool, simply search for it in the Start menu or taskbar. Once open, you’ll find various capture modes to choose from, including Free-form Snip, Rectangular Snip, Window Snip, and Full-screen Snip. Depending on your preference, you can select the capture mode that best suits your needs.
Once you’ve captured the desired area, you can save it as an image file by clicking on the Save Snip button. The Snipping Tool also provides basic annotation features that allow you to draw, highlight, and add text to your screenshots before saving them. This makes it a comprehensive tool for capturing and enhancing screenshots on Windows.
With its user-friendly interface and practical features, the Windows Snipping Tool is a reliable choice for capturing specific parts of your screen. Whether you need to capture a specific window or highlight a particular area, the Snipping Tool provides the flexibility and functionality you need.
Useful Tips for Using the Snipping Tool:
- Experiment with different capture modes to find the one that suits your needs best.
- Take advantage of the annotation features to add emphasis and clarity to your screenshots.
- Save your screenshots in a designated folder for easy access and organization.
- Consider using keyboard shortcuts to open the Snipping Tool quickly (e.g., Windows key + Shift + S on Windows 10).
- Explore other screen capture tools like Snip & Sketch, which offers additional features and integration with Windows Ink.
By mastering the Snipping Tool, you can elevate your screenshot-taking skills and efficiently capture and save specific parts of your screen with ease.
How to Save and Edit Screenshots in Microsoft Paint
Microsoft Paint is a versatile tool that allows you to save and edit your screenshots with ease. After capturing a screenshot, you can open Paint and make necessary edits such as cropping, resizing, and adding text. This simple yet powerful image editing program is a convenient option for basic editing and annotation of screenshots.
To save your screenshot in Microsoft Paint, follow these steps:
- Open Microsoft Paint by searching for it in the Start menu or using the Run dialog box.
- Paste the screenshot from the clipboard by pressing Ctrl + V or right-clicking and selecting Paste.
- Make any necessary edits using the tools available in Paint, such as the Crop tool, Text tool, or Resize tool.
- Once you’re satisfied with the edits, click on the File menu, select Save As, and choose a location on your computer to save the edited screenshot.
- Specify the file name and select the desired file format, such as JPEG or PNG.
- Click Save to save the edited screenshot.
With Microsoft Paint, you can easily annotate your screenshots by adding text, arrows, or highlighting important areas. Simply select the desired tool from the toolbar and click and drag on the screenshot to make the annotations. This is especially useful when you want to provide additional context or highlight specific details in your screenshots.
“Microsoft Paint offers a user-friendly interface and a range of basic editing tools, making it an ideal choice for saving and editing screenshots. Whether you need to crop, resize, or add text, Paint provides the necessary functionalities without overwhelming you with complex features.”
Edit Screenshots in Microsoft Paint
Editing screenshots in Microsoft Paint is a breeze. You can easily crop out unwanted areas, resize the image to fit your needs, or add text annotations to provide further explanation. By utilizing these editing features, you can refine your screenshots and make them more visually appealing and informative.
Alternative Screen Capture Tools for Advanced Features
While Windows provides built-in methods for taking screenshots, there are also alternative screen capture tools available that offer advanced features and functionalities. These third-party screenshot applications can enhance your screenshot capabilities and provide you with more options for capturing and editing screenshots.
Two popular screen capture software options are PrtScr and WinSnap. PrtScr is a lightweight and easy-to-use application that allows you to capture screenshots with precision. It offers features like pixel-perfect capture, various capture modes, and the ability to annotate and highlight screenshots before saving them. WinSnap, on the other hand, is a more robust screen capture tool that provides advanced capabilities for capturing screenshots. It offers features like customizable capture options, image editing tools, and the ability to capture transparent or shaped windows.
These advanced screen capture tools can be particularly useful for professionals and individuals who frequently need to capture and edit screenshots. Whether you need to capture screenshots for work, create tutorials, or simply want more control and flexibility over your captures, these tools can help you achieve your goals. By using PrtScr or WinSnap, you can take your screenshot capabilities to the next level and ensure that your captures are exactly what you need them to be.
| Name | Features |
|---|---|
| PrtScr | Pixel-perfect capture, various capture modes, annotation and highlighting tools |
| WinSnap | Customizable capture options, advanced editing tools, capture transparent or shaped windows |
By using these advanced screen capture tools, you can elevate your screenshot capabilities and unlock a range of features and functionalities. Whether you choose PrtScr or WinSnap, you’ll have the ability to capture, edit, and annotate your screenshots with ease, enabling you to create professional-looking captures for any purpose.
Explore these alternative screen capture tools and discover the power and versatility they offer. With PrtScr or WinSnap, you’ll have the tools you need to capture and edit screenshots like a pro.
How to Take a Screenshot on Android
Capturing a screenshot on an Android device is a simple and useful feature that allows you to save and share what’s on your screen. Whether you want to capture a funny meme or save important information, here are some methods you can use to take a screenshot on Android.
Android Screenshot Shortcut: Power + Volume Down Buttons
The most common method to take a screenshot on Android is by pressing the Power and Volume Down buttons simultaneously. Locate the Power button, usually found on the right side of your device, and the Volume Down button, typically located on the left side. Press and hold these buttons together for a few seconds until you see a visual confirmation, such as a screen flash or a sound. Your screenshot will be saved automatically in the Photo Gallery or Screenshot folder on your device, ready to be accessed and shared.
Voice Command: “OK Google, Take a Screenshot”
Another convenient method to capture a screenshot is by using voice commands. Activate Google Assistant by saying “OK Google” or by holding down the home button. Once Google Assistant is active, simply say “Take a screenshot” or “Capture the screen” to trigger the screenshot process. The screenshot will be saved in the same location as the Power + Volume Down method.
Using Third-Party Apps
If you prefer more advanced screenshot features, you can explore third-party apps available on the Google Play Store. These apps offer additional functionalities like screen recording, scrolling screenshots, and editing tools. Some popular options include Screenshot Easy, AZ Screen Recorder, and Super Screenshot. Take some time to research and find an app that suits your needs and preferences.
Taking screenshots on Android is a straightforward process that can be accomplished using different methods. Whether you opt for the traditional button combination, voice commands, or third-party apps, capturing screenshots on your Android device allows you to preserve and share valuable information with ease. So go ahead and start capturing and sharing your favorite moments and important content right from your Android device!

How to Take a Screenshot on iPhone
Taking a screenshot on an iPhone is a straightforward process that allows you to capture and save what’s on your screen with ease. The method may differ depending on the model of your iPhone, but the process remains simple and convenient.
If you have an iPhone without a Home button, such as the iPhone X or newer models, you can take a screenshot by pressing the Side + Volume Up buttons simultaneously. This action will immediately capture the screen and save the screenshot to the Photos app on your device. It’s a quick and efficient way to capture important information, conversations, or anything else that’s displayed on your iPhone screen.
For older iPhone models with a Home button, like the iPhone 8 or earlier, you can take a screenshot by pressing the Home + Sleep/Wake buttons simultaneously. The screen will flash, indicating that the screenshot has been successfully captured. You can then find and access the screenshot in the Photos app on your iPhone.
Taking screenshots on an iPhone is an essential feature that can be used for various purposes, from saving important information to sharing funny or memorable moments with friends and family. It allows you to capture a particular moment in time and store it for future reference. With just a simple combination of buttons, you can easily take screenshots on your iPhone and have them readily available whenever you need them.

Table: Comparison of Screenshot Methods on iPhone
| iPhone Model | Screenshot Shortcut | Location of Saved Screenshots |
|---|---|---|
| iPhone X or newer models | Side + Volume Up buttons | Photos app |
| iPhone 8 or earlier models | Home + Sleep/Wake buttons | Photos app |
Taking screenshots on an iPhone is a useful skill that can enhance your productivity and enable you to capture important information or moments with ease. Whether you have the latest iPhone model or an older one, the process is simple and consistent across devices. Experiment with different screenshot methods and make the most of this feature to capture and preserve meaningful content on your iPhone.
Conclusion
Taking screenshots on a computer is a simple and convenient way to capture and save what’s on your screen. Whether you’re using Windows or Android, there are various methods and tools available to capture screenshots.
Windows users can utilize keyboard shortcuts, the Snipping Tool, or third-party applications for more advanced features. These options provide flexibility and allow you to capture specific parts of the screen with ease.
Android users, on the other hand, can use voice commands or hardware button combinations to capture screenshots. This makes it quick and easy to capture what’s on your screen without the need for any additional software.
By mastering the art of taking screenshots, you can easily capture and share the content on your computer or mobile device. Whether you need to capture an important document, save a funny conversation, or share an interesting image, knowing the screen capture methods will empower you to do so.
FAQ
How do you screenshot on a computer?
To take a screenshot on a Windows computer, you can use various methods depending on the version of Windows you have. On Windows 10 and 8, you can press the Windows key + PrtScn to capture the entire screen. On Windows 7 and earlier, you can press the PrtScn key. Additionally, you can use Alt + PrtScn to capture only the active window. If you want to capture specific parts of the screen, you can use the Windows Snipping Tool or Snip & Sketch. Another option is to use third-party applications for more advanced features like fine-tuning the screenshot and annotating it before saving.
How to take a screenshot on Windows 10 and 8?
On Windows 10 and 8, you can easily take a screenshot by using the Windows key + PrtScn shortcut. This will capture the entire screen and save it in the default Pictures folder in a subfolder called Screenshots. The screenshot will be saved as an image file that you can access later. This method is quick and convenient for capturing what’s on your screen without the need for any additional software.
How to take a screenshot on Windows 7 and earlier?
If you’re using Windows 7 or an earlier version of Windows, you can take a screenshot by pressing the PrtScn key on your keyboard. This will save a screenshot of the entire screen, including all open windows and menus. The screenshot will be copied to the clipboard, and you can paste it into a program like Microsoft Paint to save it as an image file. This method is simple and works across multiple versions of Windows.
How to take a screenshot of the active window?
To capture a screenshot of only the active window, you can use the Alt + PrtScn shortcut. This combination of keys will save a screenshot of the currently focused window, such as a browser or application window. The screenshot will be copied to the clipboard, and you can paste it into a program like Microsoft Paint to save it as an image file. This method is useful when you only want to capture a specific window without including the entire screen.
How to use the Windows Snipping Tool?
Windows provides a built-in screen capture tool called the Snipping Tool. You can use this tool to capture specific parts of the screen by selecting an area with your mouse or using other capture options. To access the Snipping Tool, you can search for it in the Start menu or taskbar. Once open, you can choose from different capture modes and save the captured image as an image file. The Snipping Tool is a versatile and easy-to-use option for taking screenshots on Windows.
How to save and edit screenshots in Microsoft Paint?
If you want to save and edit your screenshots using a basic image editing program, you can use Microsoft Paint. After capturing a screenshot, you can open Paint by searching for it in the Start menu or using the Run dialog box. Once open, you can paste the screenshot from the clipboard and make any necessary edits, such as cropping, resizing, or adding text. Paint allows you to save the edited screenshot as an image file. This method is suitable for basic editing and annotation of screenshots.
Are there alternative screen capture tools for advanced features?
Yes, if you need more advanced features for capturing and editing screenshots, you can consider using third-party screen capture tools. Some popular options include PrtScr and WinSnap, which offer additional functionalities like fine-tuning the screenshot by pixel, annotating it before saving, and easy saving to a predefined location. These tools can enhance your screenshot capabilities and provide a more comprehensive set of features for capturing and editing screenshots.
How to take a screenshot on Android?
To take a screenshot on an Android device, you can use either a voice command or a combination of hardware buttons. One method is to use a voice command to tell Google Assistant to take a screenshot. Simply say, “OK Google, take a screenshot” to capture the screen. Another method is to press and hold the Power + Volume Down buttons simultaneously. The screenshot will be saved in the Photo Gallery or Screenshot folder on your device. This method works on most Android devices and is useful for capturing what’s on your screen.
How to take a screenshot on iPhone?
To take a screenshot on an iPhone, the method differs depending on the model. On iPhones without a Home button, you can press the Side + Volume Up buttons simultaneously to capture a screenshot. The screenshot will be saved to the Photos app on your device. On older iPhone models with a Home button, you can press the Home + Sleep/Wake buttons simultaneously to take a screenshot. This method is useful for capturing what’s on your iPhone screen and saving it for later use.
Why should I take screenshots on a computer?
Taking screenshots on a computer is a simple and convenient way to capture and save what’s on your screen. Whether you’re using Windows or Android, there are various methods and tools available to capture screenshots. By mastering the art of taking screenshots, you can easily capture and share the content on your computer or mobile device.

