Table of Contents
Overclocking your CPU can unlock its maximum performance potential, allowing you to achieve faster and more efficient computing. However, it’s essential to approach overclocking with caution to ensure the safety of your hardware. This step-by-step guide will walk you through the indispensable steps of safely overclocking your CPU, enabling you to harness its full power while minimizing the risk of damage.
Key Takeaways:
- To maximize your CPU’s performance, consider overclocking it within safe parameters.
- Determining the core temperature of your CPU is crucial before proceeding with overclocking.
- Perform a system stress test to ensure stability and identify any potential issues.
- Benchmark your CPU’s performance before and after overclocking to measure improvements.
- Properly adjusting the CPU multiplier and voltage are critical for achieving a stable overclock.
Determining Your CPU’s Core Temperature
Before overclocking your CPU, it’s crucial to determine its core temperature. By understanding the current temperature of your CPU, you can assess its ability to handle overclocking without risking damage.
There are two methods you can use to determine your CPU’s core temperature:
- Checking CPU temps in the BIOS
- Using a third-party tool
Method 1: Checking CPU temps in the BIOS
To check your CPU’s temperature in the BIOS, follow these steps:
- Restart your computer
- During startup, press the designated key to access the BIOS. This is typically the DELETE, F2, or F10 key. Refer to your motherboard’s manual for exact instructions.
- Once in the BIOS, navigate to the hardware or temperature monitoring section.
- Look for the CPU temperature or core temperature readings.
Method 2: Using a third-party tool
If accessing the BIOS is inconvenient or you prefer a more user-friendly interface, you can use third-party software to monitor your CPU’s temperature. Some popular options include:
- HWiNFO
- Core Temp
- Real Temp
These tools provide real-time temperature readings and can help you determine if your CPU is running hot before embarking on the overclocking process. Remember, overclocking increases the temperature of your CPU, so starting with a high baseline temperature may lead to overheating.
Once you have determined your CPU’s core temperature, you can proceed with confidence to the next steps in safely overclocking your CPU.
Performing a System Stress Test
Once you have determined your CPU’s core temperature, the next step in safely overclocking your CPU is performing a system stress test. This crucial test ensures the stability and reliability of your CPU overclock. A popular tool for conducting system stress tests is Prime95.
Prime95 is specifically designed to put a constant 100% load on all CPU cores, pushing your CPU to its limits. By subjecting your CPU to this intensive workload, you can identify any potential issues that may arise during overclocking. Running a stress test for one to two hours is recommended, while conscientiously monitoring your CPU temperatures and overall system performance.
The information gathered from the stress test will help you make necessary adjustments and optimizations before proceeding with overclocking. This ensures that your CPU remains stable and performs optimally under increased clock speeds.
Remember, a thorough system stress test is essential to avoid system instability, crashes, or overheating caused by an unstable CPU overclock. By taking the time to perform this test, you can mitigate risks and ensure a smoother overclocking experience.

Checking Your CPU’s Performance
Before overclocking, it’s important to benchmark your CPU’s current performance using tools like Cinebench, Prime 95, AIDA64, or Intel BurnTest. These tools simulate rendering workloads and provide you with a baseline score to compare against after overclocking. By measuring improvements in performance, you can determine the effectiveness of your overclock.
Running CPU performance benchmarks allows you to evaluate the speed and capabilities of your processor. It provides valuable insights into its real-world performance and helps identify areas where overclocking can yield significant improvements.
“Benchmarking is like taking your car to a racetrack to see how fast it can really go. It’s an essential step in optimizing your CPU’s performance.”
To benchmark your CPU, you can use popular tools like:
- Cinebench: Cinebench is a widely recognized benchmarking software that evaluates CPU performance by rendering a 3D scene. It measures the speed at which your CPU completes the rendering task.
- Prime 95: Prime 95 is a popular stress-testing tool that not only ensures CPU stability but also provides valuable performance metrics. It pushes your CPU to its limits, making it ideal for checking overall performance.
- AIDA64: AIDA64 is a comprehensive system information and benchmarking tool that offers various tests to evaluate CPU performance. It provides detailed insight into your CPU’s capabilities and is widely used by enthusiasts.
- Intel BurnTest: Intel BurnTest is designed specifically for Intel processors and puts a heavy load on the CPU to test stability. It provides performance metrics that can help you gauge improvement after overclocking.
By using these tools, you can generate accurate performance scores and compare them against industry standards to assess the potential gains from overclocking. Additionally, analyzing benchmark results will help you identify bottlenecks and determine if other system components need upgrading.
Example CPU Performance Benchmark Comparison:
| Benchmark Tool | Baseline Score | Overclocked Score | Improvement |
|---|---|---|---|
| Cinebench | 1120 | 1305 | +16% |
| Prime 95 | 75,000 | 88,000 | +17.3% |
| AIDA64 | 1250 | 1450 | +16% |
| Intel BurnTest | 80 GFLOPs | 95 GFLOPs | +18.8% |
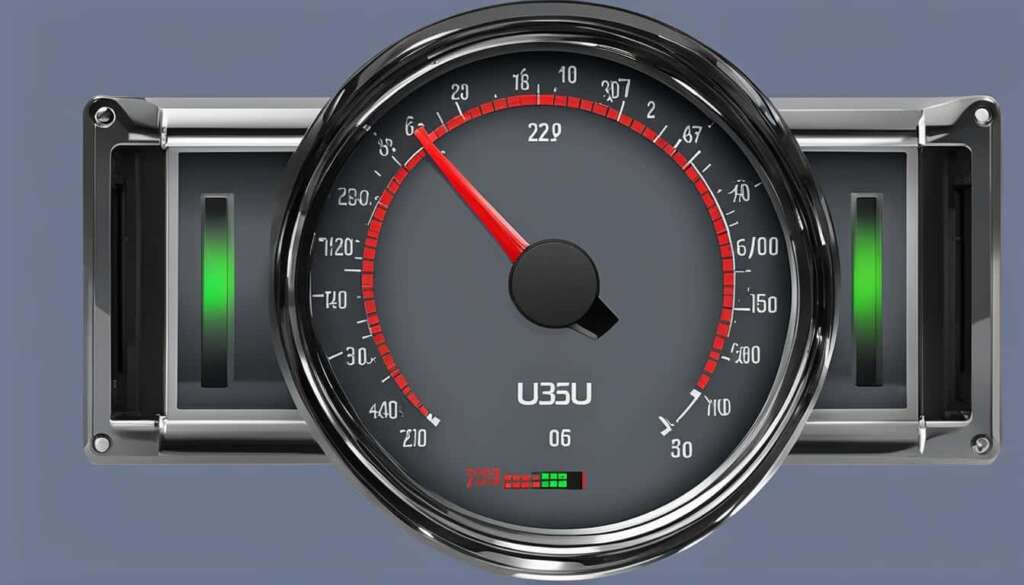
As the table and image above illustrate, overclocking your CPU can lead to significant performance gains across various benchmarks. These improvements can translate into faster rendering times, smoother multitasking, and enhanced overall system responsiveness.
Accessing Your BIOS
When it comes to overclocking your CPU, the only reliable way to do it is by accessing and modifying the settings in your computer’s BIOS. By adjusting these settings, you can change the performance parameters of your CPU and unleash its full potential.
Accessing the BIOS is a straightforward process, but it may vary slightly depending on your computer’s manufacturer. Most commonly, you can access the BIOS by restarting your computer and pressing the DELETE, F2, or F10 key repeatedly. Keep pressing the key until the BIOS setup utility screen appears.
Once you’re inside the BIOS, you need to navigate to find the settings related to overclocking your CPU. Look for options such as “Advanced CPU Core Settings” or “OC/Overclocking” in the BIOS menu. These settings may differ based on your motherboard manufacturer, but they generally provide the necessary options to adjust clock speed, voltage, and other performance parameters.
It’s important to note that modifying BIOS settings requires caution and knowledge of what you’re doing. Incorrectly changing settings can cause instability or even damage your hardware. If you’re unsure about any specific settings, refer to your motherboard’s user manual or consult with the manufacturer’s support.
“Accessing the BIOS is a critical step in the overclocking process, as it grants you the ability to fine-tune your CPU’s performance settings. Take your time to explore the BIOS options and get familiar with what each setting does before making any changes.”
Once you have successfully gained access to your BIOS and located the overclocking settings, you’re ready to proceed with making the necessary adjustments to push your CPU beyond its default limits. Remember to keep a close eye on your CPU’s temperature and stability as you modify the settings to ensure optimal performance without jeopardizing the integrity of your hardware.
The Importance of Proper Cooling During CPU Overclocking
When overclocking your CPU, it’s crucial to ensure proper cooling to prevent overheating. The increased clock speed generated by overclocking can result in higher heat production, which can negatively impact the stability and lifespan of your CPU.
To maintain optimal temperatures during CPU overclocking, consider installing an advanced cooling solution such as an aftermarket CPU cooler or liquid cooling system. These cooling systems are designed to dissipate heat efficiently, allowing you to push your CPU to higher speeds while keeping temperatures within safe limits.
Additionally, make sure your computer’s case has sufficient airflow and ventilation. Proper cable management, strategically placed case fans, and removing dust buildup can all help improve overall cooling performance and prevent heat-related issues.
Choosing Between Automatic and Manual Overclocking
When it comes to overclocking your CPU, you have two options: automatic overclocking and manual overclocking. Your motherboard manufacturer’s BIOS may offer these options, allowing you to customize your CPU’s performance. In this section, we will explore the differences between automatic and manual overclocking and provide insights into the importance of adjusting CPU multipliers and voltages.
“Automatic overclocking provides a convenient way to boost your CPU’s performance without diving into complex settings.”
Automatic overclocking simplifies the process by automatically adjusting the CPU settings for you. It typically offers a safe overclocking boost, optimizing your CPU’s performance within predefined limits or using an OC Level function. This option is ideal for beginners or users who prefer a hassle-free overclocking experience. However, keep in mind that automatic overclocking may not provide the same level of customization and performance gains as manual overclocking.
“Manual overclocking allows for greater control and fine-tuning, resulting in potentially higher performance gains.”
Manual overclocking, on the other hand, gives you complete control over your CPU’s settings. It involves tweaking parameters such as the CPU multiplier and voltage to maximize performance. This option requires more technical knowledge and experimentation, but it can yield better results if done correctly. By adjusting the CPU multipliers and voltages, you can push your CPU beyond its stock capabilities and unlock its full potential.
Why Adjusting CPU Multipliers and Voltages Matters
When manually overclocking your CPU, two essential settings to consider are the CPU multiplier and voltage. The CPU multiplier determines the clock speed of your CPU, while the voltage controls the amount of power supplied to the CPU. Fine-tuning these settings allows you to achieve higher clock speeds without sacrificing stability or risking hardware damage.
Table: Comparing Automatic and Manual Overclocking
| Overclocking Method | Advantages | Disadvantages |
|---|---|---|
| Automatic Overclocking | Convenient and user-friendly | Limited customization and potential for lower performance gains |
| Manual Overclocking | Greater control and potential for higher performance gains | Requires technical knowledge and experimentation |
By understanding the differences between automatic and manual overclocking, you can choose the method that best fits your needs and level of expertise. Whether you opt for the simplicity of automatic overclocking or the customization of manual overclocking, adjusting CPU multipliers and voltages is key to achieving a stable and improved CPU performance.
Adjusting the CPU Multiplier and Voltage
To improve the performance of your CPU and increase its clock speed, you can adjust the CPU multiplier and voltage. This process should be done gradually and with caution to ensure the stability and longevity of your hardware.
Adjusting the CPU Multiplier:
The CPU multiplier determines the clock speed of your CPU. It is a multiplier factor that is applied to the base clock frequency to determine the overall clock speed. By increasing the CPU multiplier, you can achieve a higher clock speed and improved CPU performance.
Increasing the CPU multiplier:
- Enter the BIOS settings of your computer.
- Navigate to the CPU settings or overclocking section.
- Locate the CPU multiplier or multiplier ratio option.
- Gradually increase the value of the CPU multiplier by one step at a time.
- Save the changes and exit the BIOS.
Adjusting the CPU Voltage:
Increasing the CPU voltage can help stabilize your CPU at higher clock speeds. However, it is important to note that increasing the voltage also increases the heat generated by your CPU. Proper cooling and ventilation are crucial to prevent overheating when overclocking your CPU.
Increasing the CPU voltage:
- Enter the BIOS settings of your computer.
- Navigate to the CPU settings or voltage control section.
- Locate the CPU voltage or Vcore option.
- Gradually increase the value of the CPU voltage in small increments.
- Run stability tests and monitor temperatures to ensure the CPU is not overheating.
- If stability issues occur or temperatures rise beyond safe limits, decrease the CPU voltage or revert to the previous value.
- Save the changes and exit the BIOS.
It is important to note that every CPU and system is different, and the optimal settings for overclocking will vary. It is recommended to consult your CPU’s manufacturer website or user manual for specific guidelines and safe operating parameters.
Example Table: CPU Performance Comparison
| Processor Model | Base Clock Speed (GHz) | Overclocked Clock Speed (GHz) | Performance Improvement (%) |
|---|---|---|---|
| Intel i5-9600K | 3.7 | 4.5 | 21% |
| AMD Ryzen 7 3700X | 3.6 | 4.3 | 19% |
| Intel i7-10700K | 3.8 | 5.0 | 31% |
This table demonstrates the performance improvement achieved by overclocking different processor models. The base clock speeds are compared to the overclocked clock speeds, highlighting the percentage increase in performance. It is essential to conduct thorough stability tests and monitor temperatures to ensure the reliability and safety of the overclocked CPU.
Conclusion
Overclocking your CPU can unlock its maximum performance potential, providing a significant boost in execution speed for resource-intensive tasks. By following the steps outlined in this guide, you can safely overclock your CPU and enjoy a smoother computing experience.
It is crucial to prioritize proper cooling and temperature monitoring throughout the overclocking process. Overheating can lead to system instability and potential damage to your hardware. By gradually increasing the clock speed and adjusting CPU multipliers and voltages, you can achieve a stable and effective overclock that maximizes your CPU’s capabilities.
Remember the importance of benchmarking your CPU’s performance before and after the overclock. Tools like Cinebench, Prime 95, AIDA64, or Intel BurnTest can provide you with a baseline score and help you measure the improvements achieved through overclocking.
In conclusion, overclocking your CPU can bring a significant CPU performance boost, enhancing your ability to handle demanding tasks and increasing overall productivity. By carefully following the steps and ensuring proper cooling, you can unleash the full potential of your CPU and elevate your computing experience.
FAQ
What is overclocking?
Overclocking is the process of increasing a CPU’s clock speed to unlock its maximum performance potential.
Why should I overclock my CPU?
Overclocking your CPU can significantly boost its performance, allowing you to execute resource-intensive tasks faster and smoother.
Is overclocking safe for my hardware?
Overclocking can potentially damage your hardware if not done safely. It’s important to follow the essential steps and ensure proper cooling and monitoring of temperatures.
How do I determine my CPU’s core temperature?
To determine your CPU’s core temperature, you can check the CPU temps in the BIOS or use a third-party tool.
What is a system stress test?
A system stress test is a method used to put a constant 100% load on all CPU cores to ensure the stability of your CPU overclock.
How do I perform a system stress test?
Prime95 is a useful tool for performing a system stress test. It’s recommended to run the test for one to two hours while monitoring temperatures.
How can I check my CPU’s performance?
You can benchmark your CPU’s current performance using tools like Cinebench, Prime 95, AIDA64, or Intel BurnTest.
How do I access my BIOS?
To access the BIOS, you need to restart your computer and press the DELETE, F2, or F10 key repeatedly. Once in the BIOS, look for options like “Advanced CPU Core Settings” or “OC/Overclocking” to find the settings for overclocking your CPU.
Should I choose automatic or manual overclocking?
While some motherboards offer options for automatic overclocking, manual overclocking usually yields better results.
How do I adjust the CPU multiplier and voltage?
To increase the clock speed of your CPU, you need to adjust the CPU multiplier. If your computer becomes unstable, you can increase the CPU voltage setting in your BIOS.
What precautions should I take when overclocking?
It’s crucial to ensure proper cooling and ventilation to prevent overheating when overclocking your CPU.


